How to Install ISPConfig Panel on A VPS – Alternative of cPanel – Free cPanel
Or copy link
The realm of web hosting and server management has long relied on cPanel as the trusted control panel for countless website owners and administrators. Its intuitive interface and extensive features have made it the go-to choice. However, the price associated with cPanel can pose a challenge for individuals and businesses with limited budgets or those who are just starting out.
Fortunately, there are viable alternatives available, and one such alternative is ISPConfig. ISPConfig is a control panel that is both free and open-source, offering comparable functionality to cPanel. With ISPConfig, you can effortlessly manage your Virtual Private Server (VPS), benefiting from features such as domain management, email account setup, database administration, and more.
Preparing the VPS
To ensure a smooth installation of ISPConfig, it’s important to properly prepare your Virtual Private Server (VPS) by following these steps:
ISPConfig is compatible with various Linux distributions, including Ubuntu, Debian, CentOS, and Fedora. Choose the distribution that aligns with your requirements and offers long-term support. Check the official ISPConfig documentation for recommended versions and compatibility details.
If you haven’t already done so, provision a clean VPS instance. This involves specifying the desired specifications such as CPU, RAM, and storage capacity. Additionally, make sure you have root or administrative access to the VPS, as it will be necessary for the installation and configuration processes.
To interact with your VPS, establish an SSH (Secure Shell) connection, which provides a secure remote connection to your server. Follow these steps to log into your VPS using an SSH client:
Open your preferred SSH client on your local machine.
Enter the IP address or hostname of your VPS.
Specify the SSH port (typically 22) if it differs from the default.
Provide the SSH username and password when prompted. These credentials should be provided by your hosting provider.
Once you have successfully logged in via SSH, you will gain access to the command line interface of your VPS, allowing you to proceed with the ISPConfig installation.
Installing ISPConfig
Now that your VPS is prepared, you can proceed with the installation of ISPConfig by following these steps:
Step 1 Installing Necessary Dependencies:
Update the package lists on your VPS by running the following command:
sudo apt update
If you’re using a different Linux distribution, use the appropriate package manager and command to update the package lists.
Install the required dependencies by executing the following command:
This command will fetch the latest stable version of ISPConfig from the official website.
Extract the downloaded file using the following command:
tar -xzf ISPConfig-3-stable.tar.gz
Step 3 Running the Installation Script:
Change to the extracted ISPConfig directory:
cd ispconfig3_install/install/
Start the ISPConfig installation script:
sudo php -q install.php
This command will initiate the ISPConfig installation process. Follow the on-screen prompts and provide the required information when prompted. Pay attention to the configuration settings, such as the MySQL root password, server hostname, and administrator email address.
Step 4 Configuring ISPConfig Settings During Installation:
During the installation process, you will be asked to configure various settings, including the installation mode, network configuration, and email configuration. Review and adjust these settings according to your needs.
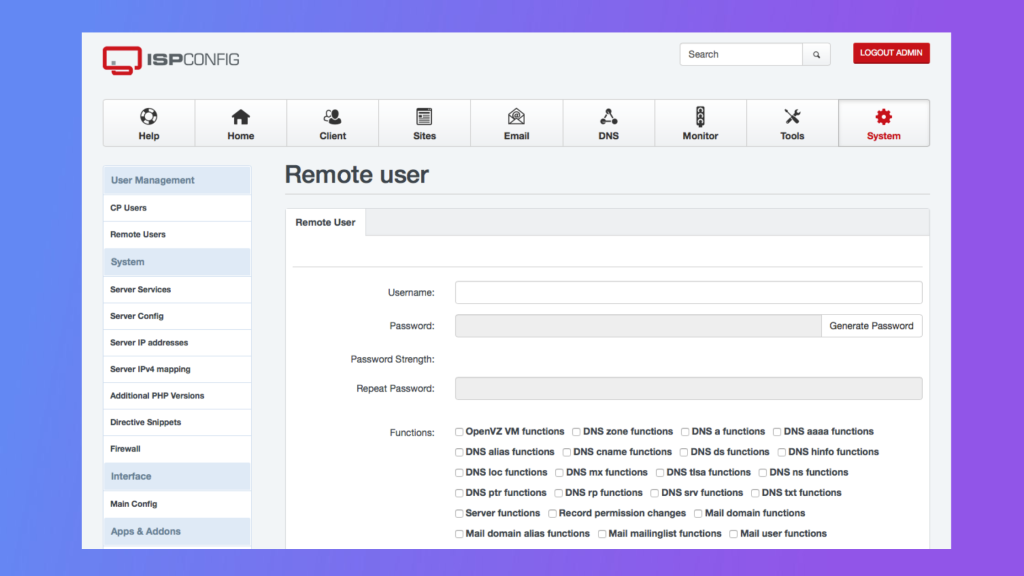
Set the password for the ISPConfig administrator account when prompted. This password will be used to log in to the ISPConfig panel later.
Once the installation is complete, make a note of the provided URL. This URL will be used to access the ISPConfig panel.
Configuring Domain and Website
Now that you have successfully installed ISPConfig, it’s time to configure a domain and set up a website within the ISPConfig panel. Follow these steps to proceed:
Adding a Domain to ISPConfig:
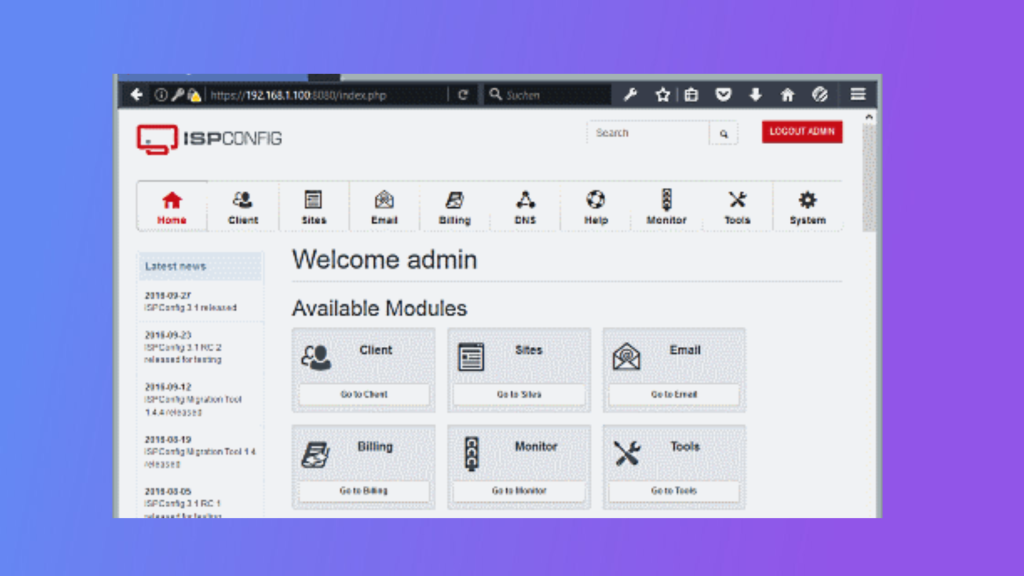
Access the ISPConfig panel by opening a web browser and entering the URL provided during the installation process.
Log in to the ISPConfig panel using the administrator username and password you set during the installation.
Once logged in, navigate to the “Sites” section in the left-hand menu.
Click on the “Add new website” button to begin adding a new website.
In the “Domain” field, enter the domain name you want to configure.
Provide the desired website settings, such as the document root directory, PHP version, and SSL options.
Click “Save” to add the domain to ISPConfig.
Setting up DNS records for the Domain:
To ensure proper functioning of the domain, you need to set up the necessary DNS records. This typically involves accessing the DNS management interface provided by your domain registrar or DNS hosting provider.
Add an “A” record pointing to your VPS’s IP address. This record directs traffic to the correct server.
If you plan to use subdomains or other services like email, create additional DNS records accordingly to support those services.
By following these steps, you will be able to add a domain to ISPConfig and configure its settings. Additionally, by setting up the appropriate DNS records, you ensure that your domain is correctly directed to your VPS.
Managing Databases
To manage databases using ISPConfig, follow these steps:
Log in to the ISPConfig panel and navigate to the “Sites” section.
Locate the website for which you want to create a database and click on it.
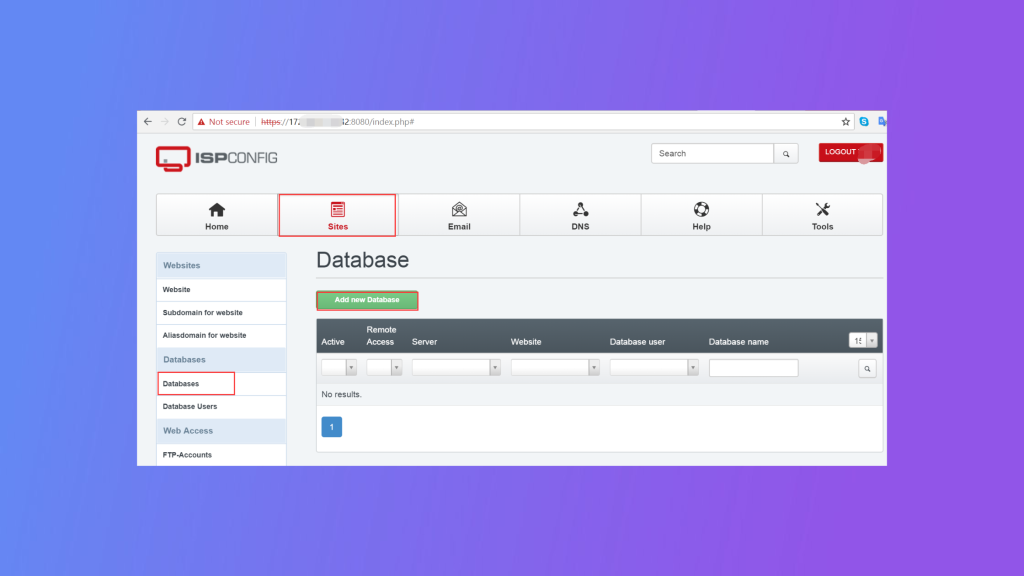
In the website settings, select the “Database” tab.
Click on the “Add new database” button.
Enter a name for the database and select the database type (MySQL or MariaDB).
Choose the appropriate user permissions for the database.
Click “Save” to create the database.
To manage the database, you can access it through the “phpMyAdmin” link provided in the ISPConfig panel. Alternatively, you can use other MySQL/MariaDB management tools like MySQL Workbench or Adminer.
Conclusion
In conclusion, installing ISPConfig on your VPS provides a cost-effective alternative to vps with cPanel for managing your server and websites. By following the installation process outlined in this guide, you can set up ISPConfig and gain access to a range of features and functionalities. ISPConfig offers a user-friendly interface and comprehensive control panel, allowing you to configure domains, set up websites, manage email accounts, and handle databases efficiently. It provides you with the tools necessary to take control of your VPS and streamline your server management tasks.