
How To Fix the “Server IP Address Could Not...
The internet an endless source of information and conne...


There are many operating systems you could install on a computer or server. These operating systems carry out various activities depending on the user’s preference. The majority of visual artists and content producers favor macOS, although regular office tasks and web browsing are more commonly done on Windows.. Based on web hosting, however, Linux is the preferred operating system.
In this article, we will delve into installing one of such specialized operating systems, Kali Linux.
Kali Linux (formerly called BackTrack Linux) is an open-source, Debian-based distribution designed for sophisticated penetration testing and security auditing. Users can concentrate on the task at hand rather than the surrounding peripheral activities by offering standard tools, configurations, and automation.
To bolster security and privacy on all your Linux devices, it is best to use a standard VPS hosting service such as those offered by Ultahost.
The installation requirements for Kali Linux will vary depending on what you would like to install and your setup. However, these are basic requirements:
Step 1: Download Kali Linux.
Step 2: Burn the Kali Linux ISO to DVD or image Kali Linux Live to a USB drive. Suppose you cannot; check out the Kali Linux Network Install.
Step 3: Back up any critical information on the device to an external media.
Penultimate Step: Ensure your computer is set to boot from CD/DVD/USB in your BIOS/UEFI.
Final Step: Make sure Secure Boot is off in the UEFI settings. Secure Boot will not recognize the unsigned Kali Linux kernel.
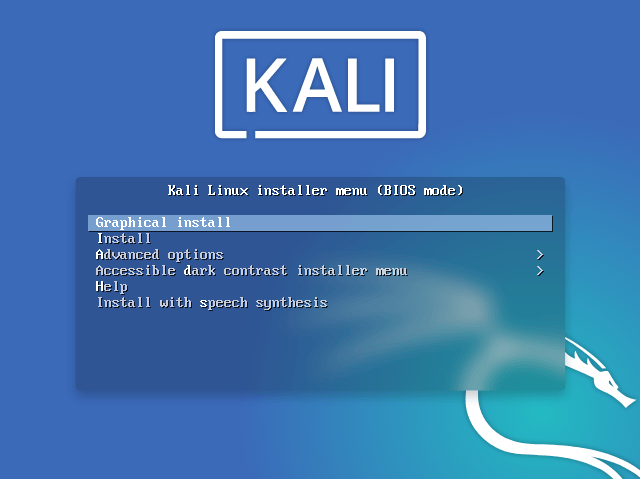
Step 1: Boot with the installation medium of your choice to begin the installation. The Kali Linux Boot screen ought to appear to welcome you. Select either a Graphical install or a Text-Mode install.
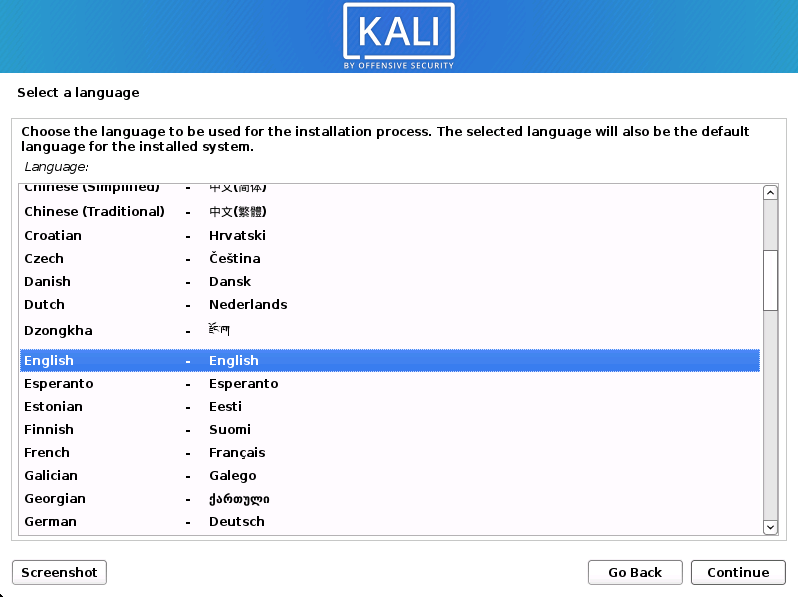
Step 2: Select the language of your choice. This is the language to be used during setup and after you start using Kali Linux.
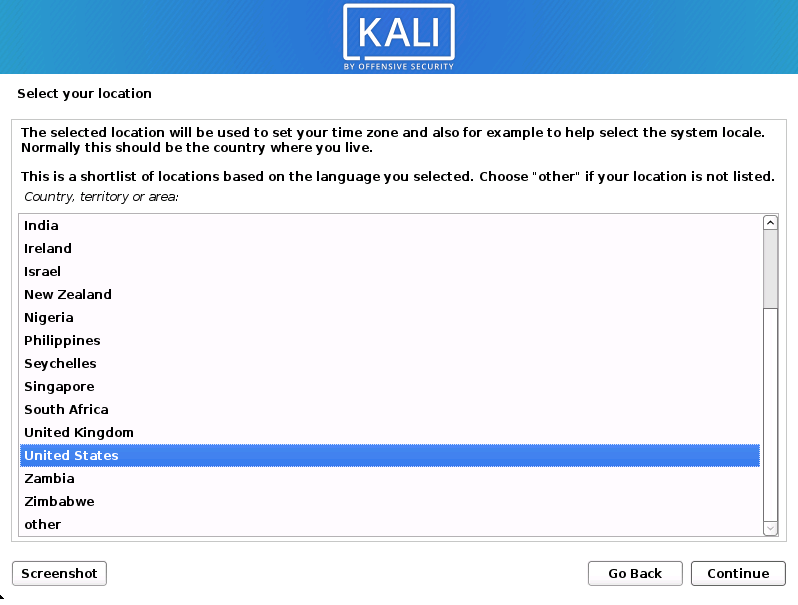
Step 3: Select your geographic location.
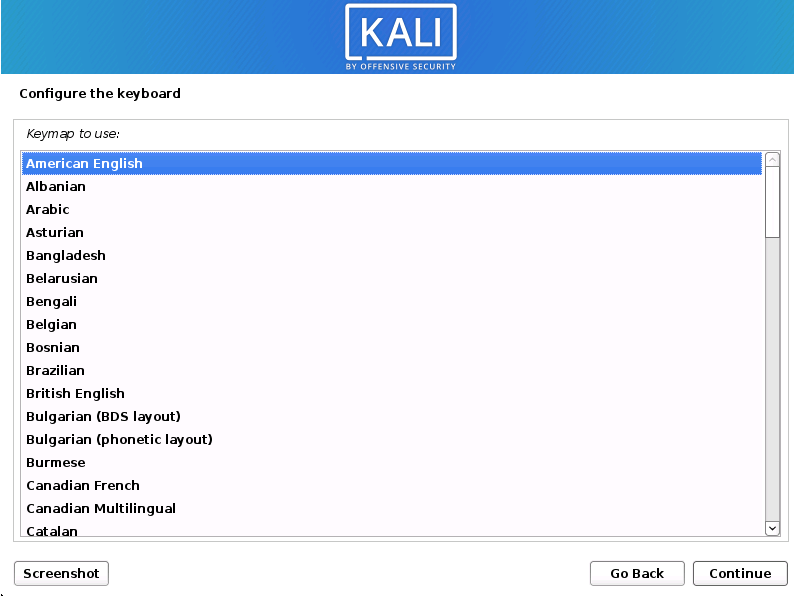
Step 4: Select your keyboard layout.
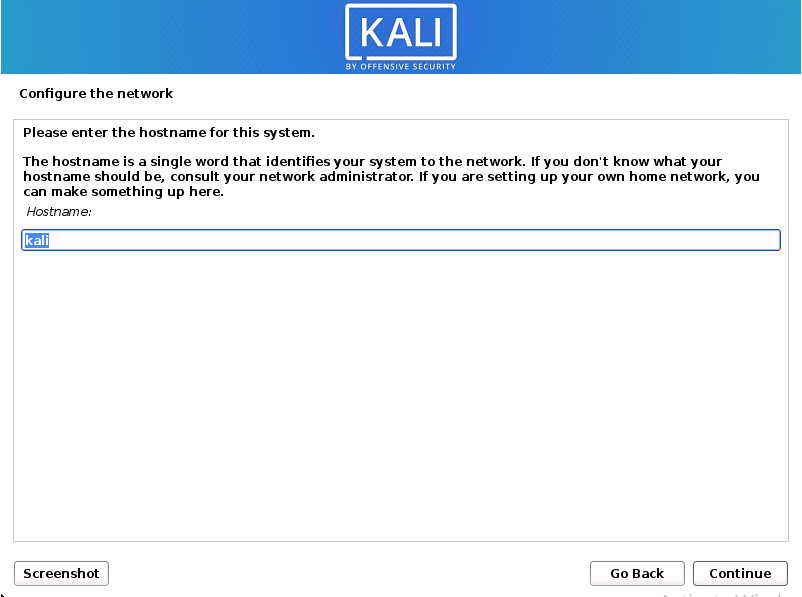
Step 5: The installation will now scan your network interfaces for DHCP servers before asking you to specify a hostname for your machine.
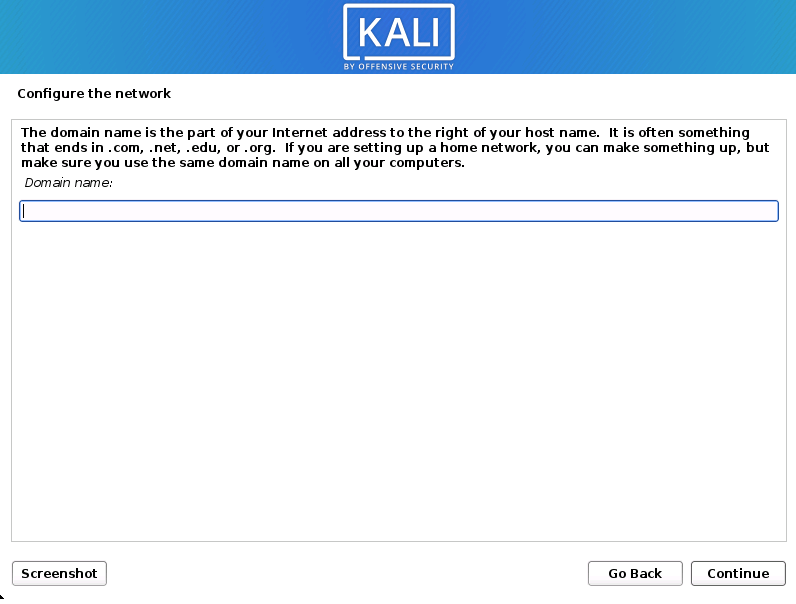
Step 6: You can provide this system with a default domain name, which it will use (values may come from DHCP or an existing operating system if one exists already).
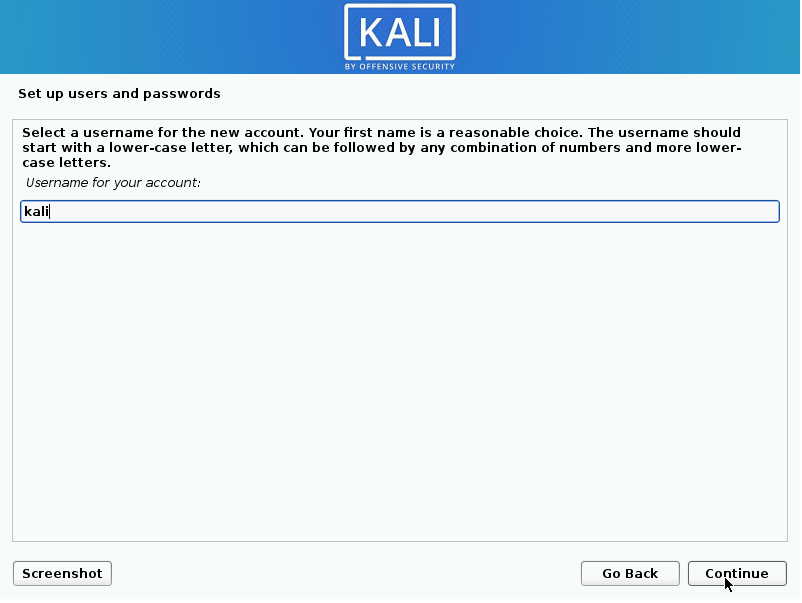
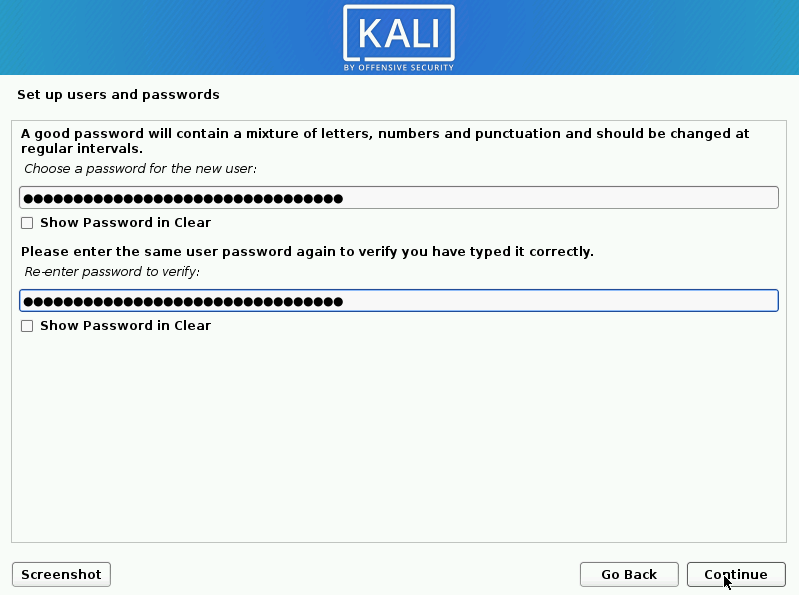
Step 7: Next, create the user account for the system (Full name, username, and a strong password).

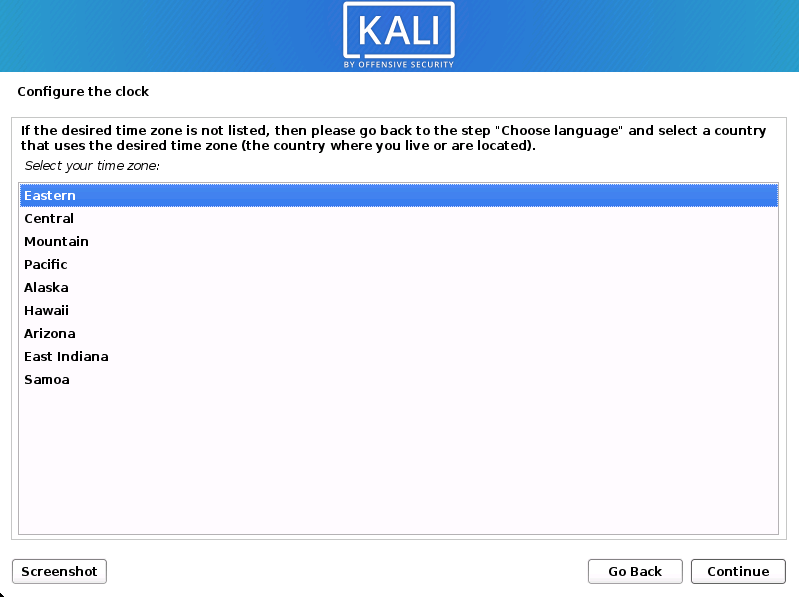
Step 8: Set your time zone.
Step 9: The installer will probe your disks and offer various choices, depending on the setup.
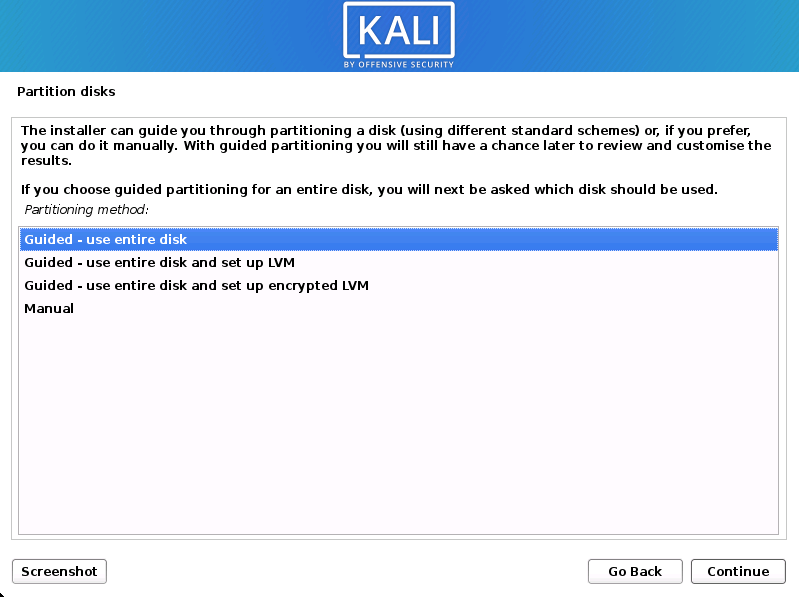
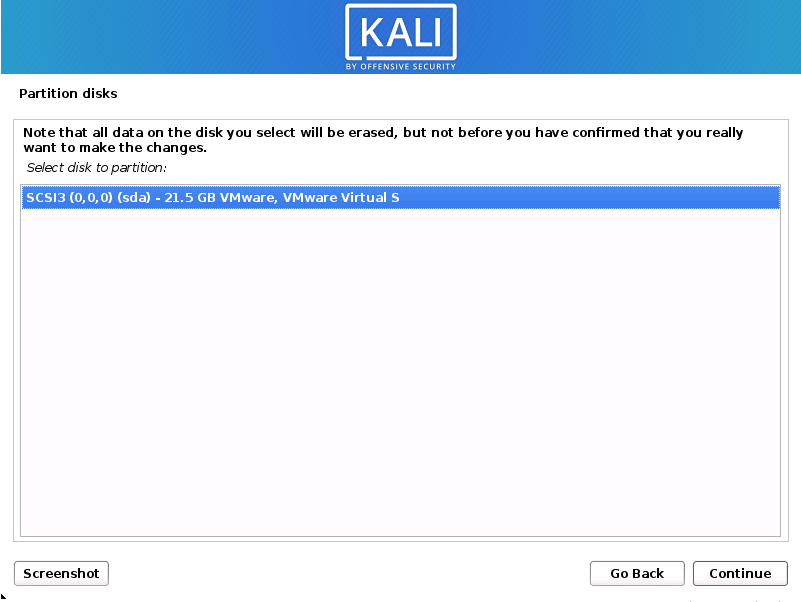
Step 10: Select the disk to be partitioned.
Step 11: Depending on your needs, you can keep all your files in a single partition – the default – or have separate partitions for one or more of the top-level directories.
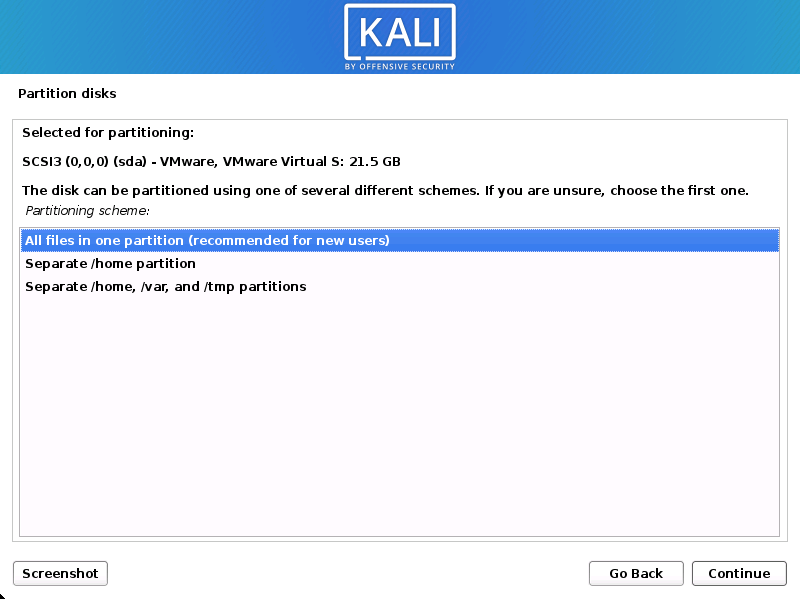
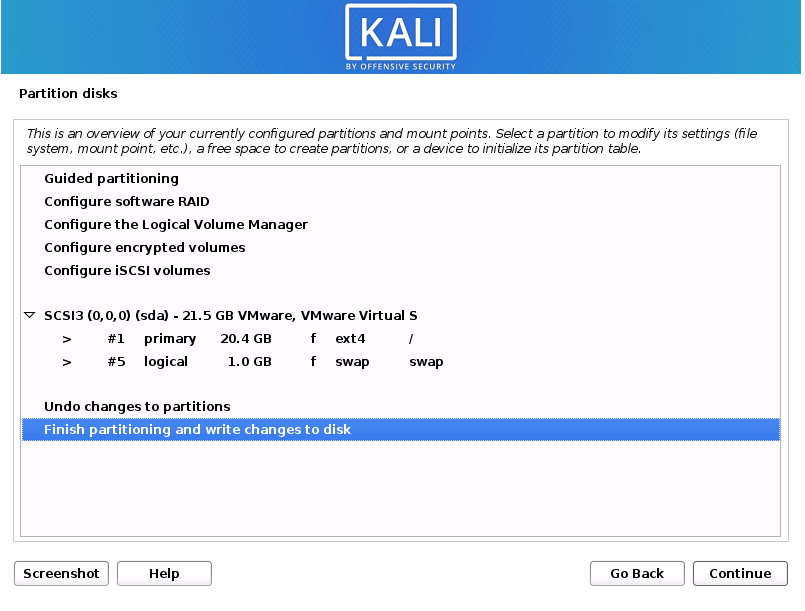
If you’re unsure which you want, you want “All files in one partition.”
Step 12: Verify your disk setup before the installer makes permanent modifications.

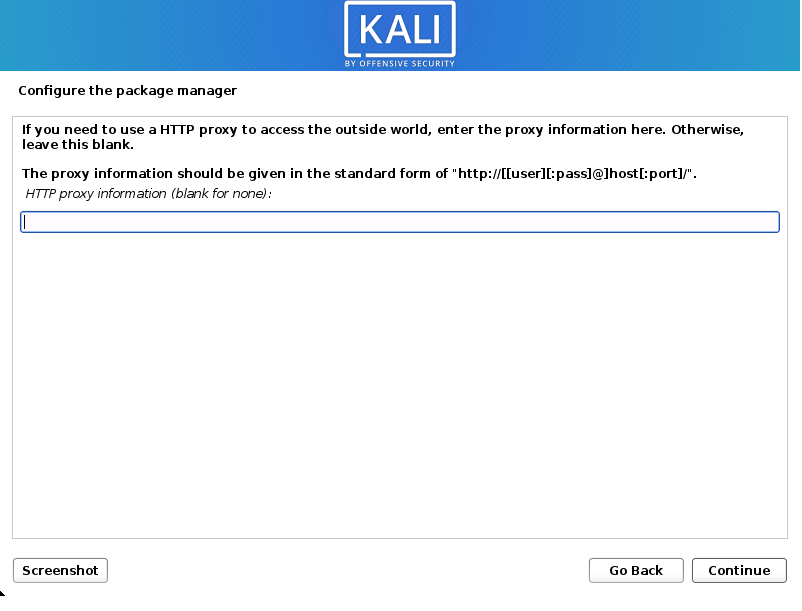
Step 13: Kali Linux distributes software through a shared repository. You will have to input any necessary proxy information.
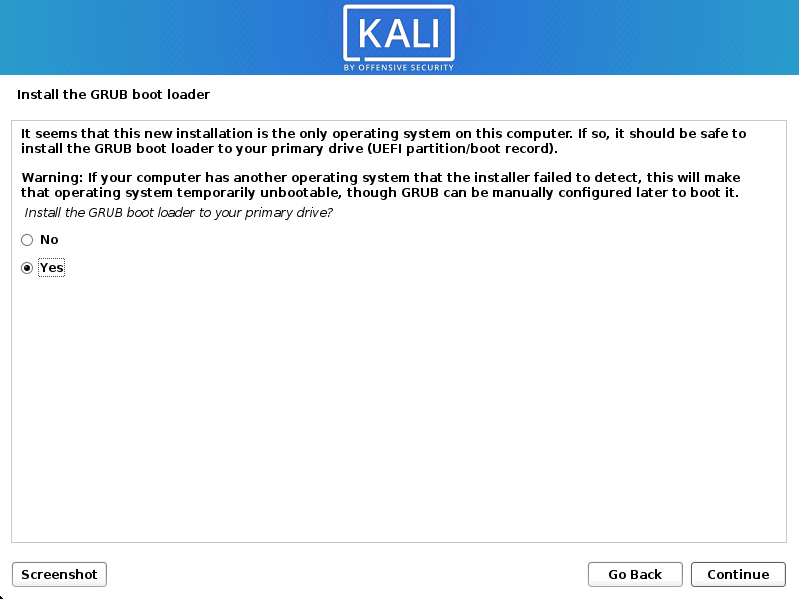
Step 14: On the next page, install GRUB. To do so, select Yes and click on Continue.
Step 15: Finally, click on Continue to reboot.

You have installed Kali successfully.
Get your Kali Linux VPS server today for a seamless installation experience and unlock the full potential of this powerful cybersecurity tool.
Kali Linux is a stylized operating system that has proven essential to thousands of computer professionals. In today’s article, we discussed Kali Linux and the specific features that allow it to function correctly, followed by a step-by-step guide on installing it on your PC.