
Exploring the installation process of MongoDB...
MongoDB, a well-known NoSQL database, has a comprehensi...


Microsoft created Windows Server, a strong operating system that offers a platform for running server applications and services. It is designed to be a robust, scalable, and secure platform for businesses and organisations to manage their IT infrastructure. It is the server equivalent to the widely used Windows client operating systems, such as Windows 10.
There are various editions of Windows Server, each with unique features and licensing choices to meet various corporate requirements. Standard, Datacenter, Essentials, and Hyper-V Server are a few of the most widely used editions of Windows Server.
In general, Windows Server is a solid and dependable operating system that gives businesses the tools and functionality they need to properly manage their IT infrastructure. It is a vital tool for anybody working in the IT industry and is widely used by companies of all sorts, from small startups to major corporations.
We frequently use domain names to access websites, apps, and other online resources while we browse the internet on a regular basis. For instance, to use Google’s search engine, we input “www.google.com” into our computer browsers. Although each device on a network is given an IP address, which is a numeric value, computers communicate with one another using these addresses. How do our computers determine which IP address goes with a particular domain name, then? The Domain Name System has the solution (DNS).
Domain names are converted into IP addresses using the hierarchical, decentralised naming system known as DNS. It can be compared to a phone book for the internet, where phone numbers are represented by IP addresses and names by domain names. When you enter a domain name into a web browser, your computer sends a request to a DNS resolver, which then searches a database of IP addresses and domain names to find the related domain name.
The requirement for a trustworthy and effective Domain Name System (DNS) is growing as more companies move their operations online. Any network infrastructure would be incomplete without DNS, which enables users to access resources by name rather than IP address. To setup and configure DNS on a Windows server, follow these steps:
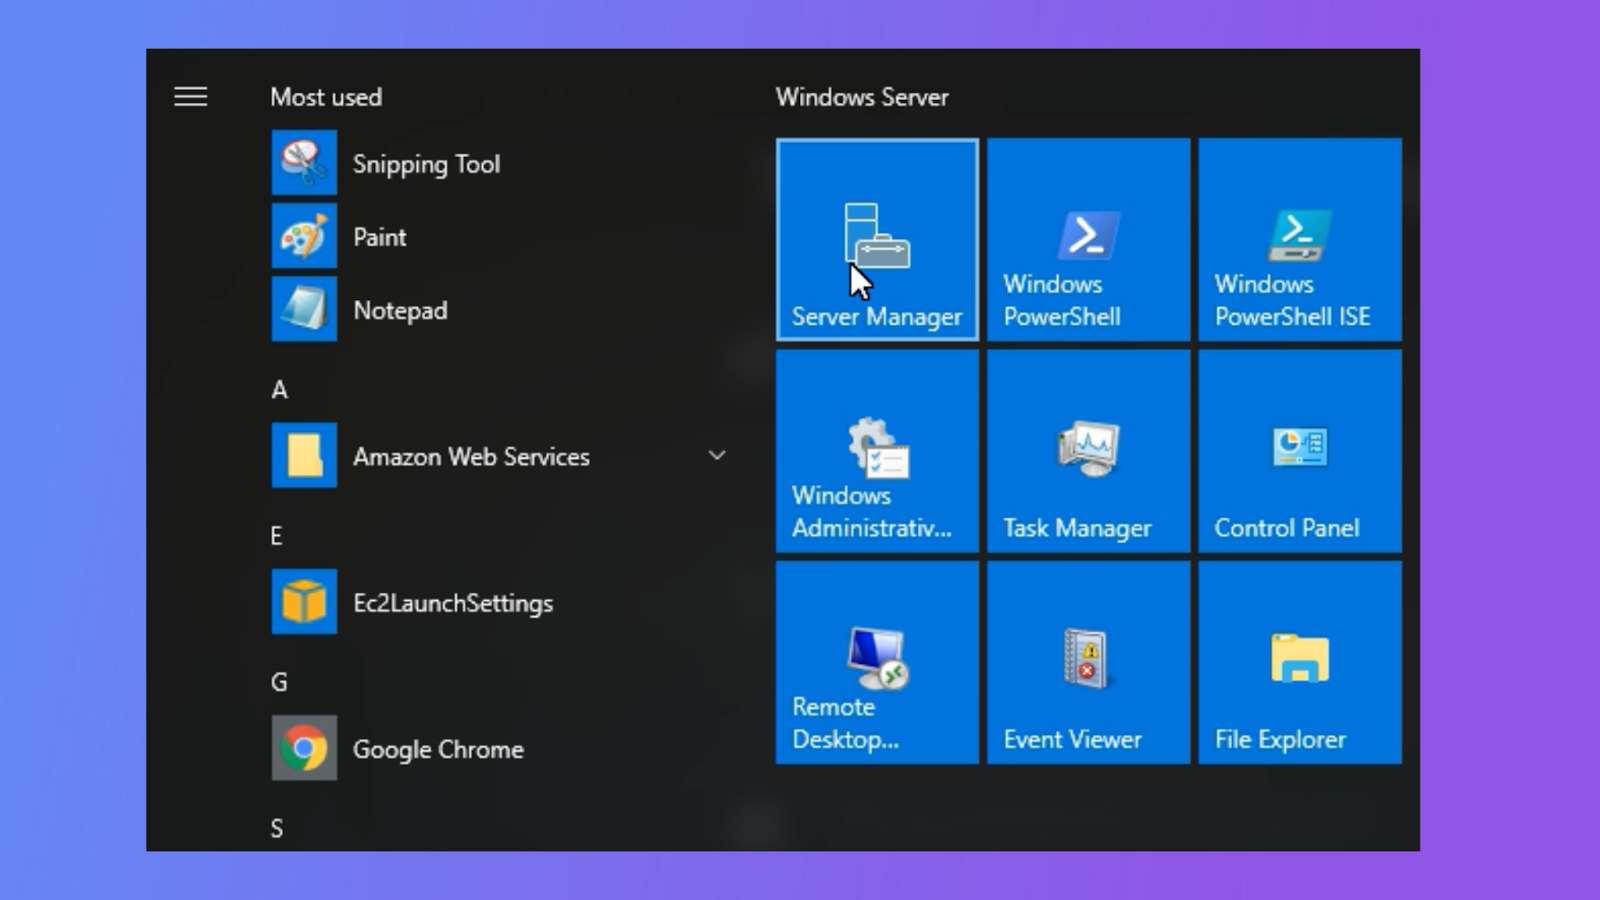
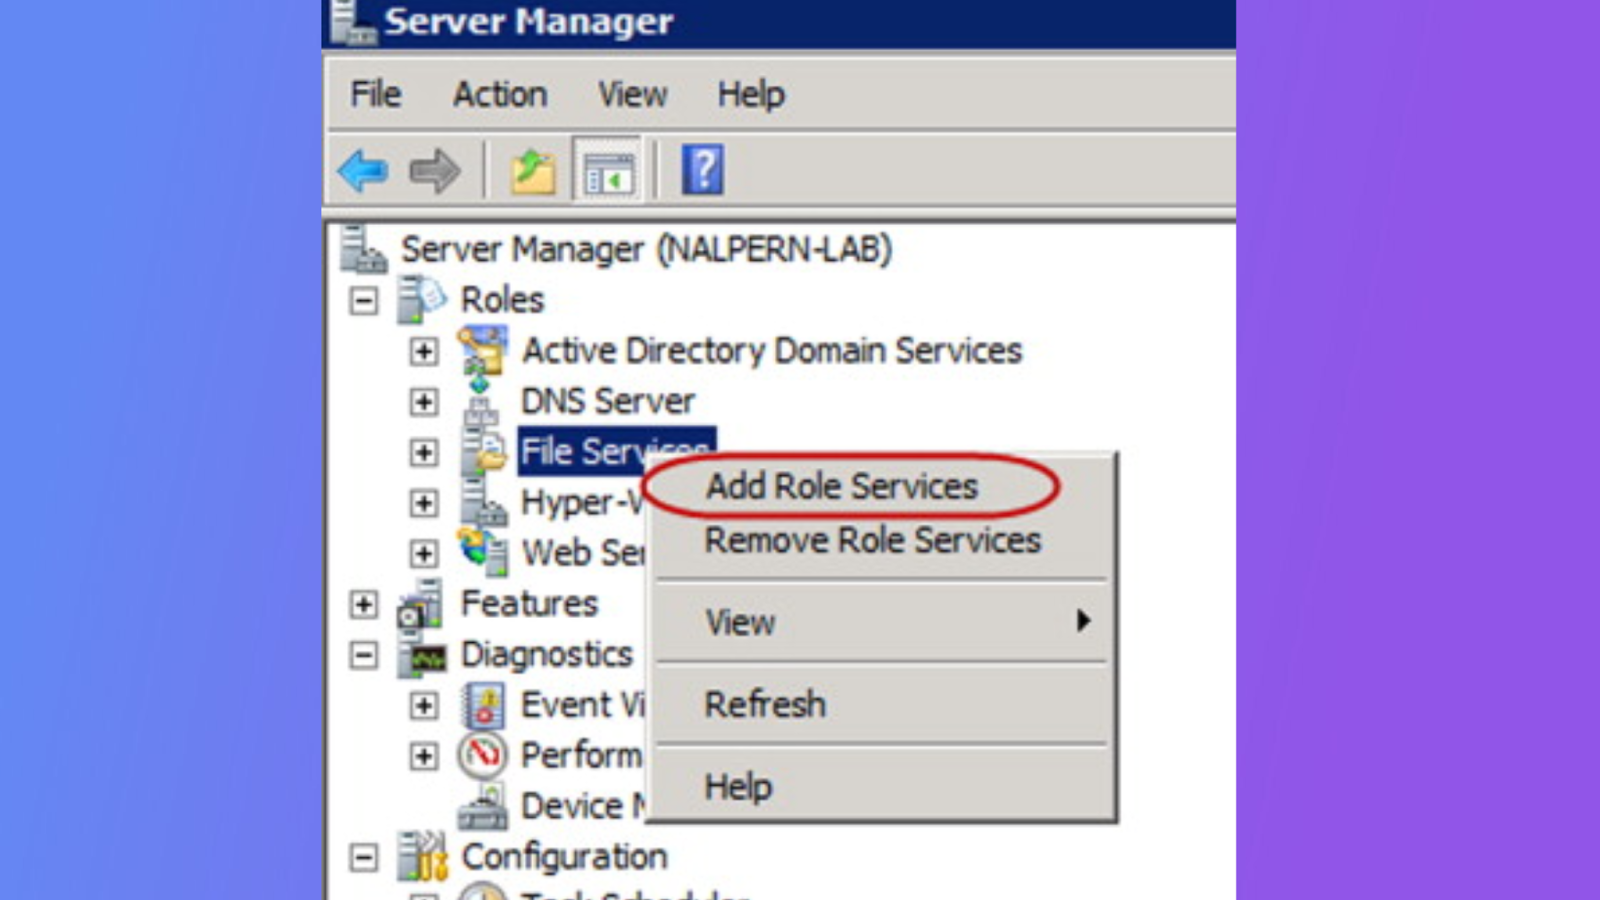
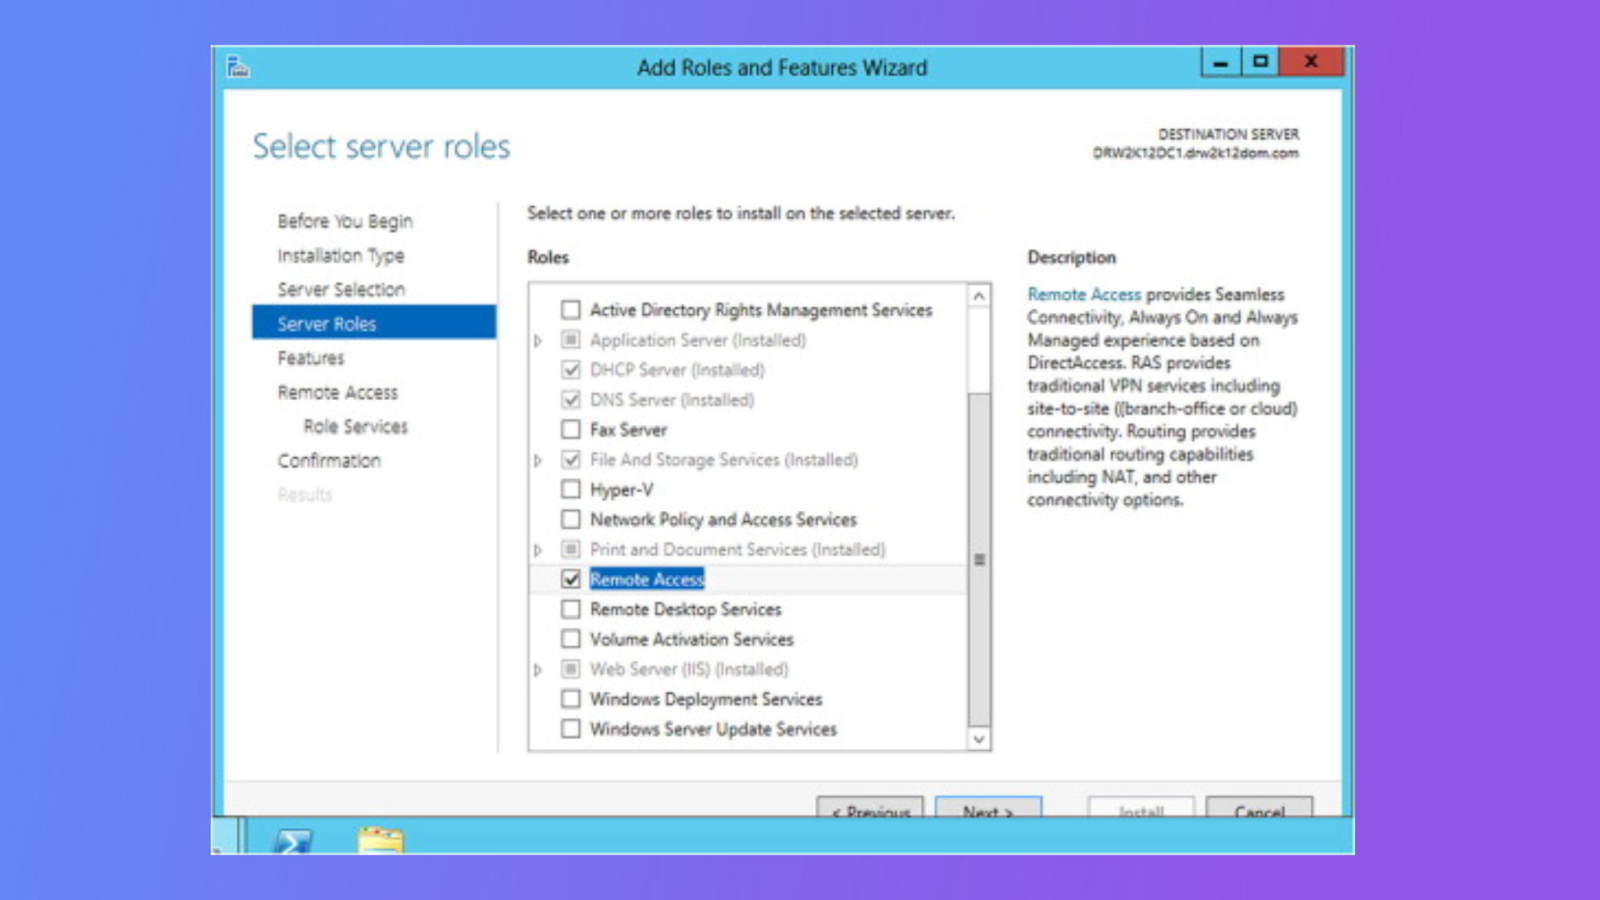
Installing the DNS Server role is the first step in setting up DNS on Windows Server. These steps can be used to do this:
You must set up the DNS Server settings after installing the DNS Server role. These steps can be used to do this:

The creation of a DNS zone is the next step in configuring DNS in Windows Server. These steps can be used to do this:
Once a DNS zone has been established, you may begin setting up DNS records. To accomplish this, take the following actions:
It is very crucial to test DNS after configuring it in Windows Server to make sure it is operating properly. These steps can be used to do this:
Effective administration of an organization’s IT infrastructure depends on correctly setting up and configuring DNS on the Windows Server. Administrators may guarantee applications and services are always available, lessen network traffic, and boost performance by defining and configuring DNS zones, adding resource records, and diagnosing problems. Users can access resources more easily when a DNS system is well-designed and correctly set up. Although the DNS configuration may appear complicated, administrators can develop the skills and expertise necessary to create and maintain a dependable DNS system for their organization through practice and knowledge.