
How to Install Curl on Windows?
Curl stands for Client URL is a popular command-line to...


Angular is a powerful front-end web development framework created by Google. It enables developers to build dynamic, single-page applications with ease. For Windows users, Angular offers a robust platform to create responsive and interactive web experiences.
Installing Angular on Windows opens up a world of possibilities for developers. It provides a structured environment for building scalable applications, complete with two-way data binding, dependency injection, and a component-based architecture. These features streamline the development process, allowing for faster creation of complex web applications. Windows users benefit from Angular’s cross-platform compatibility, ensuring their projects run smoothly across different devices and operating systems.
By setting up Angular on your Windows machine, you gain access to a comprehensive toolset for modern web development. This guide will walk you through the Angular framework installation Windows process, helping you get started with Angular quickly and efficiently.
Before installing Angular, you need to set up Node.js on your Windows system. Node.js is a crucial prerequisite for Angular development as it provides the runtime environment necessary to execute JavaScript code outside of a web browser. Here’s why Node.js is essential:
To install Node.js:
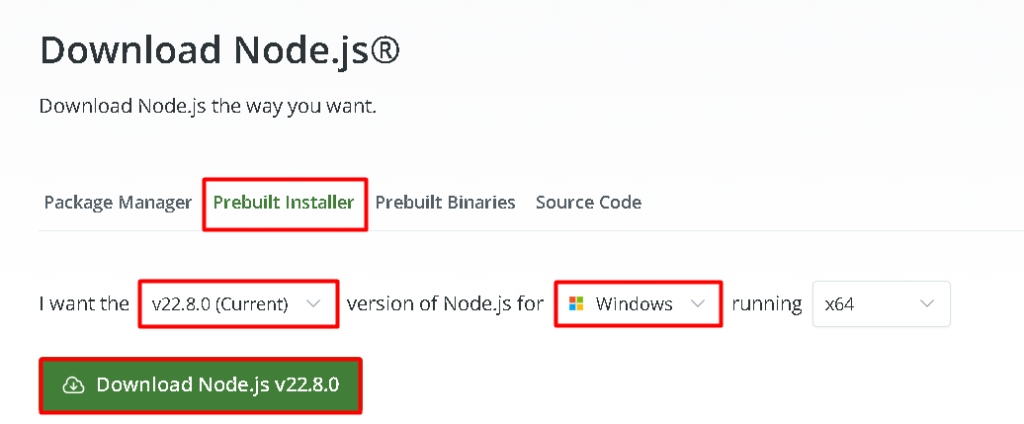
After installation, verify that Node.js is correctly installed by opening a Command Prompt and running:
node -v

This command should display the installed version of Node.js. If you see a version number, it means Node.js is successfully installed and ready to use.
With Node.js in place, you can now install Angular using the Angular CLI (Command Line Interface). The CLI is a powerful tool that helps you initialize, develop, scaffold, and maintain Angular applications.
Open a Command Prompt with administrator privileges and run the following command:
npm install -g @angular/cli@17

Let’s break down this command:
This command does several important things:
The installation process may take a few minutes, depending on your internet connection and system performance. You’ll see a progress bar and some output in the Command Prompt as the installation proceeds.
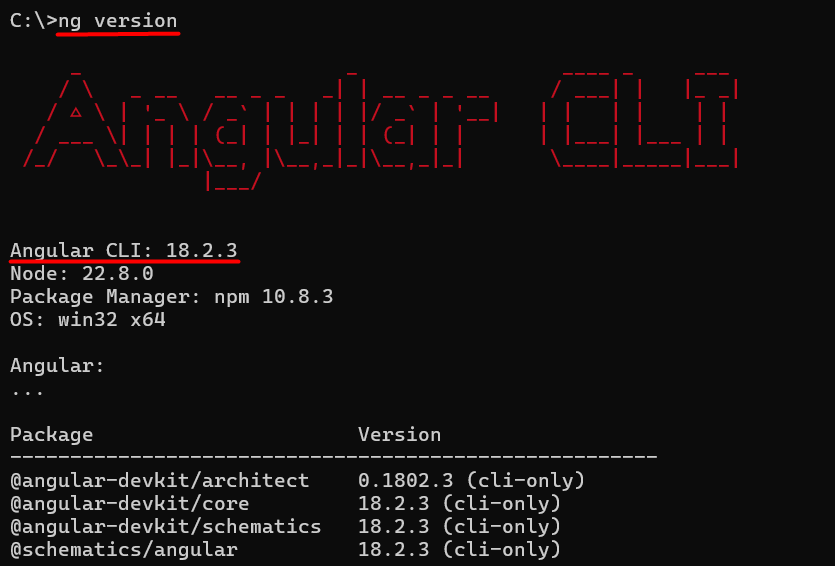
After the installation completes, it’s important to verify that Angular CLI was installed correctly. To do this, run the following command in the Command Prompt:
ng version
IDE Selection: Consider using an IDE (Integrated Development Environment) like Visual Studio Code, which offers excellent support for Angular development with helpful extensions and integrations.
Install Angular on Our Windows 10 VPS!
Hosting a Windows 10 VPS with Ultahost is easier and faster than ever. Enjoy ultra-fast SSD NVMe speeds with no interruptions or slowdowns.
Angular’s robust feature set makes it a top choice for building modern web applications. Here are some standout features:
Read also How to Install Concrete on Windows.
Angular offers several advantages specifically for Windows developers:
Installing Angular on Windows is a straightforward process that opens up a world of possibilities for web development. By following the steps outlined in this guide installing Node.js with npm on Windows then install the Angular CLI so developers can quickly set up their Angular development environment Windows. This process not only equips you with the necessary tools but also ensures you’re ready to leverage Angular’s powerful features and capabilities.
The installation of Angular Windows setup marks the beginning of an exciting journey into modern web development. With Angular’s robust ecosystem, component-based architecture, and powerful CLI tools at your disposal, you’re well-equipped to create sophisticated, scalable web applications.
Once you’ve completed these steps, Angular will be successfully installed on your Windows system, and you will be ready to start building robust websites. To make sure optimal performance and smooth development, always follow best practices and keep your software up to date. consider using Ultahost Windows hosting. You get reliable and high-speed hosting tailored to your needs.
The prerequisites are Node.js, npm, and Git.
Open Command Prompt or PowerShell and run the following commands:
Angular CLI (Command Line Interface) is a tool that helps in creating and managing Angular projects. To install it globally, run:
npm install -g @angular/cli
After installation, you can check if Angular CLI is installed by running:
ng version
If you face permission issues, try using the –force flag with npm:
npm install -g @angular/cli –force
Once Angular CLI is installed, you can create a new project using the following command:
ng new my-angular-app
Navigate to your project directory and run:

Remote Desktop Protocol (RDP) is a Microsoft client-ser...
The host file is a simple text file on your computer th...
PostgreSQL, also known as Postgres is a powerful open-s...
Installing Microsoft Office on Windows is a straightfor...