
How to Install Nmap on Windows?
Nmap, or Network Mapper, is a free and open-source secu...


Being a NoSQL database, MongoDB is singled out for its unrivaled power and versatility when it comes to data management and storage. The platform maintains its edge due to its flexibility, scalability, and performance, earning trust with businesses across the board. In this regard and for Windows OS, MongoDB serves as a robust solution for efficient data handling of various types.
This database stores data in form of documents which are flexible and JSON-like hierarchies called documents. Therefore, it can store unstructured, semi-structured, and structured data. Unlike the traditional relational databases, Dynamic and Agile development processes are made simple with MongoDB due to the absence of predefined scheme requirements, allowing for more freedom.
Windows OS users can take full advantage of MongoDB’s unparalleled seamless integration and support to install applications at their convenience. It does not matter if you run MongoDB on a local machine for development or shift to production environments on Windows servers. The native tools and utilities provided by MongoDB are always tailored for optimization and geared towards supporting the Windows platform.
This guide helps you install MongoDB in Windows and navigate other essential aspects involving the integration.
Following are the steps described below on MongoDB Windows download.
Step 1: Navigate to the MongoDB Official Website
You need to first navigate to the MongoDB official website to download the MongoDB MSI package:
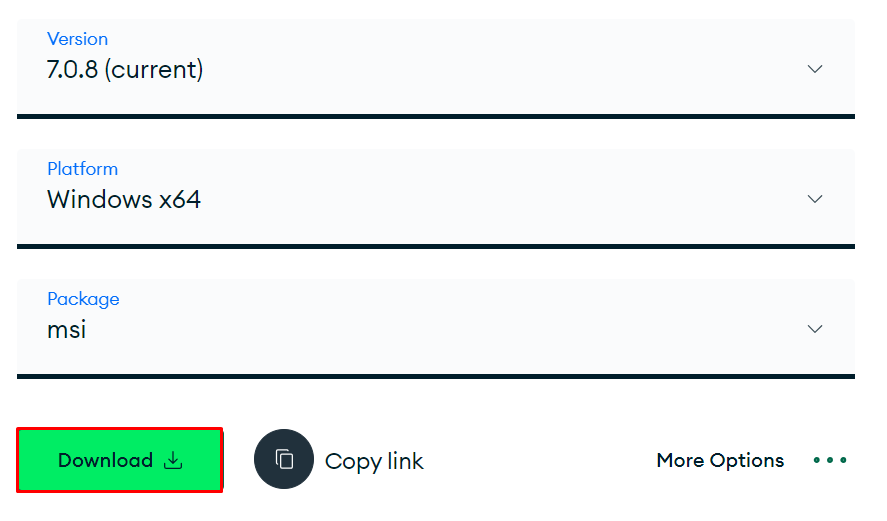
MSI stands for Microsoft Installer. It’s a file format used for installing software on Microsoft Windows operating systems. MSI packages contain installation information, such as files to be installed, registry settings, and actions to be taken during installation.
MSI files are preferred for software installation on Windows because they provide a standardized and reliable way to manage software installations and updates. MSI files are specifically designed for software installation and management.
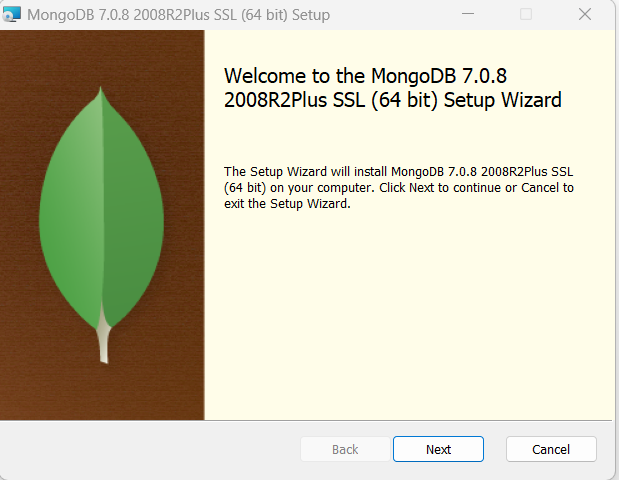
Step 2: Execute the MSI Package
After install latest MongoDB on Windows, you need to execute the file where a new dialogue window will appear. You need to click on the “Next” button to start initiating the installation process.
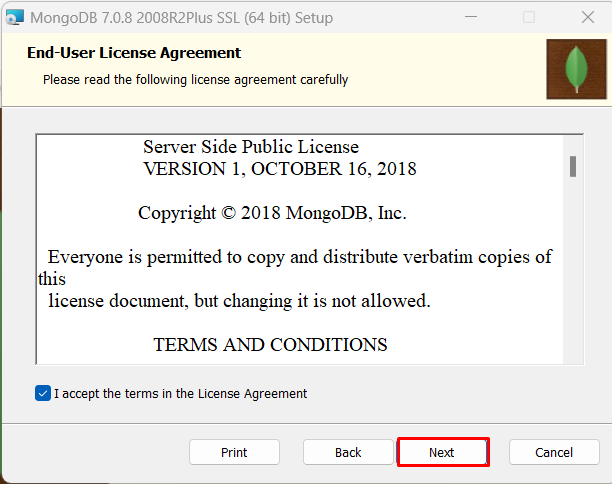
Next, an agreement window will appear which you can read if you like, else check the dialogue box and then click on the “Next” button again.
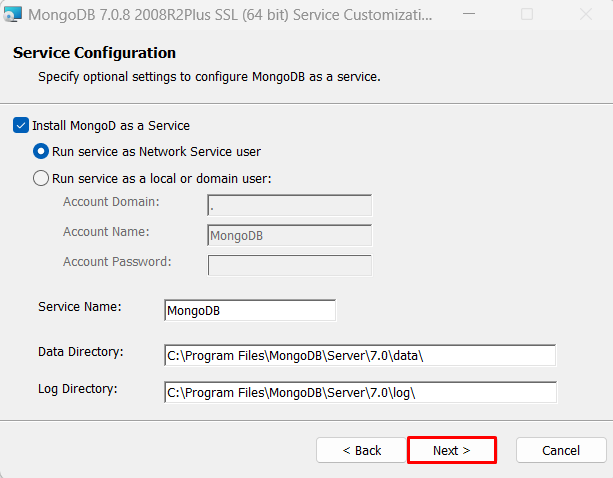
Now, you will have two options. You can either run MongoDB as a Network service user or you can either run it as a local or domain user.
The choice between these two options depends on your specific requirements for permissions, access control, and security. If you need simplicity and basic functionality, the network service user option may suffice. However, if you require more control over permissions or need to access and limit resources with specific user credentials, choosing the local or domain user option would be more appropriate.
So choose any of the single options as per your requirement and then click on the “Next” button.
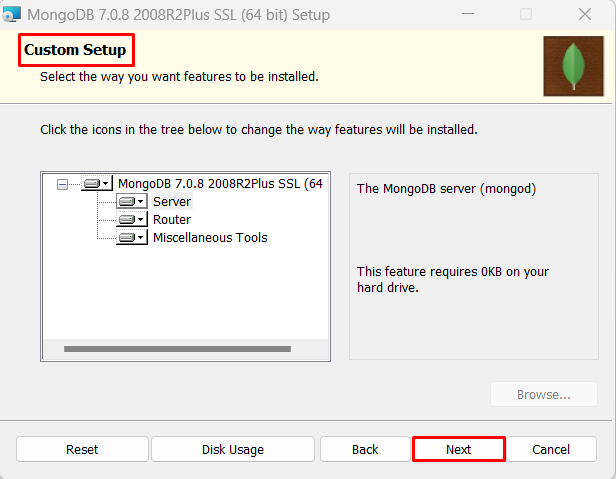
Now you will have two options for installing MongoDB. You can either opt for complete installation or you can choose custom installation.
Install MongoDB on Our Windows VPS Server!
Experience the ease and speed of a Windows VPS server. Enjoy blazing-fast SSD NVME speeds without any interruptions or slowdowns.
When opting for the complete setup during MongoDB installation on Windows, you’re essentially choosing a hassle-free installation experience. This option installs all MongoDB components and tools with their default configurations.
By selecting this option, you will get the MongoDB server, comprising the Mongod daemon process for handling data requests, along with the MongoDB shell (mongo) for database interaction. Moreover, the complete setup ensures that any additional necessary components and tools required for MongoDB’s smooth operation are also installed seamlessly.
On the other hand, the custom setup option provides users with more granular control over the installation process. With a custom setup, you have the liberty to pick specific components and tools according to your requirements. This flexibility enables you to tailor the MongoDB installation precisely to suit your needs.
Read also How to Install MongoDB in Ubuntu.
For instance, you might choose to install only the MongoDB server component (mongod) if you’re solely interested in data storage and management. Alternatively, you can opt to include the MongoDB router (mongos) if you’re planning to deploy a sharded MongoDB cluster.
Additionally, the custom setup typically offers miscellaneous tools like mongoimport, mongoexport, mongodump, and mongorestore, allowing you to selectively install tools based on your administrative and data management needs.
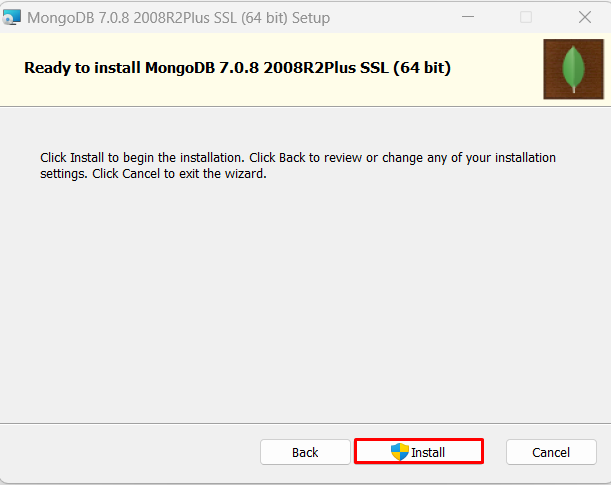
After choosing your desired installation method, you need to click on the “Install” button to start the installation process.
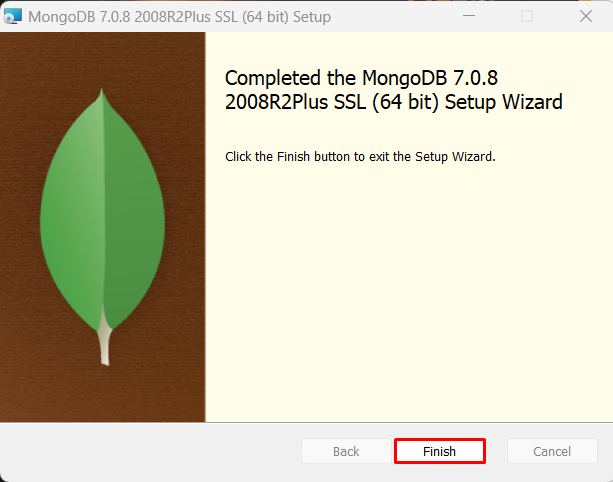
This will take some time and after that the installation will be complete and you can close the setup by clicking on the “Finish” button.
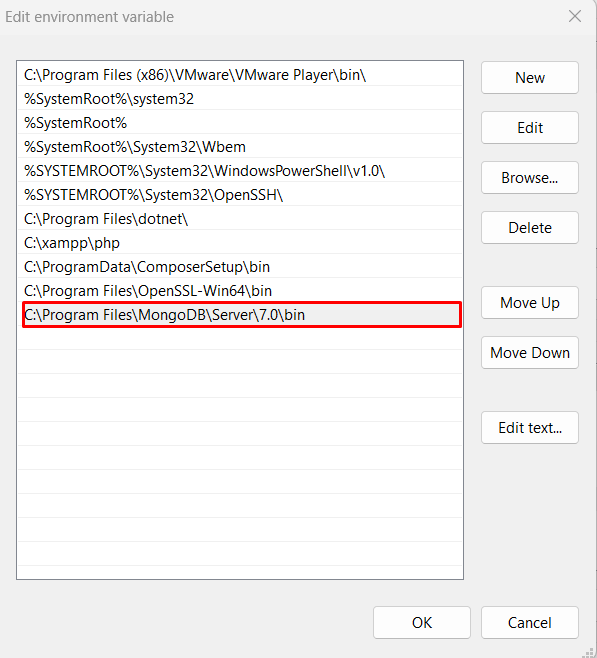
The MongoDB is generally installed on the Windows drive in the program files directory which is C drive in our case. Next, navigate to its binary directory using a command line prompt or a shell and then execute the below command:
mongod
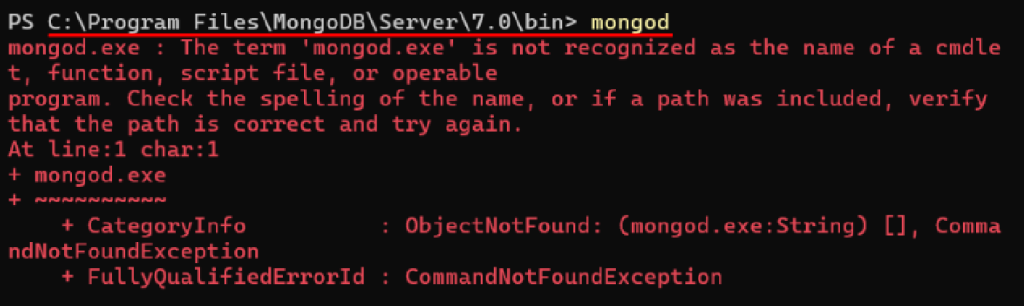
It can be seen in the output that after executing the command, the output shows that the command is not recognized. To resolve this issue we need to add the path in the environment variable.
After that, you can execute the same command to check the status of MongoDB.
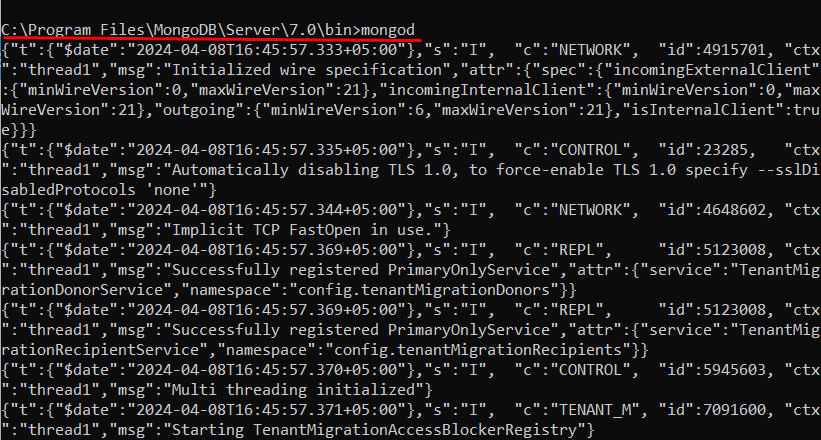
The output indicates that MongoDB has started successfully. Here are a few key points from the output:
C:/data/db/ is being used.MongoDB provides a robust solution for managing diverse data types efficiently on Windows OS. Its flexibility, scalability, and performance make it a preferred choice across businesses of varying sizes.
Install MongoDB Windows 10 is both straightforward and customizable, accommodating diverse user preferences. With options for complete or custom setups, MongoDB grants users precise control. This guide not only details the installation steps but also stresses effective MongoDB access on Windows. By leveraging MongoDB, users can effortlessly deploy and manage databases, fully realizing NoSQL technology’s capabilities in Windows environments.
If you are a developer or starting your journey and trying to dive into building your next great app, consider that you ensure your current hosting setup can handle the demands of MongoDB. This is where you need a powerful and reliable platform like Ultahost. We provide cheap VPS hosting which helps to manage your server and dedicated resources for guaranteed speed and stability, perfect for resource tasks like running MongoDB.
MongoDB is a popular open-source NoSQL database management system that provides high performance, high availability, and easy scalability. It stores data in flexible, JSON-like documents.
You can download MongoDB for Windows from the official MongoDB website. Visit the Downloads page and select the appropriate version for Windows.
Press Ctrl + C in the Command Prompt window where MongoDB is running. This will gracefully shut down the MongoDB server