How to Install Wine on Ubuntu 22.04
Wine is a third-party tool that helps you to operate Wi...
Apache is a free and open-source web server the most popular technology. If you want to host your website or web application on Ubuntu, installing Apache is important. It will handle serving your website content to visitors who access your server through a web browser. If you are not immediately publishing a website Apache can be a valuable tool for developing and testing web applications locally on your Ubuntu machine.
In this guide, we will discuss how to install Apache Ubuntu. This allows you to work on your project without needing a remote server and can help debug quickly.
Before diving into the installation process you must have the following in place:
Apache is often used as part of the LAMP stack, which combines Linux, Apache, MySQL, and PHP. This is a popular combination for building dynamic websites and web applications. If you are planning to use PHP web servers for development, Apache is a likely pre-requisite. The following steps described working on Linux install apache2:
When it comes to installing any package the first step to keeping your package lists up-to-date. Begin by updating the local package index using the following command:
sudo apt update
Now comes the simple step to install Apache Linux and its essential dependencies with this command:
sudo apt install apache2
This command initiates the installation process. Below down image shows the system retrieves and sets up the necessary components:

Let’s confirm that Apache is running on the Ubuntu server. Use the following command:
service apache2 status
If everything went smoothly, the output should indicate that Apache is active (running). This signifies a successful installation.

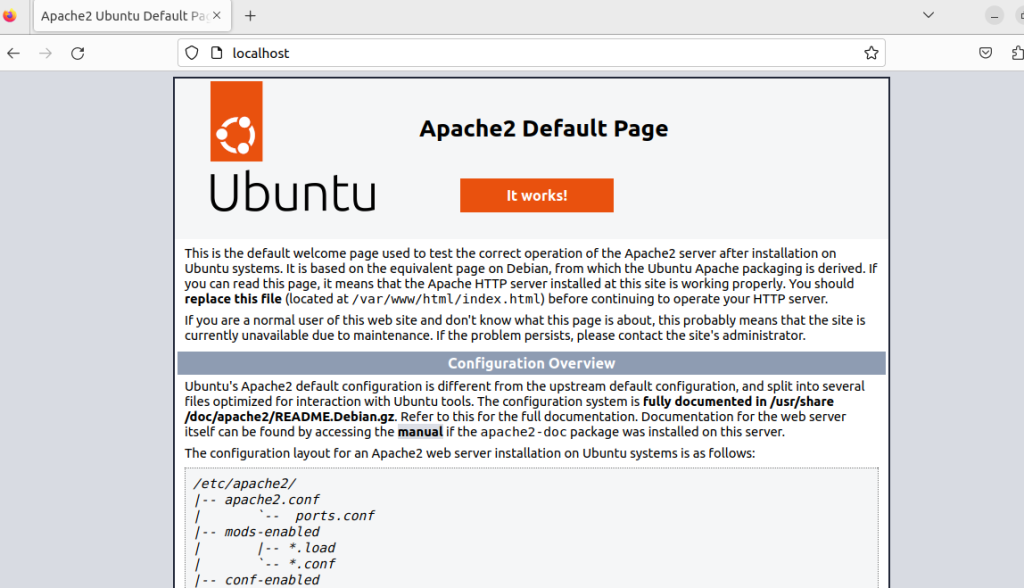
Open your favorite web browser and type in your server’s local IP address or localhost. If everything is configured correctly, you should be seen by the default Apache web page, which indicates that Apache was successfully installed.

By default, Ubuntu’s firewall blocks port 80 the standard HTTP port. If you want to access your web server publicly, open port 80 using Uncomplicated Firewall:
sudo ufw allow 80/tcp
With this step, you have created a pathway for web traffic to reach your Apache server.
Unlock the power of Ubuntu VPS
Get the reliability of the world’s most popular Linux distro and the flexibility of a virtual server. Enjoy blazing-fast speeds and low latency. Get started by installing Apache on our server.
With your up and running Apache server let’s look into some of the improvements:
Once you set up and installed Apache on your ubuntu system, it gives you a world of web development opportunities ranging from personal projects to full-fledged websites. Nevertheless, Apache is not the only option for web serving on Ubuntu. There are lots of alternative Nginx is another very versatile and powerful option.
Apache provides value flexibility and extensive customization. Ultimately, the best web server for you depends on your unique project requirements. Rent a VPS server reliable to you with scalability that adapts your resources to meet your growing needs. Explore our VPS plans and find the perfect fit.