
How to Generate Report Using MTR on Windows
MTR (My Traceroute) is a powerful network diagnostic to...


Imagine playing your favorite mobile games, but on a much larger screen, with the precision of a mouse and keyboard. That’s exactly what BlueStacks for Windows allows you to do! It bridges the gap between mobile and desktop platforms, enabling users to take advantage of the vast library of Android apps and games without being limited to a small mobile device screen.
BlueStacks is a software application designed to run Android apps and games on Windows computers. It essentially creates a virtualized Android environment within your Windows operating system, allowing you to access and use Android applications as if you were using an actual Android device.
In this article, you will learn to install BlueStack android on Windows.
Before installing BlueStacks on Windows, you should be aware of its system requirements to run it smoothly. You need to ensure that your computer meets the minimum system requirements for running BlueStacks. These typically include having sufficient RAM (at least 4GB), available storage space (at least 8GB of free disk space), and an updated graphics driver (DirectX 9.0 or higher).
Read Also: How to Enable Windows Sandbox in Windows
To get started, head over to the official Bluestack website. As of now, version 10 is the latest release and you can click on the download button to start the process. Once the file is downloaded, execute it to kick off the installation.
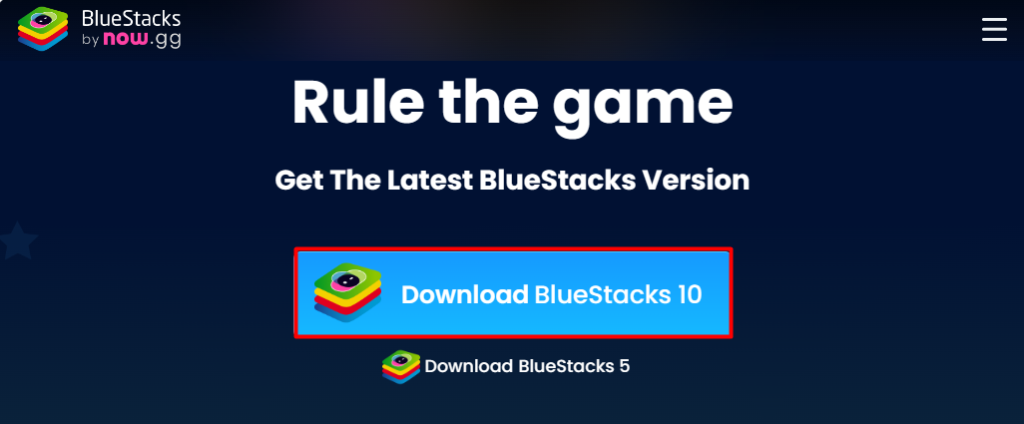
So,click on the download button to start the downloading process. Next, start the execution after downloading the file.
Explore the Blazing Fast Speed of Windows VPS!
With Ultahost, Hosting Windows VPS has never been easier or faster. Enjoy ultra-fast SSD NVME speeds with no dropouts and slowdowns.
The main interface is shown below when you execute the downloaded file.
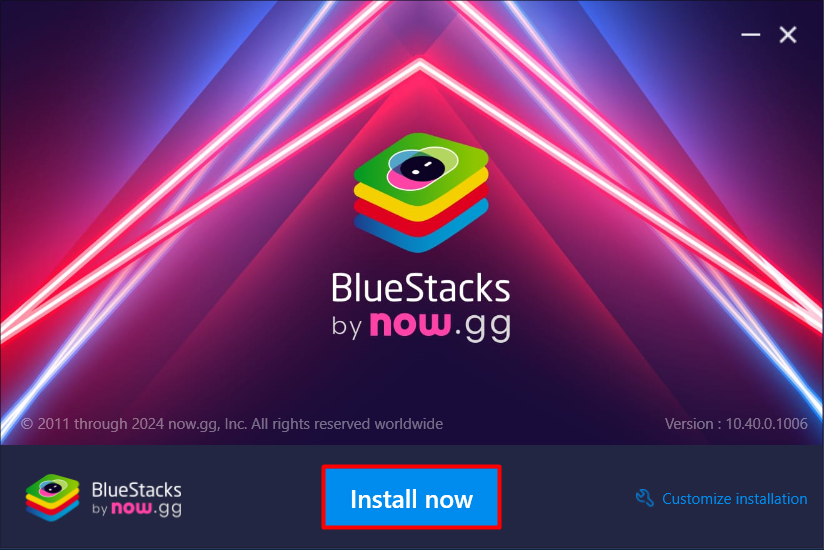
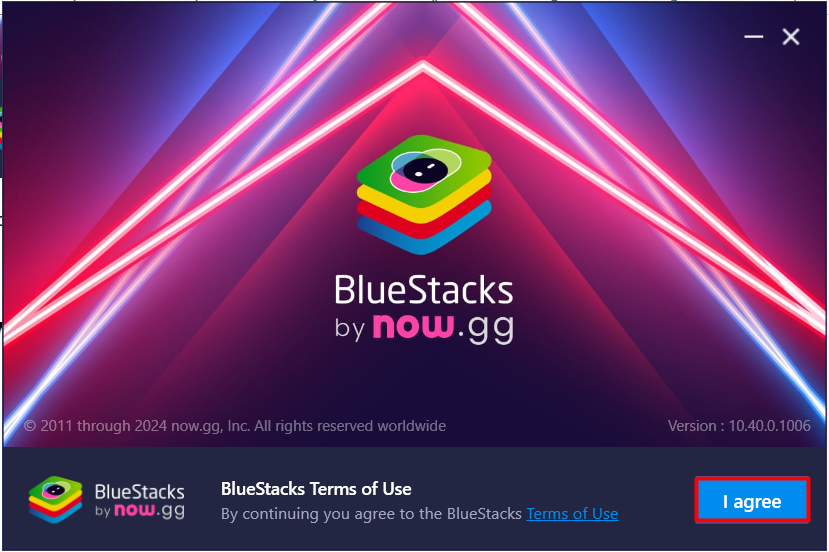
Now click on the “Install now” option to start the installation process. After that, you need to click on the “I agree” button to accept the terms and conditions.
The installation will begin with the download of the BlueStacks installer package. It’s a small executable file that serves as the foundation for the installation process.
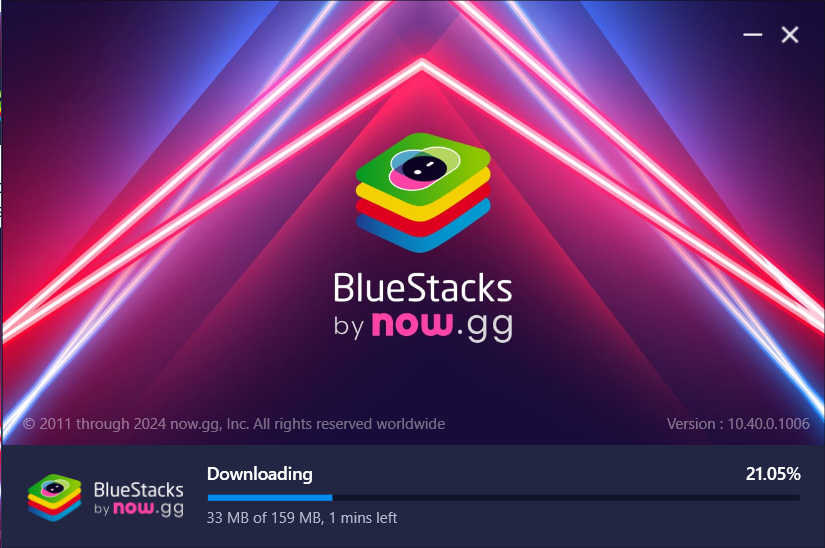
After that, it will start downloading the larger file, which is used to install the BlueStacks application itself along with all its essential components. These essential components include the Android emulator, which is the core software that allows you to run Android apps on your Windows PC.
It will also download the system image, which is a virtual representation of the Android operating system needed to run apps. Furthermore, this downloading also includes support libraries, graphics drivers, and other essential components for smooth operation.
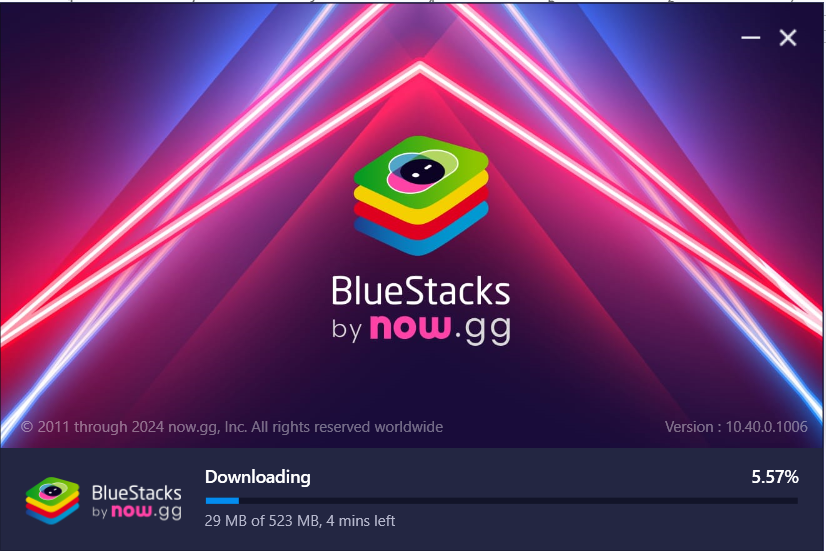
After downloading, it will automatically start the installation process, but first, it will check the system hardware to verify if they meet the recommended requirements to install BlueStacks on Windows.

After successful verification, the installation will proceed automatically. Give it some time to complete, and soon you’ll find yourself looking at the main interface of the BlueStacks Windows application.
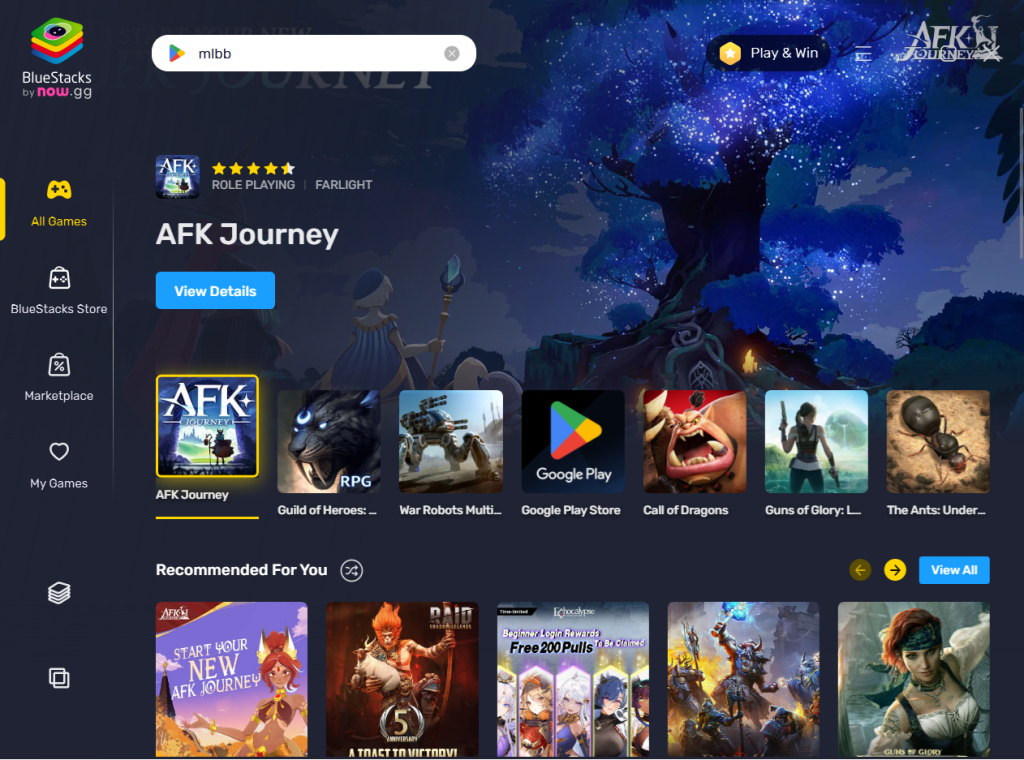
One of the primary benefits of BlueStacks is its ability to provide access to a vast array of Android applications on Windows PCs. Whether it’s productivity tools, social media apps, or games, users can enjoy the same functionality and experience as they would on their Android devices.
BlueStacks is renowned for its gaming capabilities, offering advanced features such as keymapping, gamepad support, and multi-instance support. Gamers can enjoy their favorite Android games on a larger screen with superior performance, thanks to BlueStacks’ optimization techniques.
Beyond gaming, BlueStacks enhances productivity by allowing users to utilize Android productivity apps on their computers. Whether it’s managing emails, editing documents, or organizing tasks, BlueStacks provides a seamless integration of Android apps into the cheap Windows VPS, boosting efficiency and workflow.
BlueStacks provides multi-instance functionality, allowing users to operate several instances of the emulator at the same time. This feature is particularly useful for multitasking, allowing users to switch between different apps and games effortlessly.
BlueStacks provides extensive customization options, allowing users to tailor their emulator experience according to their preferences. From resolution settings to keyboard mappings, users have full control over how they interact with Android apps on their Windows PCs.
BlueStacks is optimized for performance, ensuring smooth gameplay and responsive app performance even on lower-end hardware. The emulator utilizes advanced virtualization technology to leverage the computing power of the host system efficiently.
BlueStacks offers a compelling solution for users seeking to experience the vast world of Android applications on their Windows PCs. Creating a virtualized Android environment, eliminates the limitations of mobile device screens and hardware, providing access to a plethora of apps and games with enhanced performance and control.
The installation process is straightforward, requiring users to meet the recommended system requirements and follow the guided steps. Once installed, BlueStacks provides a range of features, including multi-instance support, customization options, and performance optimization, ensuring a smooth and tailored experience.
Take your BlueStacks experience to the next level with our tailored BlueStacks VPS hosting solutions at Ultahost. Elevate your gaming performance and enjoy lag-free gameplay.
BlueStacks is a popular Android emulator that allows you to run Android applications on your Windows PC.
Installing BlueStacks allows you to enjoy Android apps and games on a larger screen, and it can be particularly useful if you want to use apps that are not available for Windows.
You can download BlueStacks from the official website (https://www.bluestacks.com/). Make sure to download it from a trusted source to avoid malware.
Yes, BlueStacks offers a free version with some limitations. There’s also a premium version available with additional features.
BlueStacks requires a Windows PC with at least 2GB of RAM and 4GB of storage space. It also requires updated graphics drivers.
MTR (My Traceroute) is a powerful network diagnostic to...
PyCharm is a powerful Integrated Development Environmen...
Imagine you're playing your favorite online game, but y...
IntelliJ IDEA is a powerful Integrated Development Envi...
Apache Cordova is a powerful open-source mobile applica...
RubyMine is an integrated development environment (IDE)...