
How to Install Helm on Windows
Helm is a package manager for Kubernetes that helps to ...


Jira is a cross-platform project management tool developed by Atlassian and is widely used by organizations to plan, track, and release software. Organizations can customize Jira to fulfill their unique needs and workflows. It enables teams to organize and monitor tasks, assign them to members, and track progress and project milestones. In addition to this, it allows us to collaborate through comments and mentions. It also offers agile features like Scrum and Kanban boards to track workflows. Moreover, Jira provides reports and dashboards to monitor project progress. Luckily, Jira is available for all major operating systems and can also be accessed through a web browser.
This article will show you how to install, set up, and use Jira on Windows. However, to install Jira on Windows, you must ensure your system meets the minimum requirements: Windows XP or later, 512 MB of RAM or more, 50 MB of free disk space, and an Intel Dual Core or higher processor.
You can download Jira from the official website and then install it by following the on-screen instructions. Here is a step-by-step guide on downloading and installing Jira on Windows:
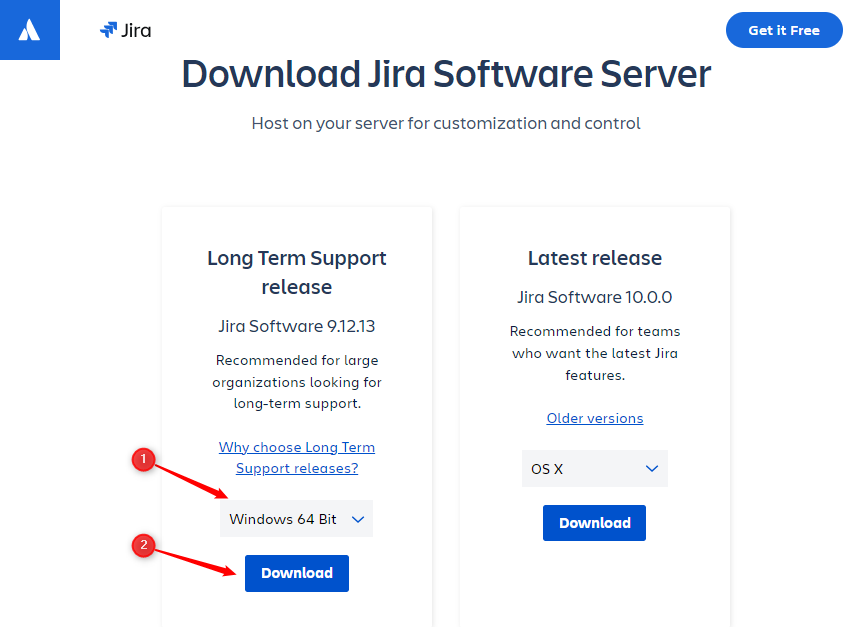
To download Jira for Windows, visit the official Atlassian website, select the Long Term Support release, and then click on the Download button:
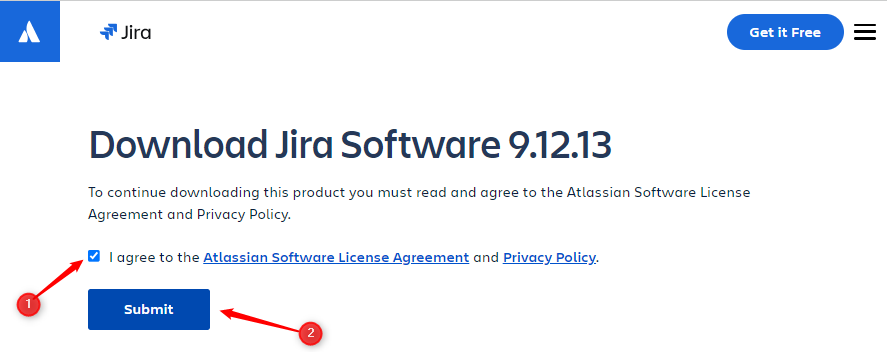
Read the Atlassian privacy policy, check the box to agree to the license agreement, and click the submit button to start the download:
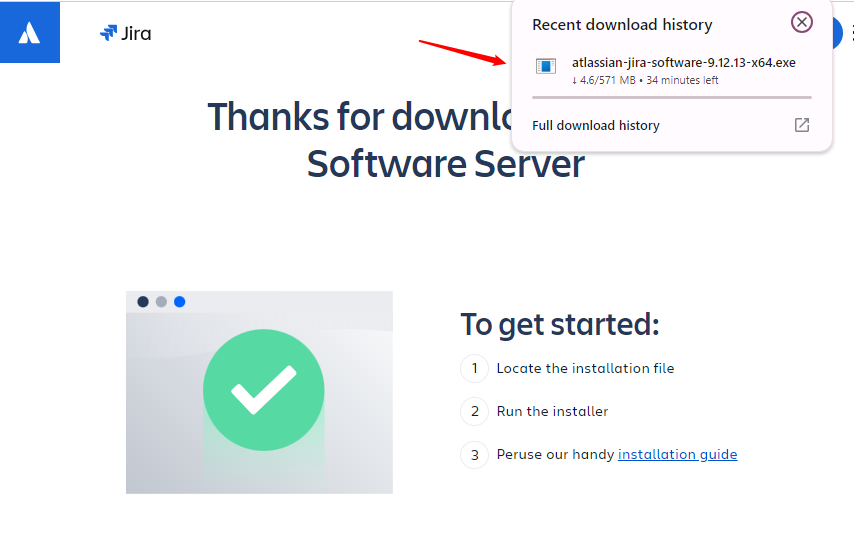
As soon as you hit the submit button, an “.exe” file for Jira will start downloading:
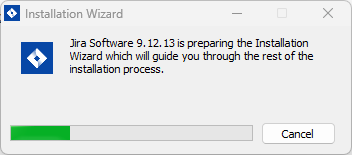
Once you download Jira for Windows, go to the directory where you saved the file and run it to start the Jira installation on Windows:
After this, a pop-up window appears, click the Yes button to let User Account Control start the Jira Windows installation process.
You will see the following window. Click the Next button to start the Jira software installation:

Now choose the appropriate installation or upgrade option and hit the next button to continue installing Jira software on Windows:
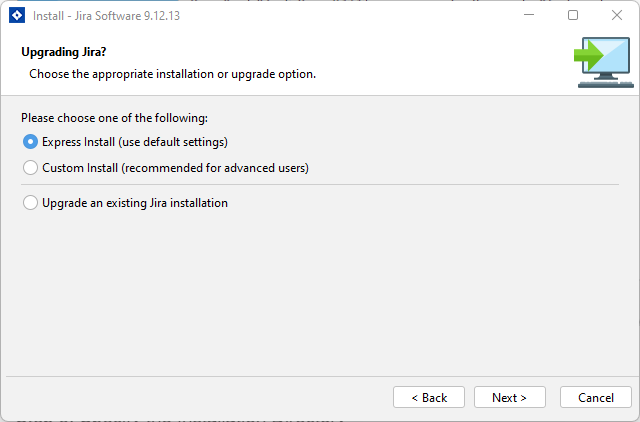
We select “Express Install” to proceed with the default installation settings.
Read also How to Install Java on Windows
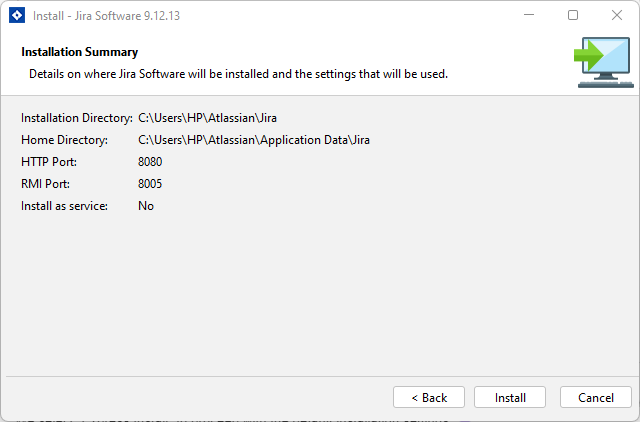
Now review the installation summary and hit the install button to start Jira’s installation on Windows. The summary contains the details like the installation directory, home directory, HTTP, and RMI ports for JIRA Windows configuration:
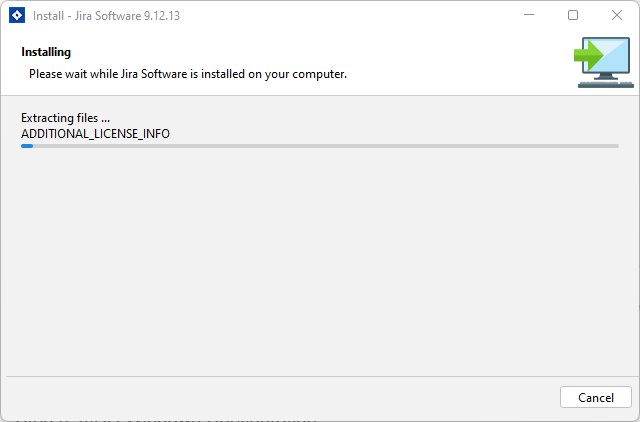
The following screenshot demonstrates that Jira’s installation on Windows has started:
The system will direct you to the following window after successfully installing Jira software on Windows:
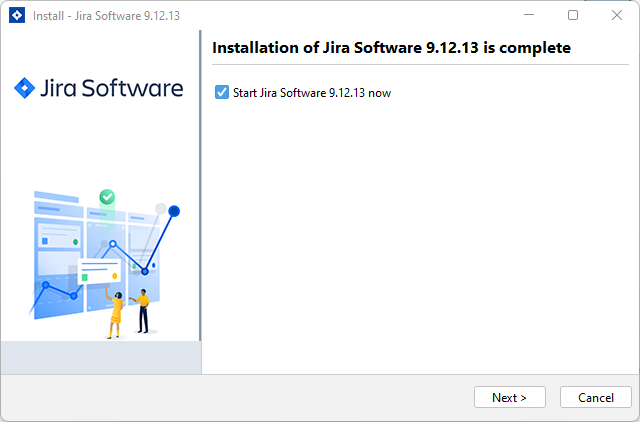
Finally, you will see a window stating, “Your installation of Jira software is now ready and can be accessed via your browser”:
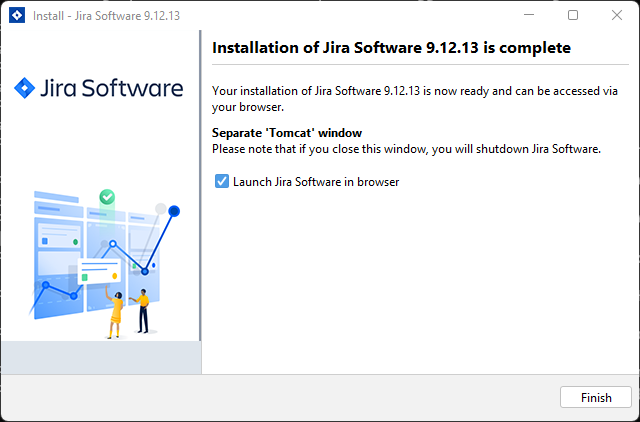
Click on the Finish button to Launch Jira Server in a browser.
Discover the Fast Performance of Windows Server!
For optimal performance, consider Ultahost’s reliable Windows hosting, which offers a high-speed and stable environment.
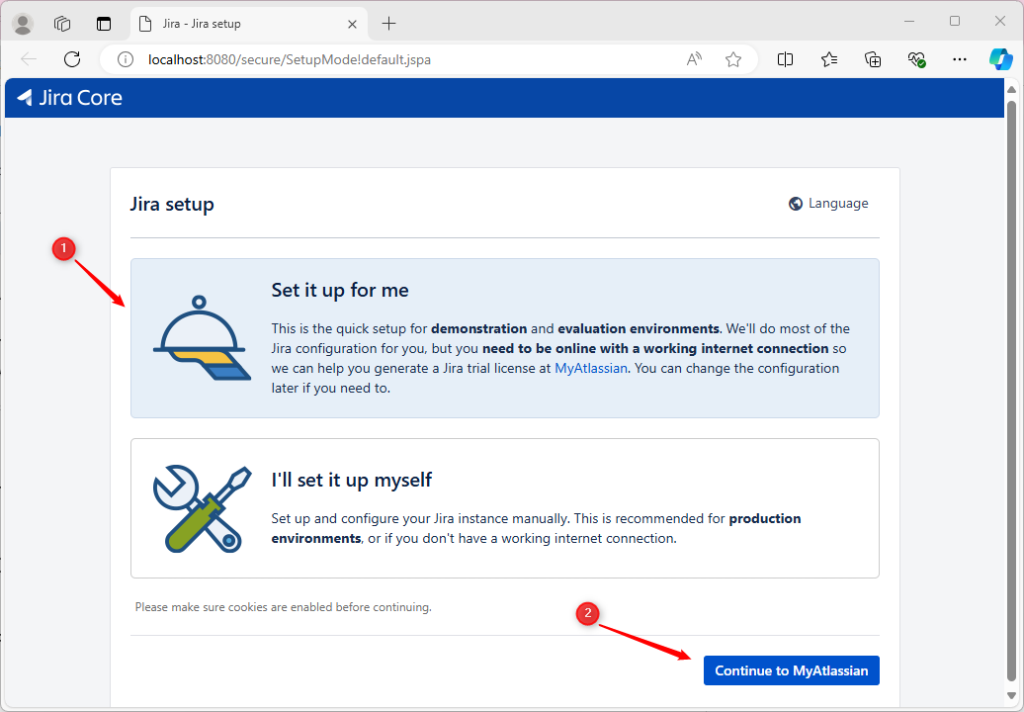
After installation, Jira will automatically start in your default browser. Here, you have two options to set up Jira: select “Set it up for me” to proceed with Jira’s default settings or “I’ll set it up myself” to manually configure Jira. We proceed with the default JIRA setup on Windows:
Once you complete the setup and create a Jira account, you’ll be ready to use it to manage your projects.
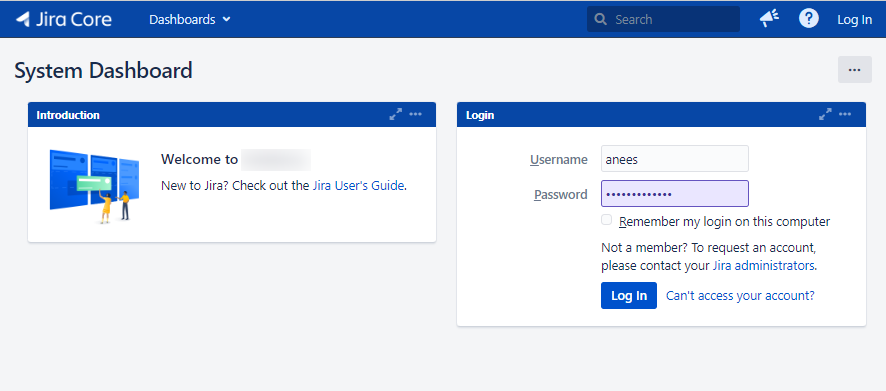
To access Jira on Windows, specify the username and password, and click on the login button:
After logging in, you can set up a project by choosing a template and configuring its details. Also, you can create issues by clicking the Create button and entering the required information. You can manage tasks with the backlog or Kanban/Scrum boards, and track progress using the dashboard and reports. Moreover, you can collaborate with your team by commenting on issues and @mentioning team members. Apart from these, Jira offers many more advanced features and customizations.
Jira is a cross-platform project management tool that can be customized to meet an organization’s specific needs. To install Jira Software on Windows, download the installer, run it, and follow the on-screen instructions. Once installed, you can manage projects, track progress, and achieve productivity with your team using Jira’s features. This guide explains how to install, set up, and use Jira on Windows.
Streamline your Jira setup on Windows with Ultahost’s VPS hosting, offering powerful processing, increased memory, and ample storage. Focus on managing your projects effortlessly, while Ultahost delivers the performance and resources you need to run Jira smoothly.
Jira is a project management tool developed by Atlassian, and used by organizations to plan, track, and release software.
Yes, you can customize Jira to meet the specific needs and workflows of your organization.
Jira is cross-platform and can be installed on Windows, macOS, and Linux. It’s also accessible through any web browser.
To install Jira on Windows, download the installer from the official Atlassian website, run the downloaded file, and follow the on-screen instructions.
After installation, Jira will open in your browser, where you can choose to proceed with the default setup or manually configure Jira according to your preferences.
To access Jira, open your web browser, enter the provided URL, and log in with your username and password.
By default, Jira uses port 8080 for web access. If you need to use a different port, you can configure this in the Jira settings during the installation process or later through the server configuration.


Power BI is a business analytics service provided by Mi...
The chkdsk command short for "Check Disk" is a powerful...

If you're looking for a simple guide on how to restart ...
Imagine you're playing your favorite online game, but y...