
How to Install Plesk on Linux
Plesk is a comprehensive web hosting control panel desi...


OpenCV, short for Open Source Computer Vision Library, is a powerful and versatile open-source software library designed for computer vision and machine learning tasks. It provides a comprehensive set of tools and functions that enable developers to create advanced applications in areas such as image processing, object detection, facial recognition, and augmented reality. For Ubuntu users, OpenCV offers a robust platform to develop innovative solutions across various industries, including robotics, autonomous vehicles, and medical imaging.
Installing OpenCV on Ubuntu allows developers to harness its extensive capabilities within the Linux environment. Ubuntu, known for its stability and user-friendly interface, provides an ideal platform for working with OpenCV. By integrating OpenCV into their Ubuntu systems, users can take advantage of the library’s optimized algorithms, GPU acceleration support, and compatibility with other popular programming languages like Python and C++.
This guide will walk you through the process to install OpenCV Ubuntu, ensuring you have access to its full range of features and functionalities. Whether you’re a beginner or an experienced developer, following these steps will help you set up OpenCV efficiently and start building cutting-edge computer vision applications on your Ubuntu system.
This method is the simplest and quickest way to get OpenCV up and running on your Ubuntu system. However, it’s important to note that the version available in the Ubuntu repositories may not be the latest.
Before installing any new packages, it’s crucial to update your system’s package list to ensure you’re getting the most recent versions available in the repositories.
sudo apt update

This command refreshes your system’s package list, preparing it for installation.
Once your system is updated, you can install the OpenCV development library:
sudo apt install libopencv-dev
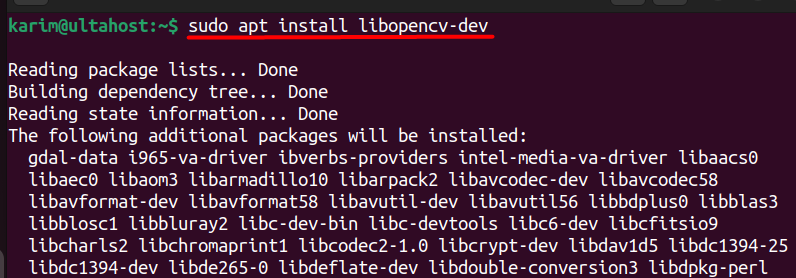
This command installs the latest version of OpenCV available in Ubuntu’s official repositories. Although this method is convenient, it may not provide the cutting-edge features found in newer releases.
After installation, it’s a good practice to verify which version of OpenCV was installed:
dpkg -l libopencv-dev
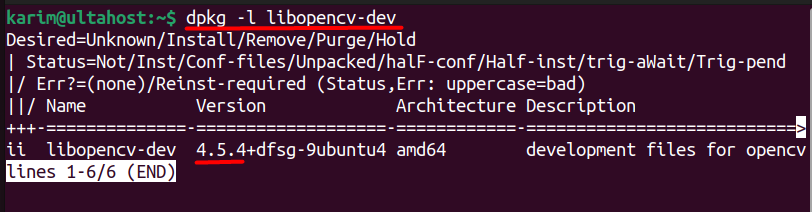
This command lists the details of OpenCV installation on the Ubuntu package, including its version number.
Install OpenCV on Our Ubuntu Server!
Combine the power of the world’s most trusted Linux distro with the flexibility of a VPS. Experience lightning-fast performance.
For those who require the latest version of OpenCV or prefer a more customizable installation, using Pip in a virtual environment is the way to go. This method ensures that your OpenCV installation is isolated from other projects, preventing potential conflicts between dependencies.
Before you can create a virtual environment, you’ll need to ensure that the venv module is installed. This module allows you to create isolated Python environments for different projects:
sudo apt install python3.10-venv -y
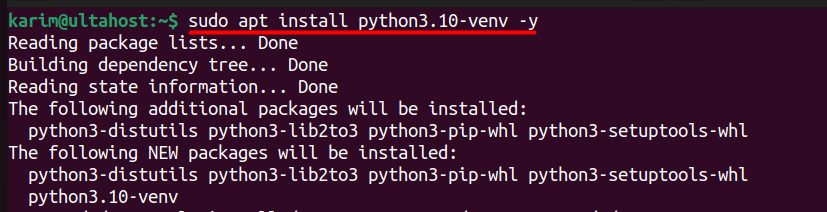
If you are using a different Python version, replace python3.10 with the appropriate version number.
With the venv module installed, you can now create a virtual environment. This step is crucial for managing dependencies separately for different projects:
sudo python3 -m venv myenv

Here, myenv is the name of your virtual environment. You can choose any name that suits your project.
Before installing OpenCV, you must activate the virtual environment. This step ensures that all the packages you install are contained within this environment:
source myenv/bin/activate

Once activated, you’ll notice that your command prompt is prefixed with the environment name (e.g., (myenv)), indicating that you’re now working within the virtual environment.
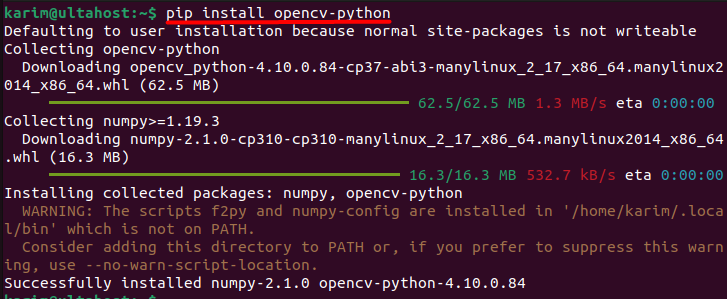
With your virtual environment active, you can proceed to install OpenCV using Pip:
pip3install opencv-python
For users who need additional functionalities provided by OpenCV’s contrib modules, such as non-free algorithms or extra modules, you can install them with:
After installation, it’s essential to verify that OpenCV was installed correctly and is functioning as expected.
To test your installation, start by launching the Python shell:
python3
Once inside the Python shell, you can check the version of OpenCV by running the following commands:
import cv2
print(cv2.__version__)

This command will print the installed OpenCV version, confirming that the OpenCV installation on Ubuntu was successful.
Learn about How to Install Vault on Ubuntu.
Each method of installing OpenCV on Ubuntu has its advantages and disadvantages. For most users, installing from the Ubuntu repositories is the quickest and easiest option, but it may not offer the latest features. While installing via Pip provides the flexibility to get the most recent version and manage dependencies effectively, making it ideal for developers who need the latest features.
Regardless of the method you choose, following this guide ensures that you can successfully install OpenCV Ubuntu setup on your system, unlocking the full potential of computer vision in your projects.
If you are looking for a server for installation, ultimately here is the best web server for you depending on your unique project requirements. Rent a VPS server reliable to you and cheaper with scalability that adapts your resources to meet your growing needs. Explore Ultahost VPS plans and find the perfect fit.
OpenCV (Open Source Computer Vision Library) is an open-source computer vision and machine learning software library. It contains various functions and algorithms for real-time computer vision, image processing, and machine learning.
You need a system running Ubuntu (preferably a recent version) with internet access to download the necessary packages and dependencies. Basic hardware requirements include a minimum of 4 GB of RAM and 2 GB of disk space, though more is recommended for extensive processing tasks.
To verify if OpenCV is installed correctly, you can run:
pkg-config –modversion opencv4
or check within Python by running:
import cv2
print(cv2.__version__)
If you installed OpenCV via APT, you can update it using:
sudo apt update
sudo apt upgrade libopencv-dev python3-opencv
For installations from source, you would need to re-clone the latest version from GitHub and recompile.
Check the error messages carefully as they often indicate missing dependencies or misconfigurations. Common issues include missing development libraries or incorrect paths. Ensure all dependencies are installed and consider consulting OpenCV’s documentation or forums for specific issues.
Yes, OpenCV supports multiple programming languages including Python, C++, Java, and others. For Python, ensure you have python3-opencv installed, and for Java, you may need to follow additional steps for configuration.
To uninstall OpenCV installed via APT:
sudo apt remove –purge libopencv-dev python3-opencv
To remove a source installation, you would need to delete the build and install directories manually.
Plesk is a comprehensive web hosting control panel desi...
Chromium is an open-source web browser project that ser...
Migrating your WordPress site from a local development ...
A proxy server acts as an intermediary between a client...

RubyMine is an IDE specifically for Ruby and Rails deve...