
How to Install Arduino IDE on Windows
Arduino is an open-source electronics platform that has...


Selenium WebDriver is a powerful tool for automating web browsers. It allows developers and testers to simulate user interactions with web applications. On Windows, installing Selenium WebDriver enables the automation of web tasks, ranging from simple actions like clicking buttons and entering text, to more complex procedures such as navigating through websites and handling pop-ups.
By automating these tasks, Selenium WebDriver helps in identifying issues early in the development cycle, saving time and improving the quality of the software. Additionally, it supports various programming languages such as Java, Python, Ruby, C#, JavaScript, etc., making it a versatile choice for many development teams.
In this tutorial, we will teach you how to install Selenium WebDriver on a Windows system.
Selenium WebDriver is an essential tool to automate web browser interactions. It supports several programming languages such as Java, Python, Ruby, C#, and JavaScript. In our guide, we will use Java and configure it with Selenium on Windows.
To install Selenium WebDriver on the Windows system, follow the steps below:
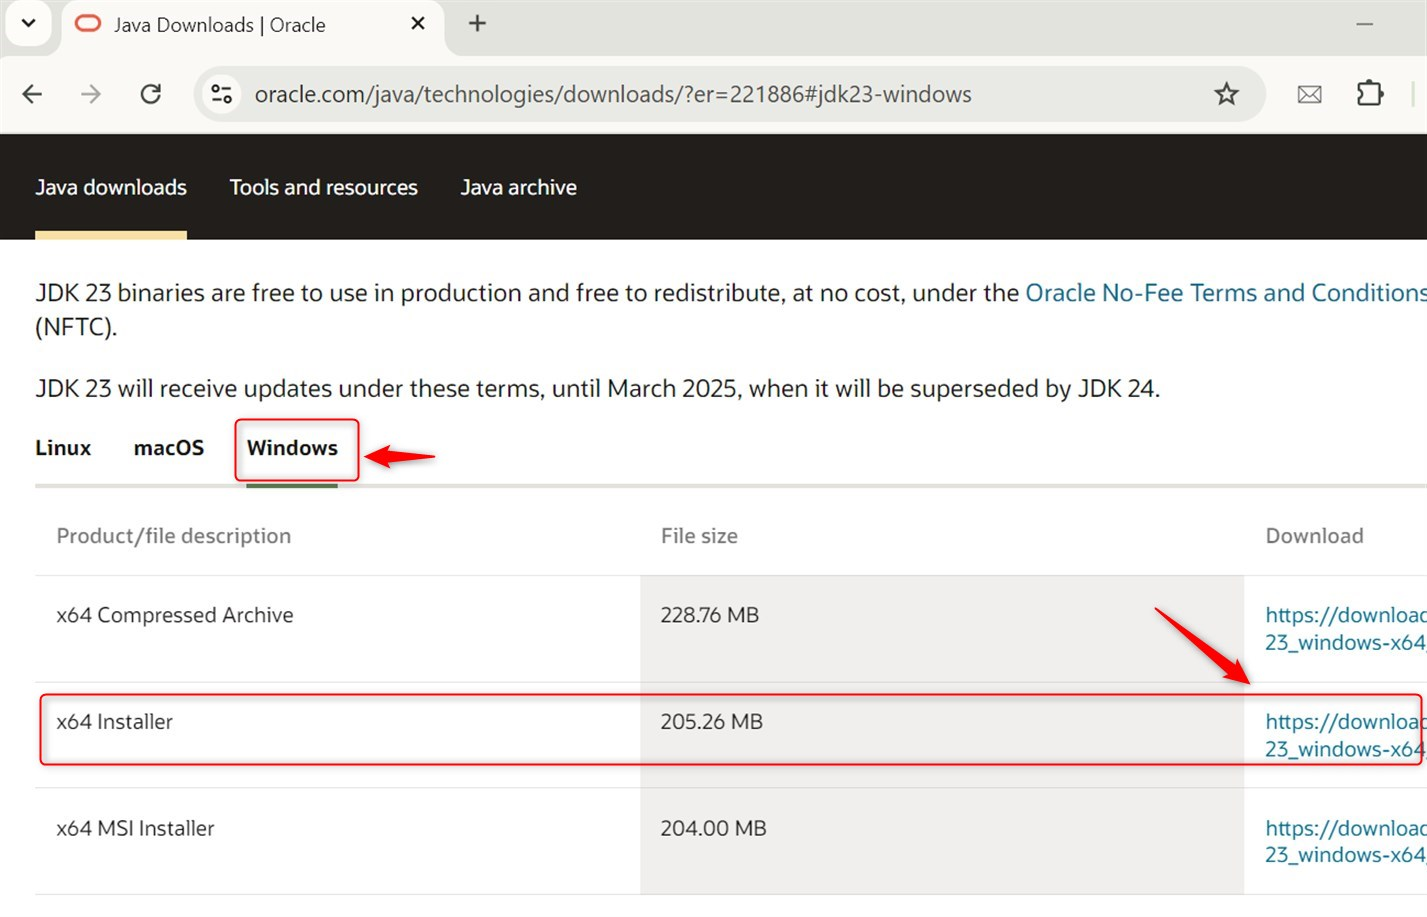
Before installing Selenium WebDriver, ensure that Java is installed on your system. Selenium requires JDK to run the test scripts. If Java is not installed, download and install the JDK from Oracle’s official website.
First of all, download the JDK from the official Oracle website by pressing the Download link in the Windows section:
After downloading the installer, run it and click the “Next” button to install JDK:

Optional: During the installation, you can set the JAVA_HOME environment variable to point to the JDK installation directory.
Read also How to Install Java on Windows
Verify the installation by opening a Command Prompt and typing the below command:
java -version
It displays the installed Java version:

Eclipse is a popular integrated development environment (IDE) that supports Java and other programming languages. To install Eclipse IDE on Windows, follow the below instructions:
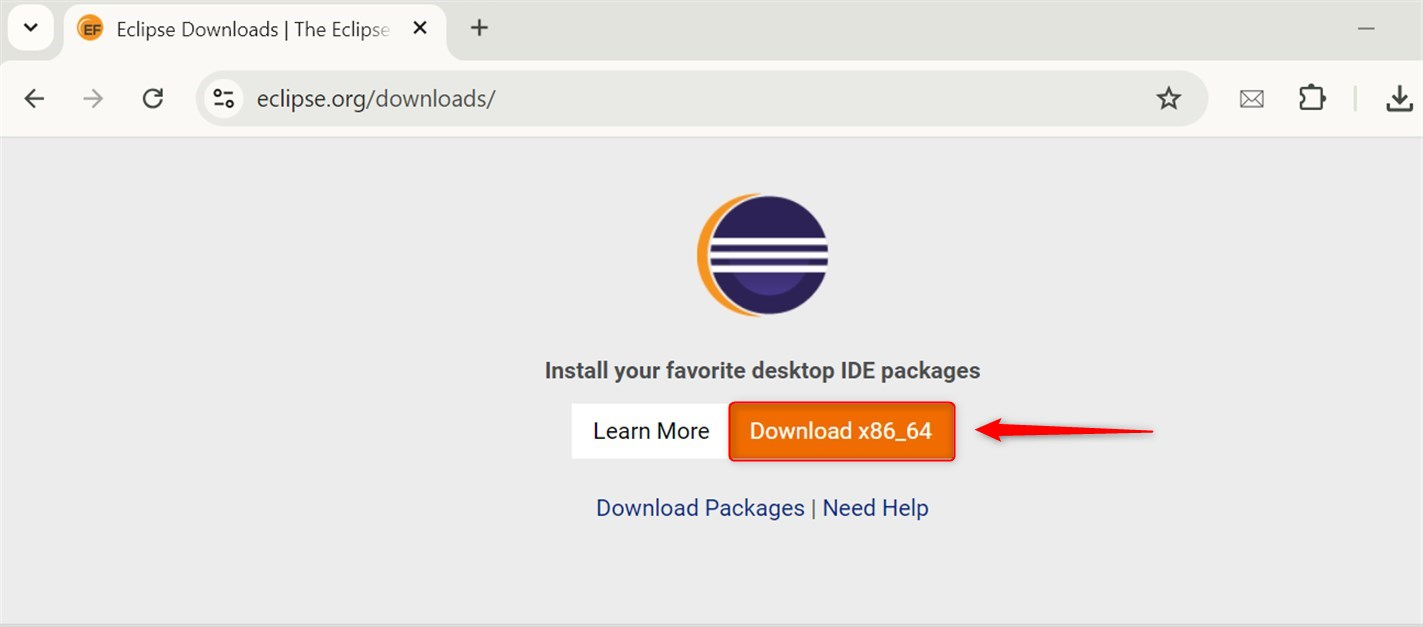
First, navigate to the Eclipse official website and download the Eclipse by pressing the “Download” button:

It pops up on the new page. Now, hit the “Download x86_64” button:
Note: While downloading Eclipse from the official website, ensure you select the correct version for your Windows architecture (32-bit or 64-bit).
Discover the Fast Performance of Windows Server!
For optimal performance, consider Ultahost’s reliable Windows hosting, which offers a high-speed and stable environment.
Now, navigate to the Download folder and extract the downloaded package. After that, run the Eclipse installer. During the installation, pick the “Eclipse IDE for Java Developers” option:

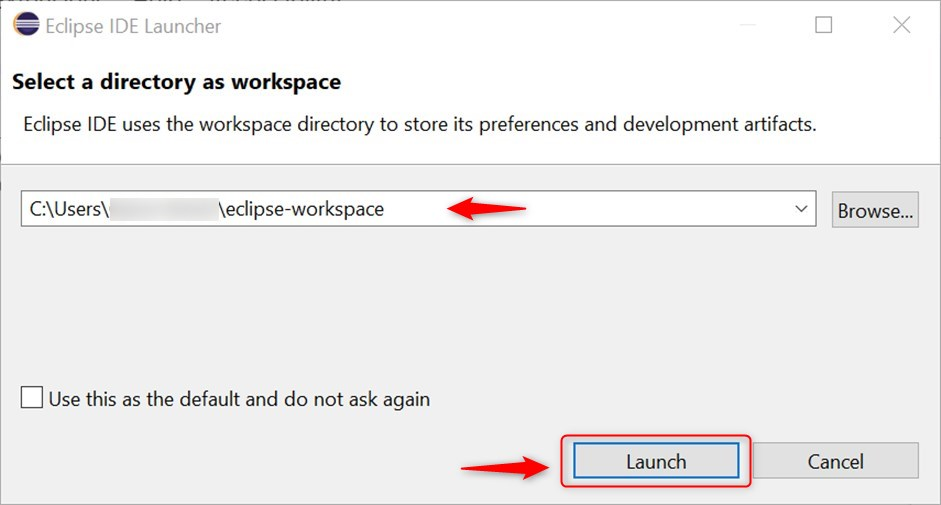
The installation takes some time and after installation, launch Eclipse by pressing the “LAUNCH” button:

Now, select a workspace directory. You can change it by pressing the “Browse” button and hit the “Launch” button:
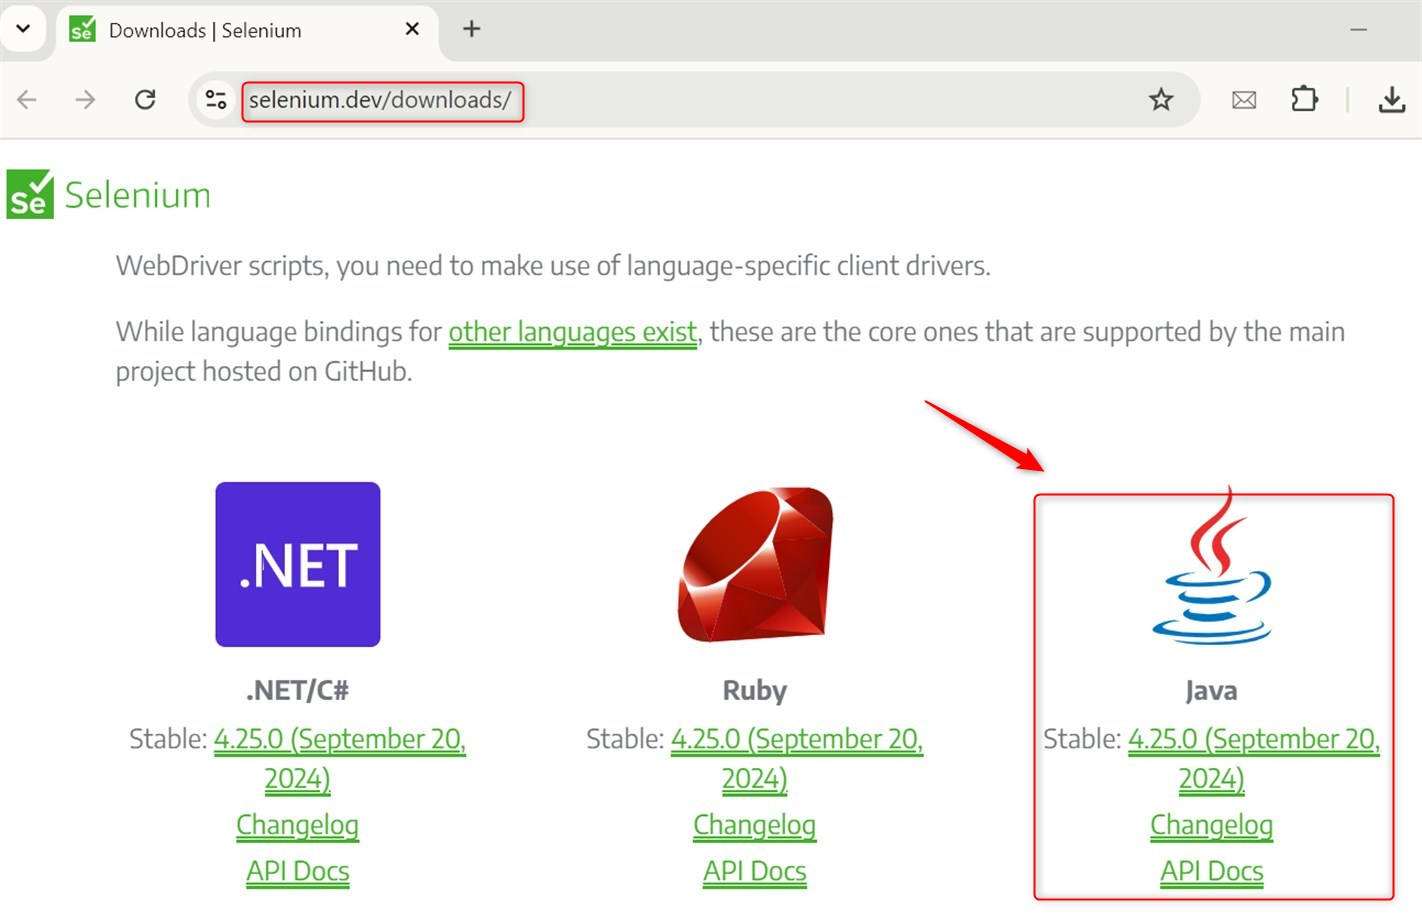
With Java and Eclipse set up, you can now install Selenium WebDriver. For this, navigate to the official Selenium website and download the Selenium WebDriver Java client:
Let’s download the Selenium WebDriver Java client from the official Selenium website:
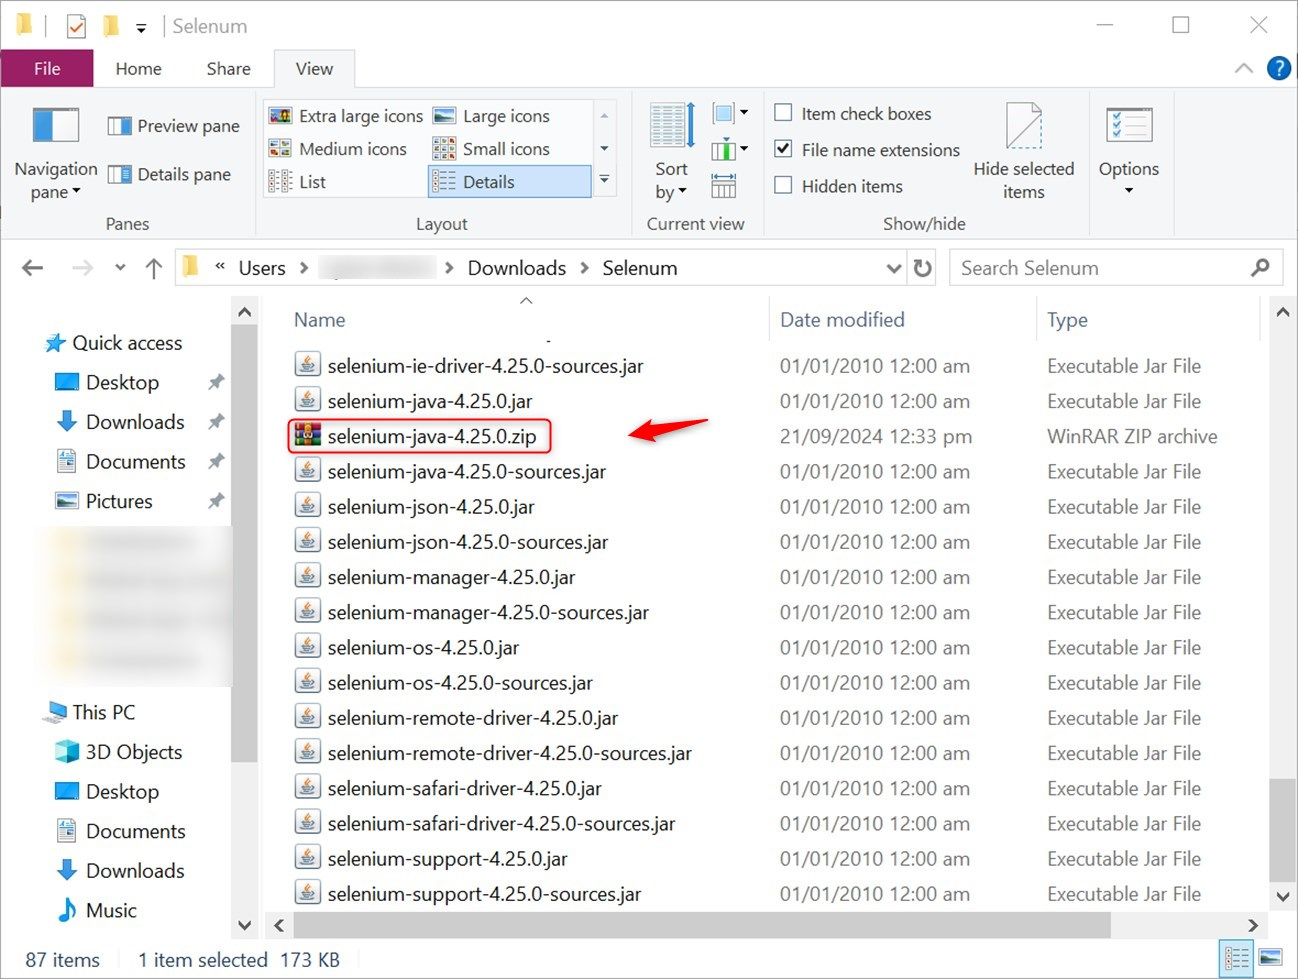
After that, extract the downloaded ZIP file to a directory on the system as below:
Now, open Eclipse and set up a new Java project. After that, add the Selenium WebDriver JAR files you downloaded earlier to the library:
To configure Eclipse with WebDriver, set up Java Project by clicking the “Create a new Java project” option or New Project from the File tab:

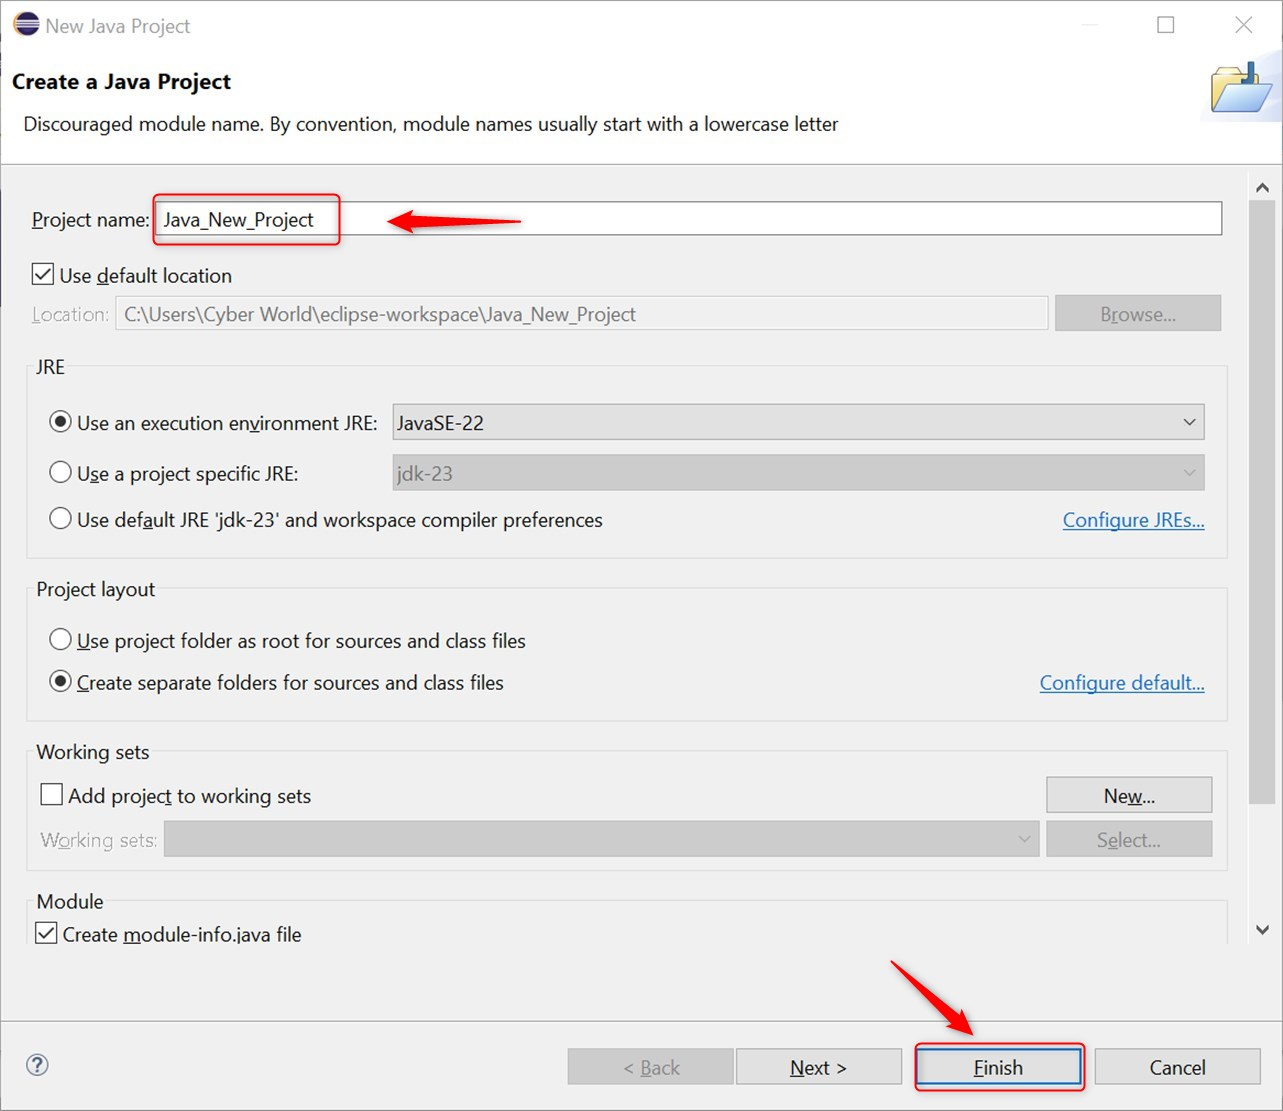
In the new interface, fill the “Project name” section by specifying the name as “Java_New_Project”. In addition, you can pick the folder where you want to save the project files via the “Use default location” checkbox. Finally, press the “Finish” button:
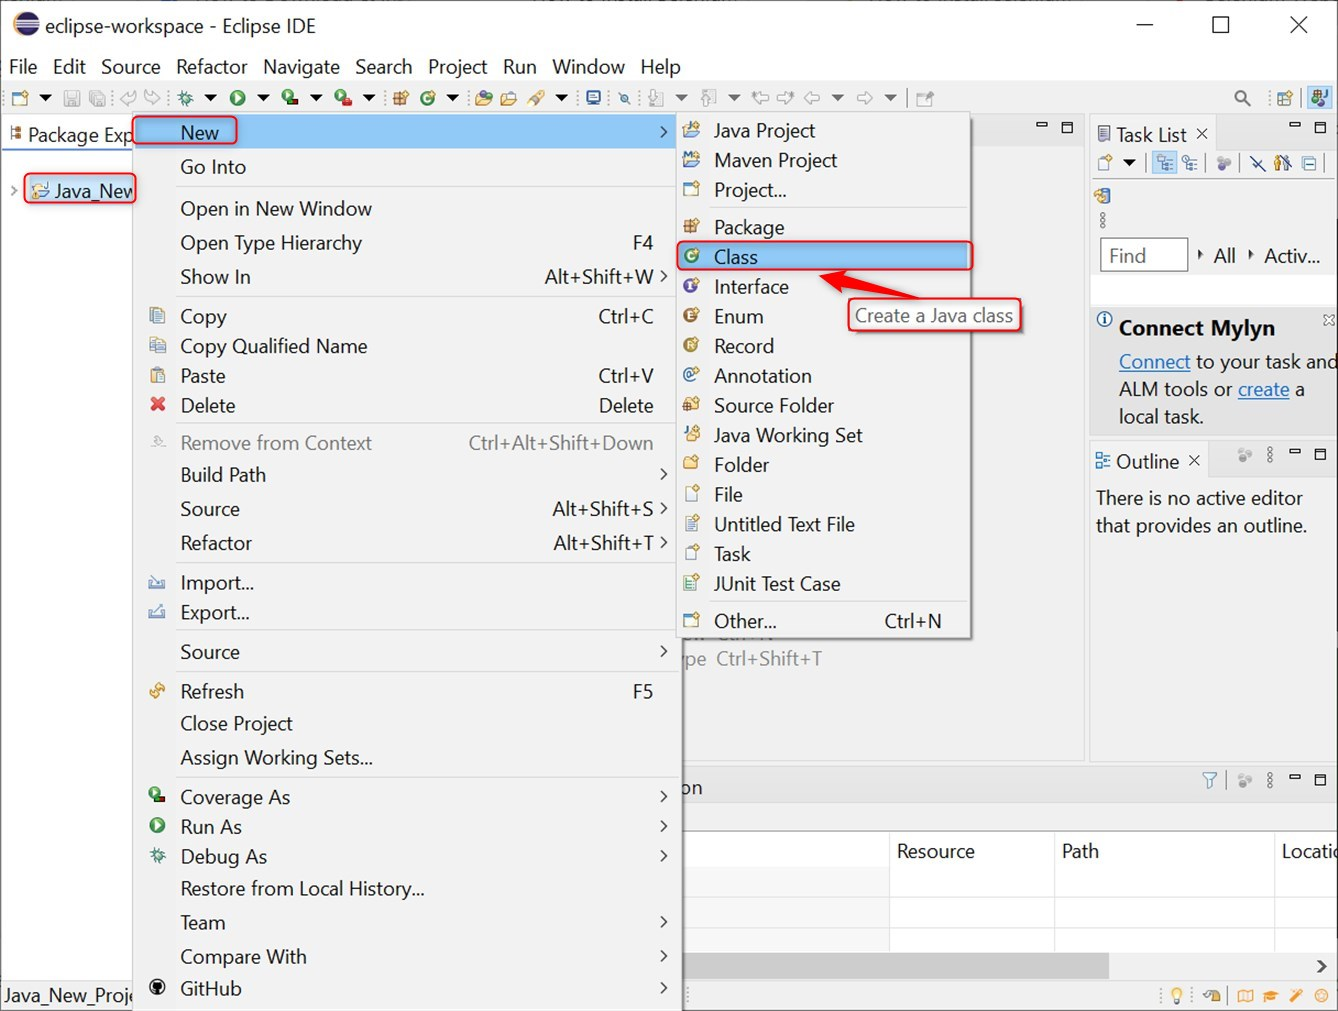
After that, create a Java class by pressing the right-click on the project name and selecting New > Class:
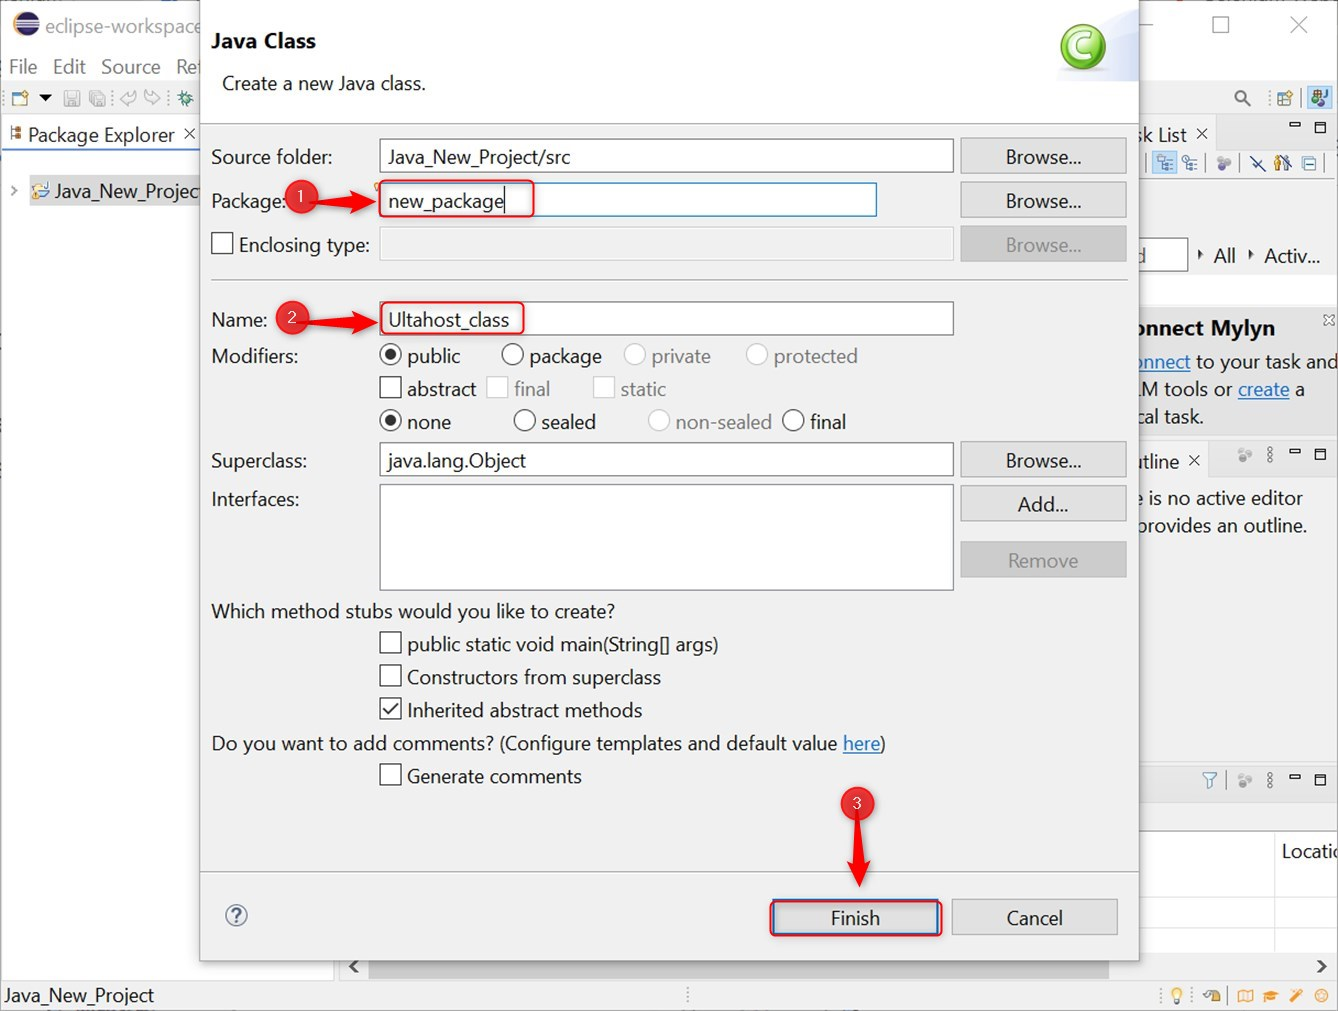
You may give the class whatever name you like, such as Ultahost_class. In addition, you need to add the package name such as new_package. After specifying names, press the “Finish” button:
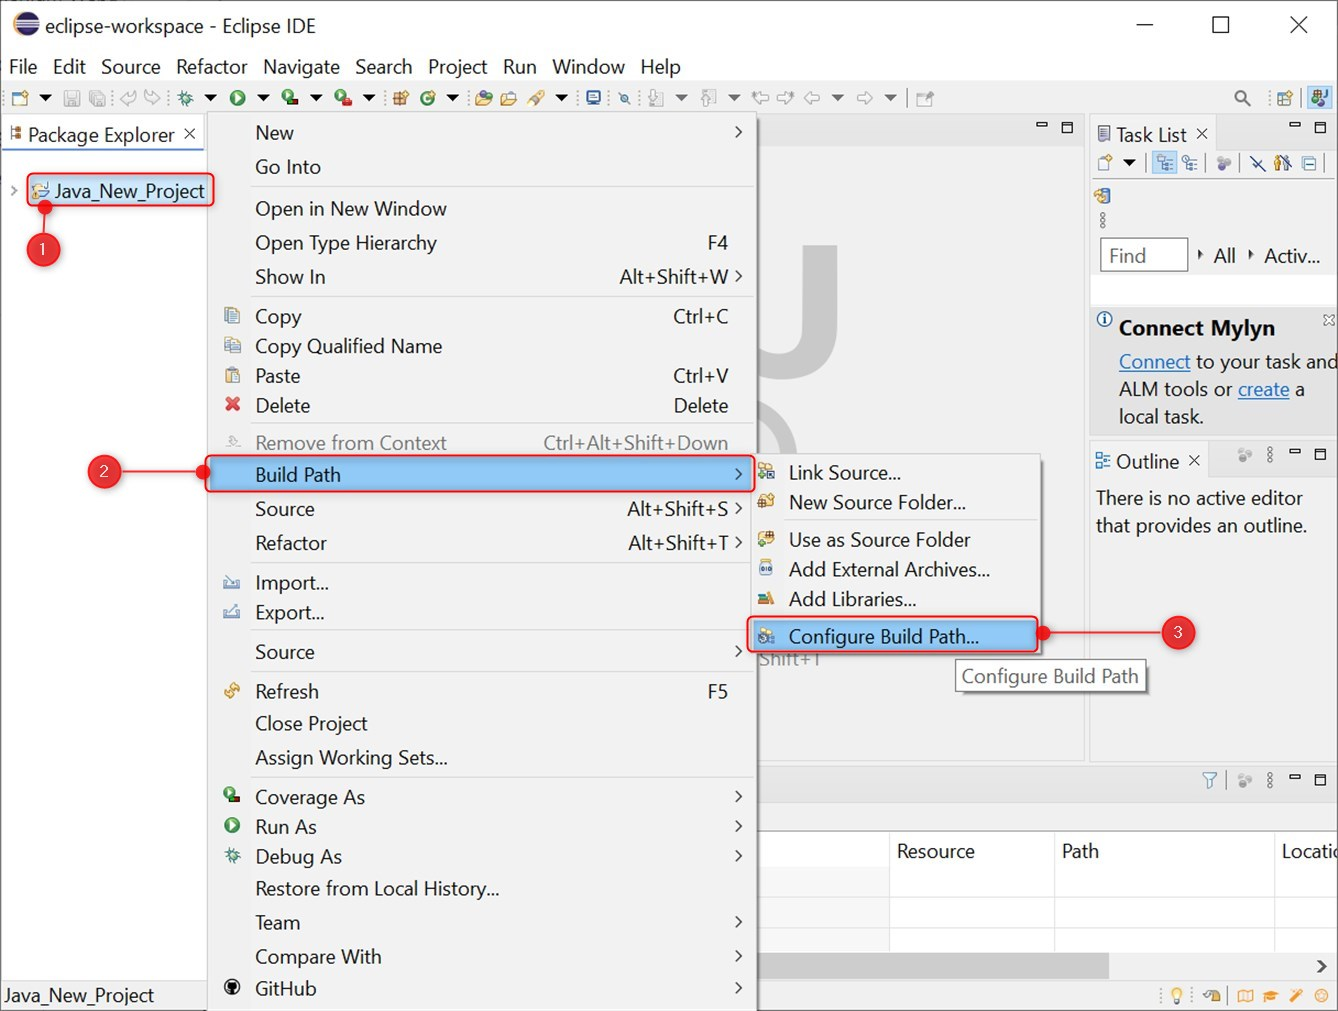
Now, right-click on the project, go to Build Path > Configure Build Path as below:
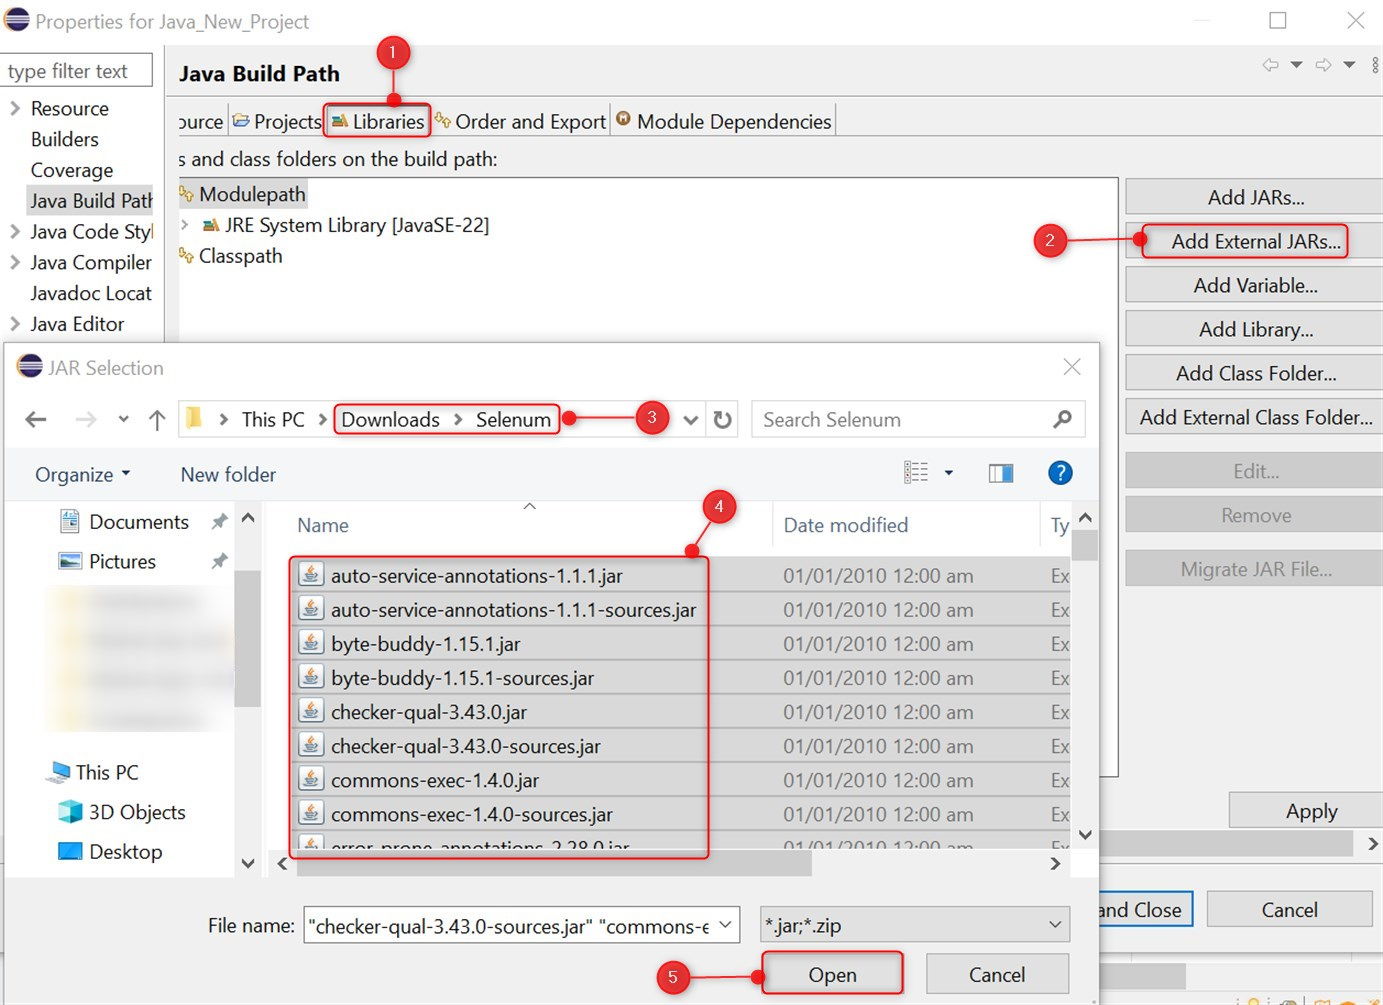
It moves to the new interface, now, click on “Add External JARs” under the Libraries tab. It navigates to the directory where you extracted Selenium WebDriver and selects all JAR files. Finally, click Open to add the JARs to your project as below:
After adding all JARs to the project, click the “Apply and Close” button:

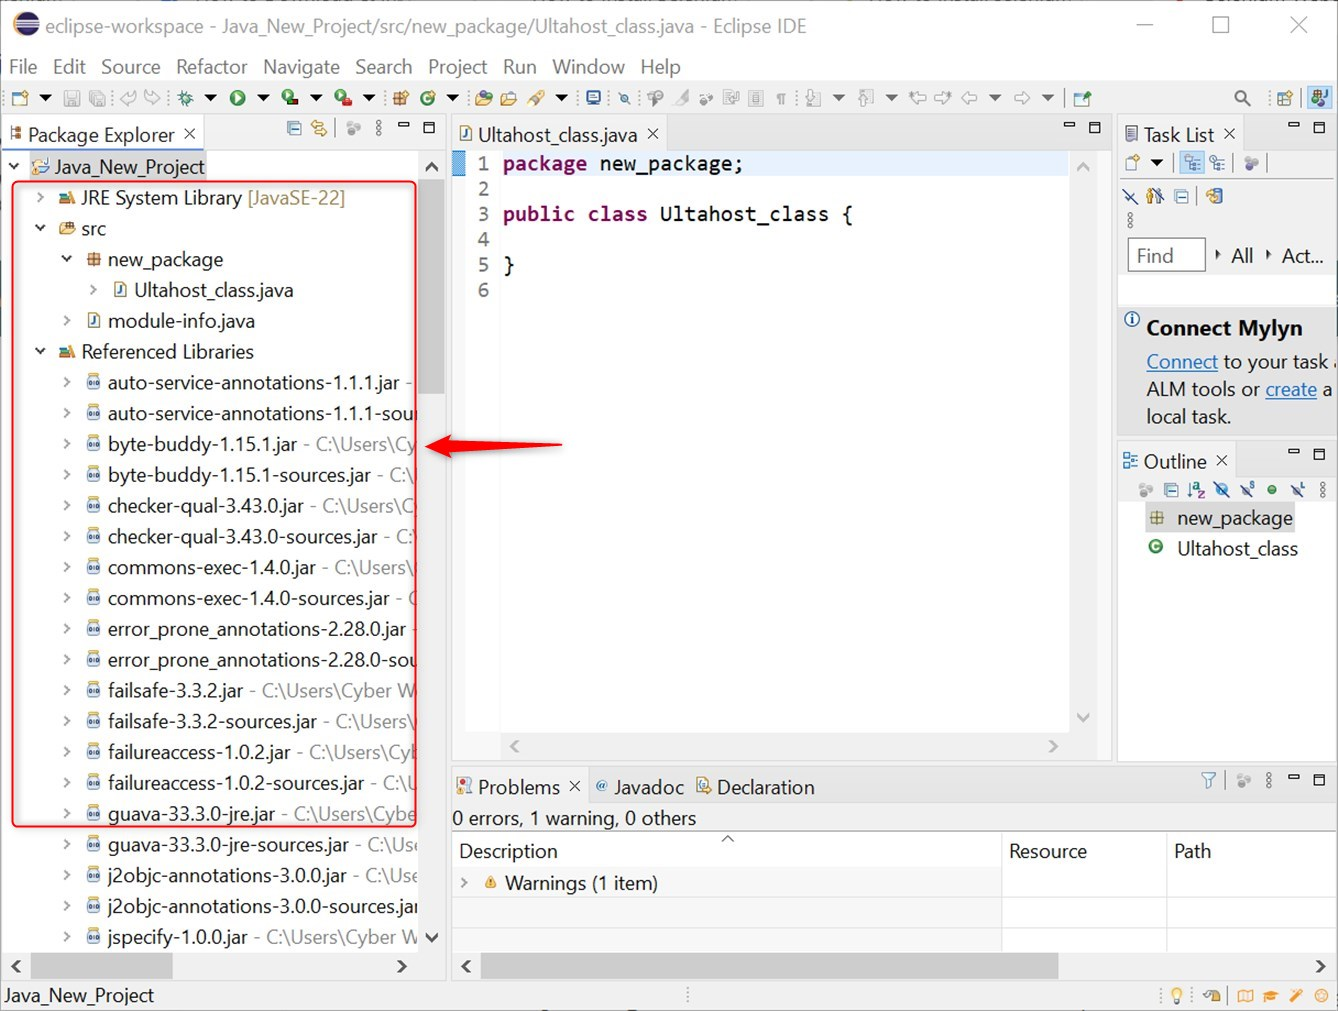
To verify the successful installation of Selenium WebDriver, you can navigate to the main project and see the JRE System Library and Referenced Libraries on the left-side panel as below:
Note: To install Selenium WebDriver for Python on Windows, you’ll need to ensure that Python is already installed on your system. You can download the most recent version of Python through the official website of Python. Once Python is set up, you can install Selenium using pip, by running the following command in your command prompt:
pip install selenium
By following these steps, you have a functional Selenium WebDriver setup on your Windows machine.
To install Selenium WebDriver on Windows, you’ll need to follow these steps: First, ensure that you have the latest version of Java installed on your system. Next, download and install an IDE like Eclipse, which helps you write and execute your tests. Then, visit the Selenium official website and download the WebDriver for the language you intend to use, such as Java, Python, or C#. After downloading, add the WebDriver to your project’s build path. Finally, you can write your test scripts and run them using the WebDriver.
Enhance your testing environment on Windows with Ultahost’s cheap Windows VPS hosting. Enjoy improved processing power, increased memory, and sufficient storage, making it easier to set up and run Selenium WebDriver. Ultahost provides the performance you need to execute automated tests efficiently.
Selenium WebDriver is an open-source automation tool used for testing web applications. It allows you to write test scripts in various programming languages and interact with web browsers.
Selenium tools and libraries are Java-based, which is why it’s often recommended. You only need Java installed if you plan to write your Selenium tests in Java. If you’re using another language like Python or C#, you would install the appropriate tools for that language.
Eclipse is an integrated development environment (IDE) that provides a comprehensive set of tools for Java development. It simplifies the process of writing, compiling, and running Selenium test scripts.
Yes, you can use other IDEs like IntelliJ IDEA, NetBeans, or Visual Studio Code. However, Eclipse is a popular choice due to its extensive support for Java and its free availability.
Right-click on your project in Eclipse, go to “Build Path”, “Configure Build Path”, and add the JAR file to the “Libraries” tab.
Yes, you can use a text editor like Notepad or a command-line interface to write Selenium test scripts. However, an IDE provides many features that can improve your productivity and make development easier.
If you encounter issues, double-check the steps you followed, ensure you have the correct versions of Java, Eclipse, and Selenium WebDriver, and consult the official documentation or online forums for troubleshooting assistance.
Arduino is an open-source electronics platform that has...

If you're looking for a simple guide on how to restart ...
Remote Desktop Protocol (RDP) has changed how we contro...
Java is a powerful programming language used develop di...
Genymotion stands as a powerful Android emulator, allow...