How to Install Git in Windows 10
Git is a key service on Windows, both for development a...
Ruby, a dynamic and versatile programming language, has gained immense popularity for its elegant syntax and powerful capabilities, especially in web development. Its simplicity, flexibility, and ease of use have made it a favorite among web developers, allowing them to build robust and scalable applications quickly. Ruby’s popularity is further amplified by the Ruby on Rails framework, which has been used to build some of the world’s most iconic websites, such as Airbnb, GitHub, and Shopify.
This guide provides a comprehensive, step-by-step process to install Ruby on Windows, ensuring a seamless and hassle-free experience. This guide will walk you through the entire installation process, from downloading the Ruby installer to setting up your Ruby environment on Windows.
Before diving into the installation process, let’s ensure your system is ready to welcome Ruby. Here are a few things to check:
To install Ruby on Windows, your system should meet the following requirements:
Read Also: How to install Ruby on Ubuntu
Installing software often requires administrator privileges. Make sure you’re logged in to an account with administrator rights on your Windows machine. This allows you to make system-wide changes necessary for Ruby to function correctly.
The Command-Line Interface (CLI) is a text-based interface used to interact with your operating system. While we’ll use a user-friendly installer for setting up Ruby, the command-line interface (CLI), often referred to as the command prompt (CMD), becomes your primary tool for working with Ruby after it’s installed. You’ll use it to run Ruby code, manage gems (packages), and interact with various Ruby tools.
While not strictly required for installation, having a good text editor or Integrated Development Environment (IDE) can significantly enhance your Ruby coding experience. Here are a few popular options:
Install Ruby on Our Windows VPS!
Get the reliability of the world’s most popular Windows hosting and the flexibility of a virtual server. Enjoy blazing-fast speeds and low latency.
Now that we’ve covered the prerequisites, let’s move on to downloading and installing Ruby on your Windows system by following the below instructions.
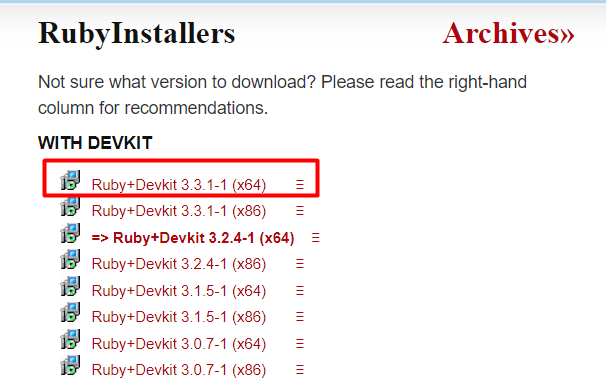
Visit the RubyInstaller download page and select the desired version. Click on the download link for the RubyInstaller executable:
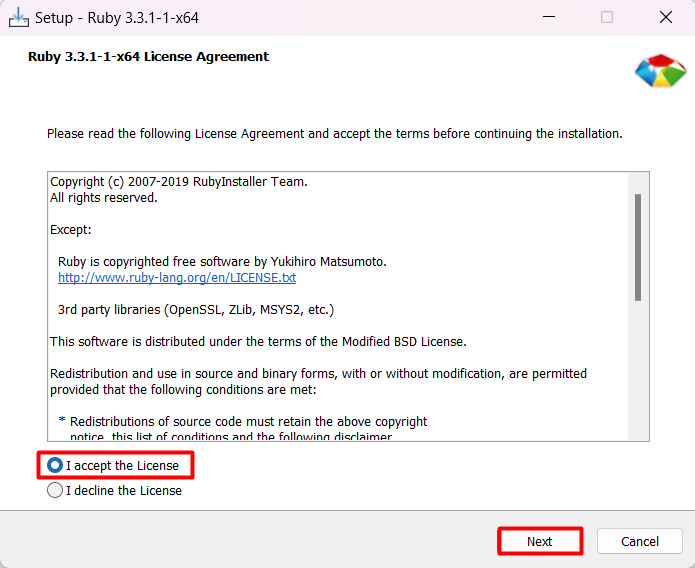
Once the download is complete, run the installer executable and follow the on-screen instructions to install Ruby. The first screen displays the terms and conditions of using Ruby. It’s essential to read through the agreement carefully to understand your rights and obligations as a user.
So to initiate the installation of Ruby, you need to accept the license and click on Next to proceed further.
In this step, you’ll be asked to specify the location where you want to install Ruby on your Windows 10 VPS system. The installation location is where the Ruby executable files, libraries, and other dependencies will be stored.
You can choose to accept this default location or click on the “Browse” button to select a different location. Make sure to choose a location that’s easy to remember and has sufficient disk space:
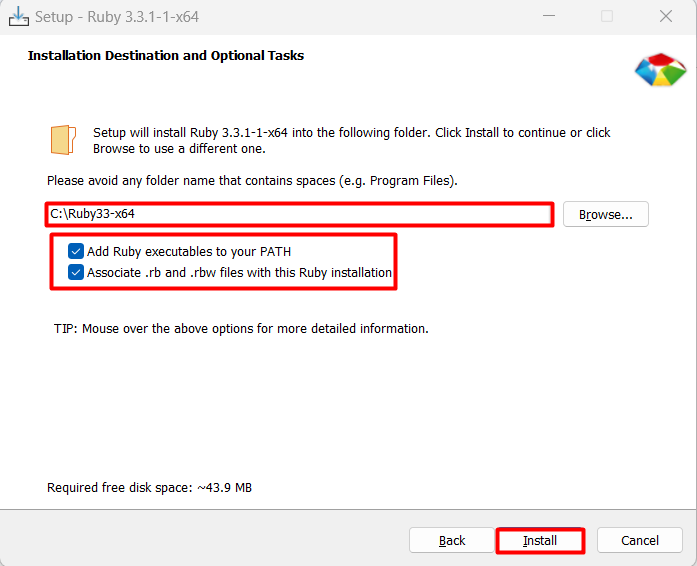
In addition to specifying the installation location, you’ll see two checkboxes with additional options:
Checking this box allows you to run Ruby commands directly from the command prompt (cmd) or PowerShell without needing to specify the full path to the Ruby executables every time.
Checking this box associates Ruby files with the .rb and .rbw extensions with the Ruby installation you’re currently setting up. This means that when you double-click on a Ruby file with one of these extensions, it will automatically open with the Ruby interpreter. This option is useful if you plan to work with Ruby files frequently.
It is highly recommend to check both these boxes and after that click on the Install button.
In this step, you’re given the option to select which components to install along with Ruby. These components are additional tools and resources that can enhance your Ruby development experience.
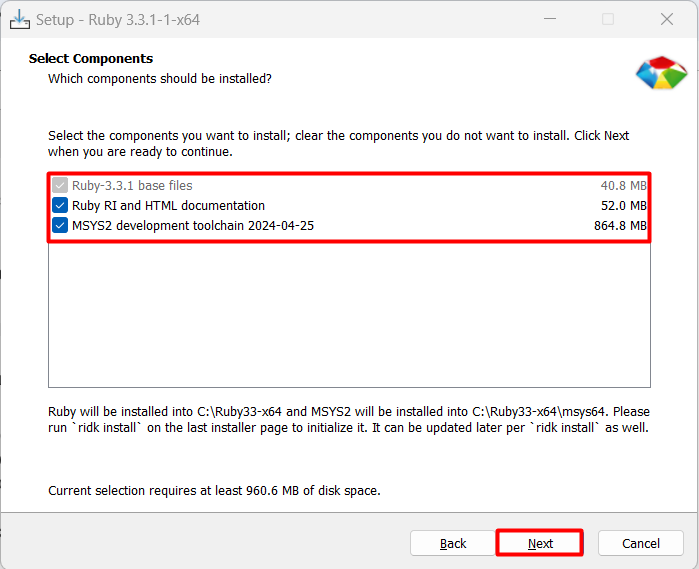
The Ruby RI (Ruby Information) and HTML documentation component provides offline access to Ruby’s documentation. This includes detailed information on Ruby’s classes, modules, and methods, as well as guides and tutorials. Having this documentation installed locally can be helpful when you don’t have internet access or prefer to work offline.
If you’re new to Ruby, it’s recommended to install this component, as it can serve as a valuable resource for learning and referencing Ruby’s syntax and features.
This is a powerful toolkit that provides a Unix-like environment on Windows. Moreover, it includes a compiler (like GCC) and other essential tools for building and compiling native extensions for Ruby gems.
Keep in mind that the MSYS2 development toolchain requires a significant amount of disk space, so if you’re short on storage, you might want to skip it.
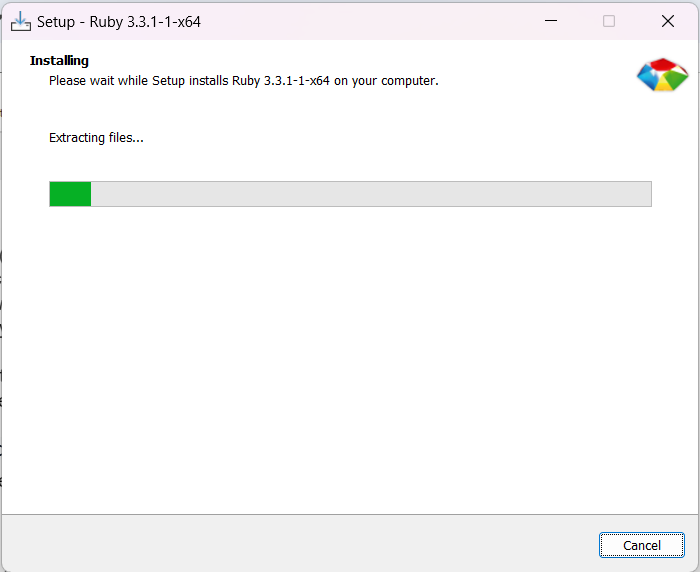
So when you click on the Next button, it starts the installation by extracting files:
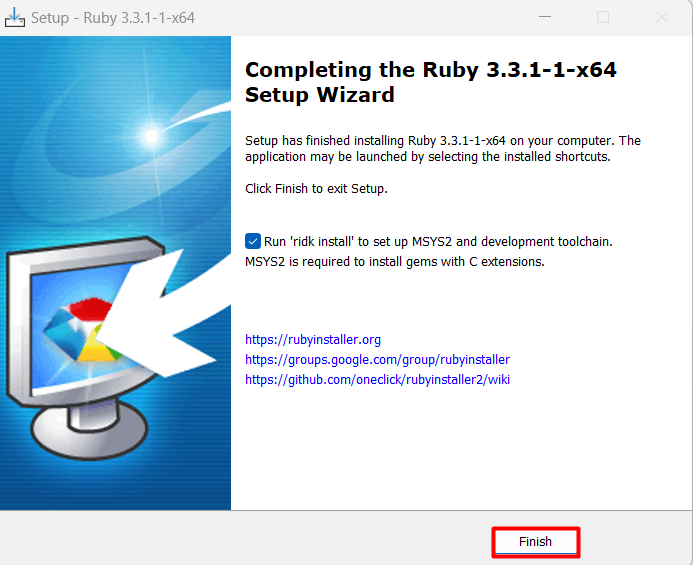
After completing the Ruby installation, you’re prompted to run the ridk install command to set up MSYS2 and the development toolchain. This step is optional, but it’s recommended if you plan to work with Ruby gems that have C extensions.
After that click on the Finish button to complete the installation process.
After complete the installation, you can verify if ruby is properly installed by opening CMD and then execute the below command:
ruby -v

Installing Ruby on Windows is a straightforward process that can be completed in a few easy steps. Furthermore, by following the instructions outlined in this article, you can successfully install Ruby and verify its installation without any issues.
From downloading the Ruby installer to accepting the license agreement, choosing the installation location, and selecting components, each step is crucial in ensuring a smooth installation process.
Installing Ruby on Windows procedure involving dependency management and potentially conflicting with Ruby versions. Upgrading to the Ultahost cheap Windows VPS plan offers robust solution which grants you root access and full control over your server environment.
Ruby is a dynamic, open-source programming language with a focus on simplicity and productivity. It has an elegant syntax that is natural to read and easy to write.
Ruby is popular for web development, especially with the Ruby on Rails framework. It is also used for data processing, automation, and more.
You can download Ruby from the official RubyInstaller website. RubyInstaller provides an easy-to-use installer that includes the Ruby language, an execution environment, and a package manager.
RubyInstaller is a self-contained Windows-based installer that includes a complete Ruby environment. It simplifies the installation process on Windows systems.
MSYS2 is a software distribution and building platform for Windows. RubyInstaller uses MSYS2 to provide a development toolkit and build tools necessary for compiling native Ruby gems.