
How to Install Vim on Ubuntu
Vim (Vi IMproved) is one of the best Linux text editors...


Zenmap the official graphical user interface for the powerful Nmap security scanner empowers you to explore networks with ease on your Ubuntu system. It allows users to visualize and analyze network types to detect vulnerabilities and perform security assessments.
In this guide, we will navigate you through how to install Zenmap Ubuntu by providing you with knowledge and different methods to explore in depth.
Before diving in, it is important to understand the relation between Nmap and Zenmap. Nmap, a command-line tool, offers unparalleled flexibility for network security assessments. Zenmap serves as a user-friendly front end, translating Nmap’s commands into a visual interface. This allows you to perform scans, analyze results, and visualize network types without using complex command-line syntax. If you are comfortable with the command line interface you can switch to Nmap, check out the post on Nmap essential commands and options for flexibility.
There are two primary approaches to install Zenmap on Ubuntu:
This method is efficient and ensures compatibility with your Ubuntu version. Here’s what you need to do:
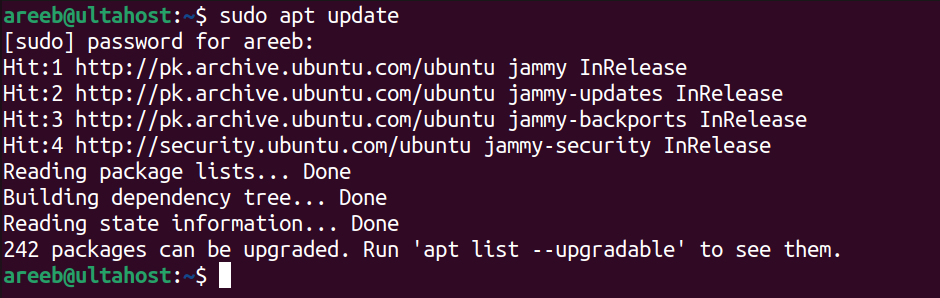
1. Update Package Lists
Open a terminal window from Applications then Terminal and execute the following command to refresh the list of available packages:
sudo apt update
2. Install Zenmap
Now, use the following command to install Zenmap:
sudo apt-get install zenmap
The system will download and install Zenmap along with any necessary dependencies.

3. Verify Installation
Once the installation is complete, you can verify it by typing:
zenmap --version
This should display the installed Zenmap version.
Install Zenmap on Our Fast Ubuntu Server!
Get the reliability of the world’s most popular Linux distro and the flexibility of a virtual server. Enjoy blazing-fast speeds and low latency.
This method provides more control but involves additional steps:
1. Install Build Essentials
Ensure you have the necessary build dependencies in your Ubuntu system:
sudo apt install build-essential checkinstall zlib1g-dev libssl-dev libcurl4-openssl-dev
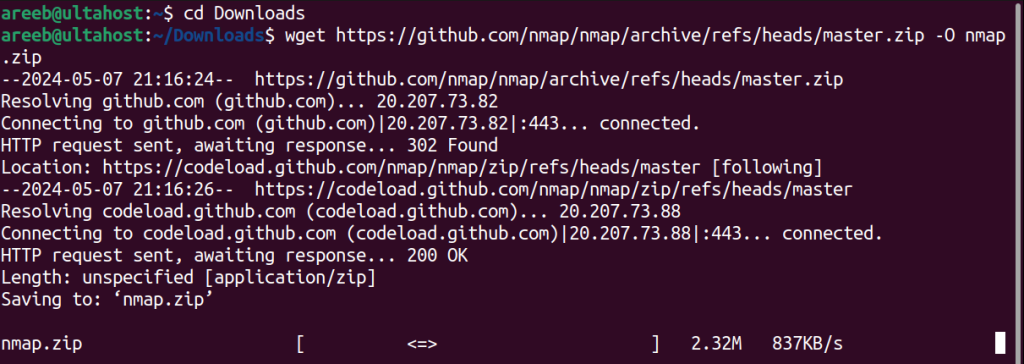
2. Download Zenmap Source Code
Navigate to your preferred download directory for example Downloads in the terminal using the cd command. Then install Zenmap latest version source code from the official Nmap GitHub repository using a tool like wget:
cd Downloads
wget https://github.com/nmap/nmap/archive/refs/heads/master.zip -O nmap.zip
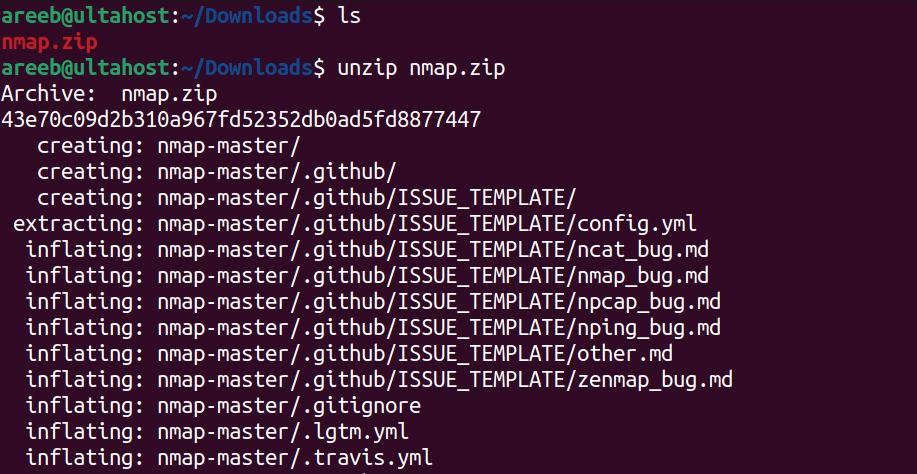
3. Extract and Compile
Unzip the Nmap downloaded archive from the terminal in the Ubuntu system:
unzip nmap.zip
Then navigate to the extracted directory by typing cd command, for example:
cd nmap-master
Configure the build process and adjust flags as needed:
./configure
It is essential to compile the source code using make command, then install the compiled Zenmap application with administrative privileges:
sudo make install
This should confirm the successful compilation and installation of Zenmap on your Ubuntu system.
Learn about How to Install Nmap on Ubuntu.
After installation, you can launch Zenmap from the Applications menu or by typing zenmap in the terminal.
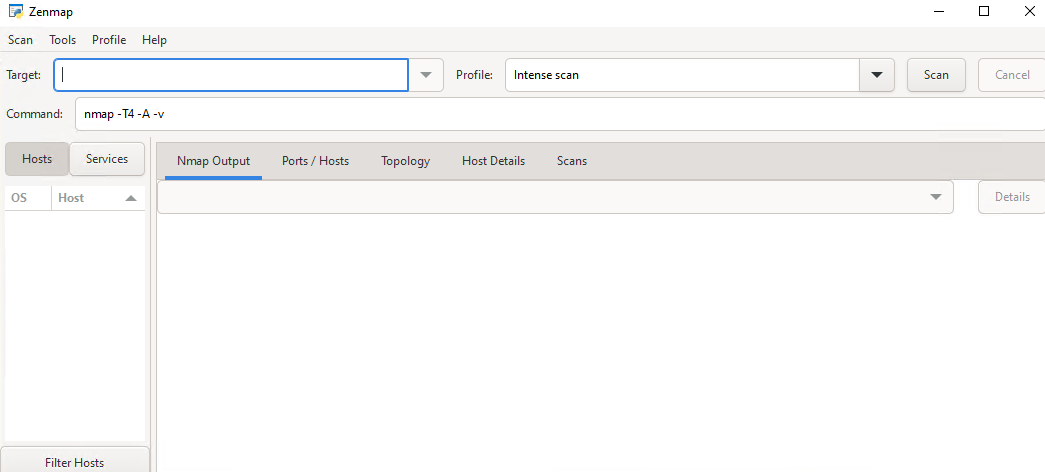
Zenmap boasts a range of features that simplify network security assessments:
Following are some additional considerations on how to install Zenmap on Ubuntu system:
With Zenmap in your collection, you possess a powerful tool for network reconnaissance and security analysis on Ubuntu leads to you in network testing. Remember to utilize it responsibly, following ethical guidelines and obtaining proper authorization.
Zenmap is commonly used in scanning networks you can install Zenmap on our server. Ultahost’s cheap VPS hosting plan offers you an easy-to-manage, reliable, and economical hosting plan for businesses of all sizes. Get started today and enjoy the freedom and flexibility of a VPS!
Zenmap is a free and open-source tool used for network discovery and security auditing.
Yes, Zenmap can be easily installed and used on the Ubuntu Linux operating system.
You can install Zenmap on Ubuntu by following a few simple steps outlined in our guide.
No, installing Zenmap on Ubuntu is straightforward and doesn’t require advanced technical skills.
Absolutely! Zenmap provides powerful features for scanning networks and identifying potential security vulnerabilities.

Screenshots are a convenient way to explain complex ide...
The Oracle Database is a powerful relational database m...

RubyMine is an IDE specifically for Ruby and Rails deve...
IPv6, also known as Internet Protocol version 6, offers...