
How to Install Atom IDE on Ubuntu
Atom is a free text editor created by Github that is hi...


The hostname refers to the name assigned to every individual computer. It serves to differentiate and identify each computer on the network. Without a hostname, monitoring, managing, and communicating within the network becomes difficult. A hostname helps administrators or applications identify a specific computer within a networked cluster of systems. They often change hostname when configuring a new server, working on a VPS, or setting up servers during production.
Moreover, administrators usually configure a server’s hostname based on its function to make identification easier. For instance, it is common to see hostnames such as web-server01, database-server01, or backup-node. Without the proper configuration of the hostnames on the servers, it would be a difficult task to manage servers in a network where thousands of devices operate.
This guide will show you different ways to change the hostname in Ubuntu and CentOS. It will show you several methods so you can make a decision about what method to use for what circumstances.
There are numerous methods of executing this task in modern Linux distributions. The most common of all is the hostnamectl command. Note that this command works only on systems based on systemd. Besides this method, administrators can also use other methods, such as changing certain configuration files, such as “/etc/hostname”, “/etc/hosts”.
Boost Your Website’s Performance with Ubuntu VPS!
Experience unmatched reliability and flexibility with Ubuntu VPS, a powerful hosting solution designed to meet your specific needs.
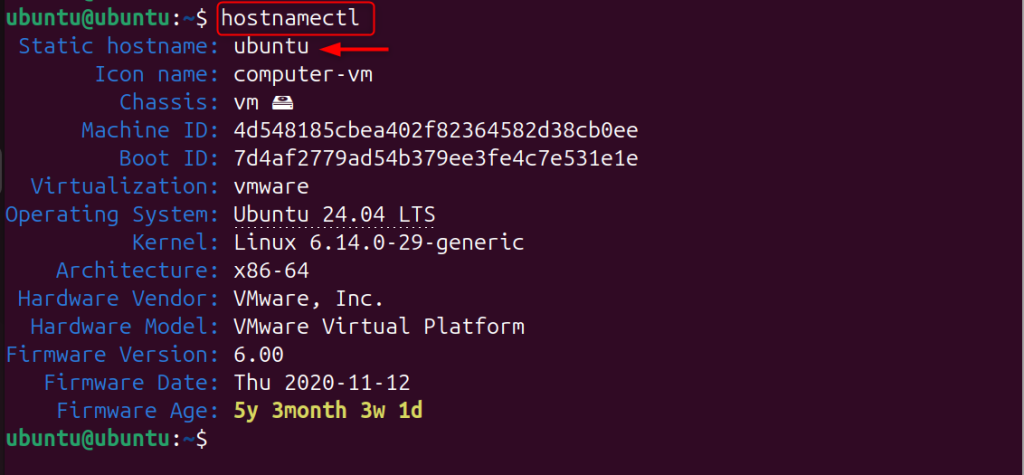
It is crucial to find your current hostname, and it is essential to be clear about the task and the configurations. It will help to validate the changes. Therefore, you can use the command below to display the current hostname along with other system information.
hostnamectl
This command will show you the current hostname “ubuntu”, the version of the operating system, the version of the kernel, and the system architecture.
If you only want to see the current hostname without other system information, you can run the following command.
hostname

The output of this command shows the current hostname assigned to the system.
The most preferable method of changing the hostname in the new versions of Linux is using the hostnamectl command. This works on Ubuntu 18.04 and above, CentOS 7 and above, and basically all distributions that use systemd.
Using hostnamectl changes the hostname instantly and keeps the change after the system reboots.
To modify the system’s hostname with hostnamectl, execute the command below and replace new-hostname with the hostname you want to assign to the system.
sudo hostnamectl set-hostname new-hostname
So, for the case of changing the hostname to “web-server01”, the command would be as follows.
sudo hostnamectl set-hostname web-server01

Executing this command changes the hostname instantly.
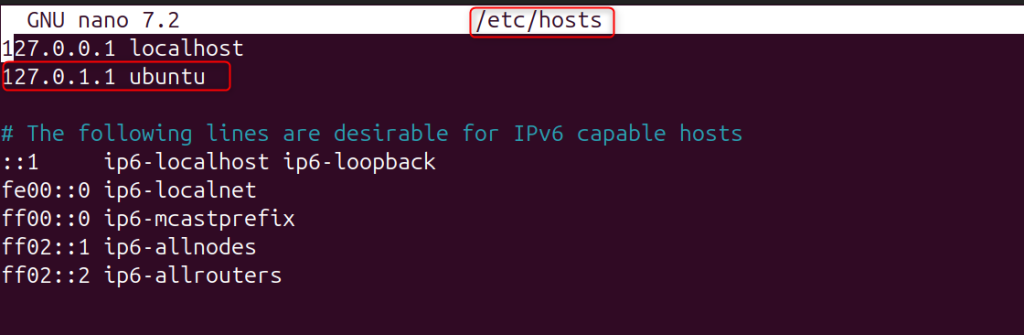
It is also advisable to edit the file “/etc/hosts” when changing the hostname. This is to avoid issues with hostname resolution when the “system/host” cannot resolve its hostname, since that file converts names to addresses.
You can edit the hosts file with the following command.
sudo nano /etc/hosts
Inside that file, find the old hostname line. It would look like this.
127.0.1.1 old-hostname
Replace the old hostname with the new hostname so that it looks like this.
127.0.1.1 web-server01
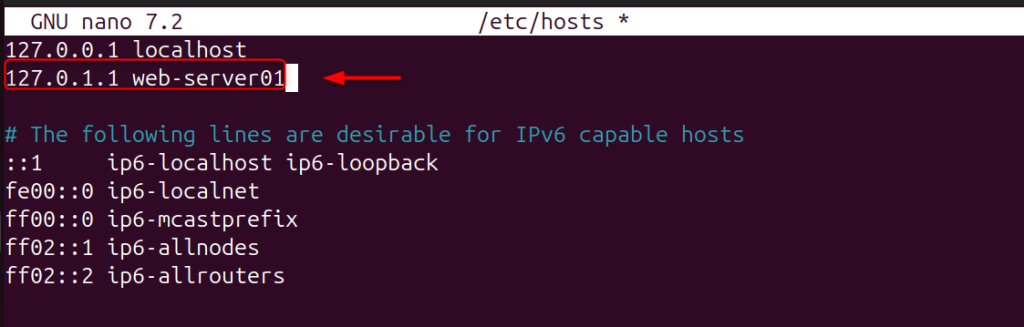
After the edit, exit the editor.
After changing the hostname, confirm that the system reflects the new name to ensure the change succeeded. To check the hostname, type the command below.
hostnamectl

The new hostname should appear in the Static hostname section. To check the hostname, run the following command.
hostname

If the system lists the new hostname, the modification succeeded.
On the Ubuntu operating system, the system stores the static hostname in the /etc/hostname file. You can modify this file to change the hostname.
To access the config file, use the following command by specifying the configuration file name.
sudo nano /etc/hostname
The file consists of only one line with the hostname that will be the existing hostname.
web-server01

To give the system a new hostname, edit the line and enter the text of the new hostname.
new-server
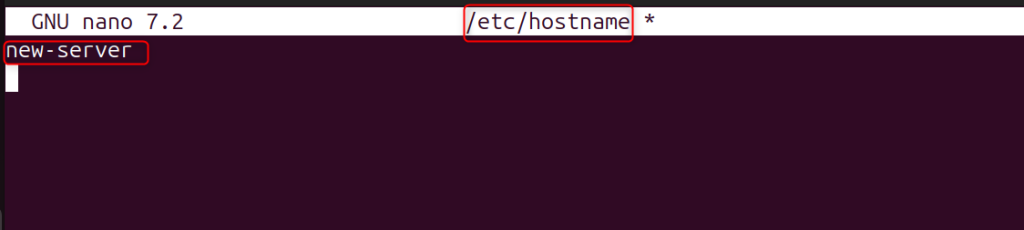
After updating the file, make sure to save and exit the text editor.
The next step is editing the hosts file for the new hostname to take effect. You can do this with the command.
sudo nano /etc/hosts
Find the line with the old hostname and change it to the new hostname.
127.0.1.1 new-server
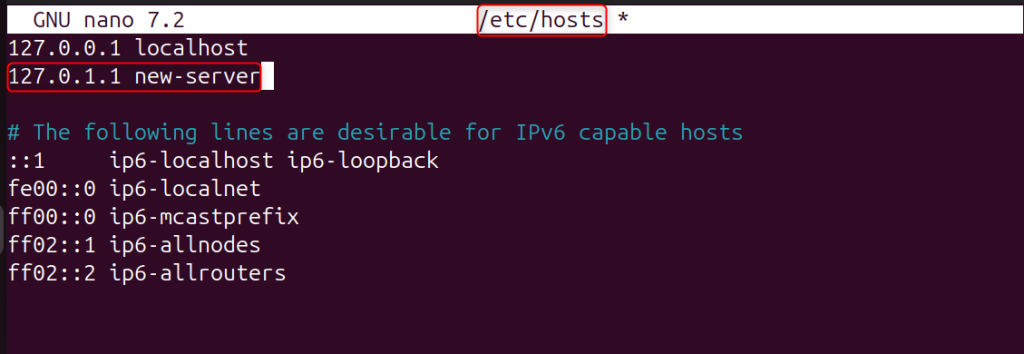
After making the appropriate changes, save the file.
After modifying the configuration files, you will have to restart the machine for all the services to verify the new hostname. The following command will initiate a restart.
sudo reboot
Once the system is back on or new session, you can verify the hostname with the command below.
hostnamectl

Administrators can change the hostname of a machine using the hostname command. This change is temporary because the system returns to the original hostname after a reboot.
To view the hostname of the machine, and not the other system information, one can use the command below.
hostname

The output shows that the system uses Ubuntu as its current hostname.
Use the command below to temporarily change the hostname, replacing new-hostname with the desired name.
sudo hostname new-hostname
Change the hostname to test-server using the command below.
sudo hostname test-server

This will change the hostname to test-server, which will only be valid for the current session.
To verify the change of the hostname, run the command.
hostname
You should see the hostname displayed. Keep in mind that these changes will revert after a reboot unless you make a permanent change.

For servers, administrators must assign hostnames that reflect the system’s role. When choosing a hostname, an administrator should:
All these combined will simplify server management in large spaces and will help the role of the system be readily apparent.
Server identification and organization within a network is a key task when changing and configuring hostnames on Ubuntu and CentOS. Proper hostnames allow systems to communicate with each other and for applications and services to communicate with the systems.
Hostnamectl is the most preferred way of changing hostnames. The other ways include hostname, which makes a temporary change, and the manual way of changing hostname in files (i.e., editing /etc/hostname and /etc/hosts). Other ways assist the administrator so that the network of Linux systems is simple and orderly.
Hostnames identify systems and distinguish them from one another. They allow interaction with the systems.
The system applies the hostname change immediately. You do not need to restart the server for the new hostname to take effect. However, you may need to restart some services or applications before they recognize the change.
The easiest way is to use the hostnamectl command. This is because it works on almost all recent Linux distributions and automatically updates the saved hostname files.
If we do not update /etc/hosts, the system cannot resolve the hostname locally. As a result, applications that rely on hostname resolution may fail to work correctly.
We need administrative privileges to change the hostname because it modifies system configuration files. Therefore, we must enable root access or use sudo.
If several servers in the same network have the same hostname, the log files, monitoring tools, and network services will all become confused. Therefore, every server must have a unique hostname.
We can determine the success of a hostname change by using the hostnamectl command. This command provides the hostname, along with some system information, which allows verification of the change.
Speed Up Your CRM with Ultahost Managed Hosting!
Our service handles caching and server optimization, delivering faster load times, smoother performance, and a stress-free experience for both users and your CRM system.
Atom is a free text editor created by Github that is hi...
SCP (Secure Copy Protocol) is a command that securely t...
The MERN stack, an acronym for MongoDB, Express.js, Rea...
Puppet is a popular open-source configuration managemen...
Linux gaming is exploding in popularity, and Steam is l...

Apache Hive serves as an enterprise-level system for a ...