How to Fix “Installation Failed: Could Not ...
When you encounter the "Installation Failed: Could Not ...
Search engines like Google cannot index websites hosted on local servers. This means your website won’t appear in search results making it difficult for potential organic traffic. Whether it is a personal portfolio, a business website, or a blog, the core objective is to share your content with a wider audience. A live website allows you to do just that.
In this post, we will discuss how to migrate a WordPress website from a local server to a live website. This guide to your website is hosted on a web server that users can access through the internet.
A local server is a development environment on your machine. Before migrating your WordPress website from a local to a live server create a backup of your WordPress website this may prevent any unforeseen events and is also helpful in manual migration.
If you are a beginner most probably install XAMPP as the local server that hosts your website, now you want to live your website, and for this, you need hosting and the domain name of your website. After that choosing your migration method is important. There are two primary approaches to this process:
Let’s explore both methods to migrate WordPress local to live:
While automated migration tools often exist for transferring websites there are scenarios where a manual approach using cPanel and phpMyAdmin becomes necessary. Manual website migration involves transferring essential website data including:
Following are the steps involved in move WordPress localhost to live server:
Exporting the Database from the local server
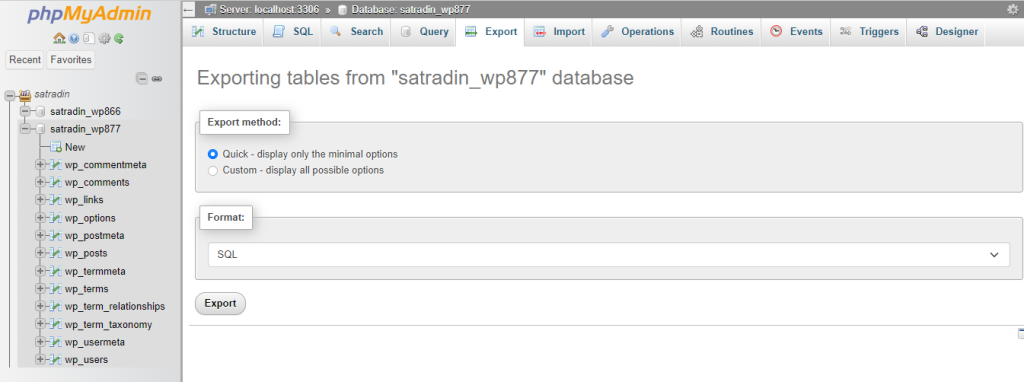
In XAMPP utilize the phpMyAdmin tool available within your local server’s control panel, to export your WordPress database as an SQL file. After that navigate to the “Databases” section. Select the database you want to migrate. Click on the “Export” tab.

Select the location and download the generated SQL file to your local machine.
Exporting the Files from the local server
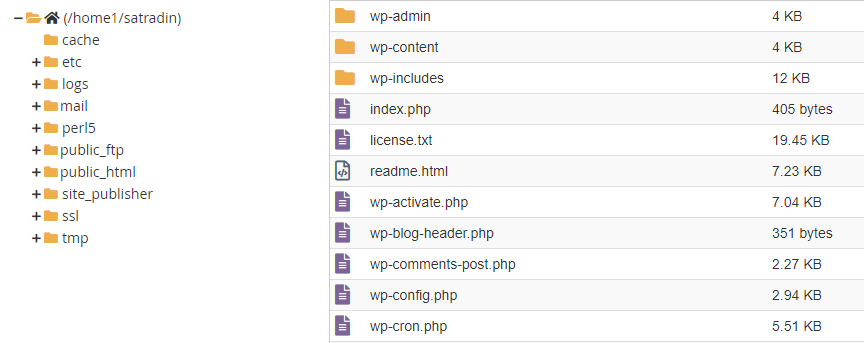
If you are using XAMPP you can copy your WordPress files from htdocs directory and transfer all files such as themes and plugins from your local server to the cPanel directory which is public_html on your live server.
Importing the Database to the cPanel
Access your live servers cPanel and utilize phpMyAdmin to import the previously exported SQL file into your newly created database. Create a new database by navigating to the ”Databases” section from cPanel then MySQL Databases. You can create a new database and add it to the database for the user.

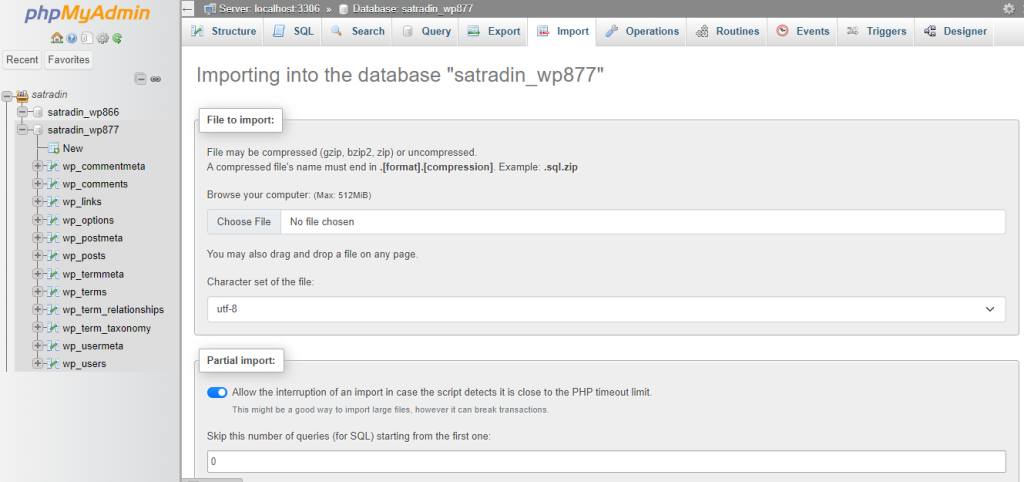
To import to SQL file navigate the “phpMyAdmin” from the “Database” section.

Check the existing database name that you newly created from above then select the database name click on the “Import” option and select the SQL file that you previously saved on your local machine.

Unlock the power of Fast WordPress Hosting
Increase the speed of your WordPress website with Ultahost’s fast WordPress Hosting and provide your visitors with the best possible faster page-loading experience.
Importing the Files to the cPanel
Login to your cPanel from the provided credentials. Navigate to “File Manager” from the “Files” section.

Locate the public_html folder upload the WordPress zip file from your local machine and unzip the folder to the directory.

Editing wp-config.php file
Now if you browse your website you may encounter with Error Establishing a Database Connection issue. To resolve this issue edit the wp-config.php file on your live server to reflect your new database credentials.
Fix Broken Links and Images
Since URLs change during migration, you must address broken links and image paths within your database.
To transfer WordPress from local to live server using the plugin migration method, we will use a duplicator plugin as an example:
installer.php and archive.zip to the cPanel directory of your live website.https://example.com/installer.phpBy following these steps and considering the valuable pointers you can successfully migrate your WordPress site from your local server to the live website setting up your online presence. Remember manual website migration using cPanel and phpMyAdmin requires a certain level of technical knowledge.
Successfully migrating your WordPress website from a local server to a live environment requires the right hosting partner. Ultahost offers web hosting plans with user-friendly features like cPanel and FTP access allowing for easy file transfer and database management.
Moving WordPress from a local server to a live website means transferring your site from a testing environment to the internet.
Transitioning ensures your website is accessible to the public allowing users to visit and interact with your content online.
While generally safe, it’s crucial to back up your data to avoid potential issues during the move from a local server to a live website.
Yes, Follow our guide for a smooth transition from a local server to a live website even if you are not a tech expert.