How to Install Odoo on Ubuntu
Odoo, the powerful open-source enterprise resource plan...
Ruby is a dynamic, interpreted programming language renowned for its readability and cleanliness. It’s ideal for web development because of its huge ecosystem of libraries and frameworks such as Rails. If you intend to create online applications or work on projects that need Ruby you must install it on your Ubuntu machine.
In this post, we will discuss several methods to install Ruby Ubuntu system each with its own advantages and considerations.
We will dive into the step-by-step instructions for each method, along with the pros and cons to help you decide the most suitable approach for your needs. This guide will explore the three primary methods on ruby install ubuntu:
The appropriate install ruby Linux method depends on various factors, including:
Following are the different methods discussed below on how to install ruby on Ubuntu system:
Method 1: Installing Ruby with the Ubuntu Repository
The Ubuntu repositories provide pre-built Ruby packages making installation the most convenient option for beginners. Here is a detailed instructions:
1. Update Package Lists
Before installing any packages it is recommended to update the list of available packages from the repositories using the following command:
sudo apt update

2. Install Ruby Package
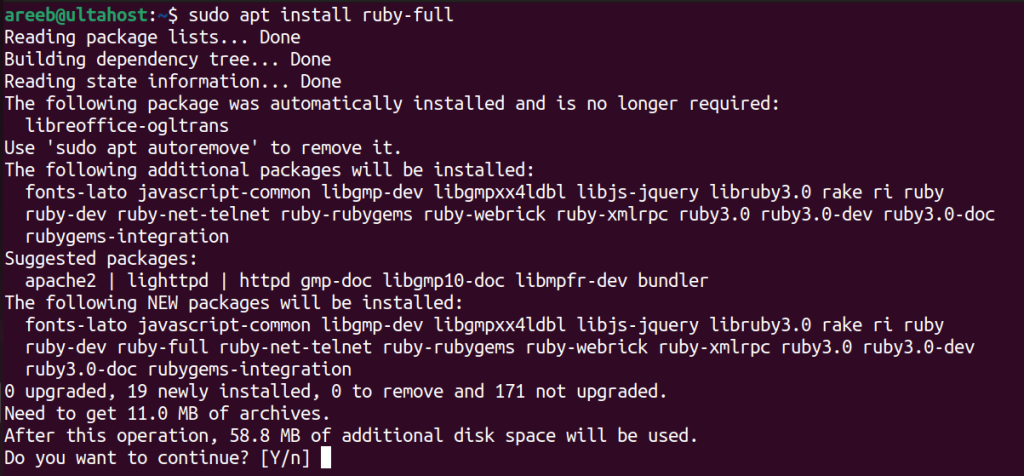
Once the package lists are updated, use the apt command to install the Ruby version. For instance, to install Ruby full use the following command:
sudo apt install ruby-full

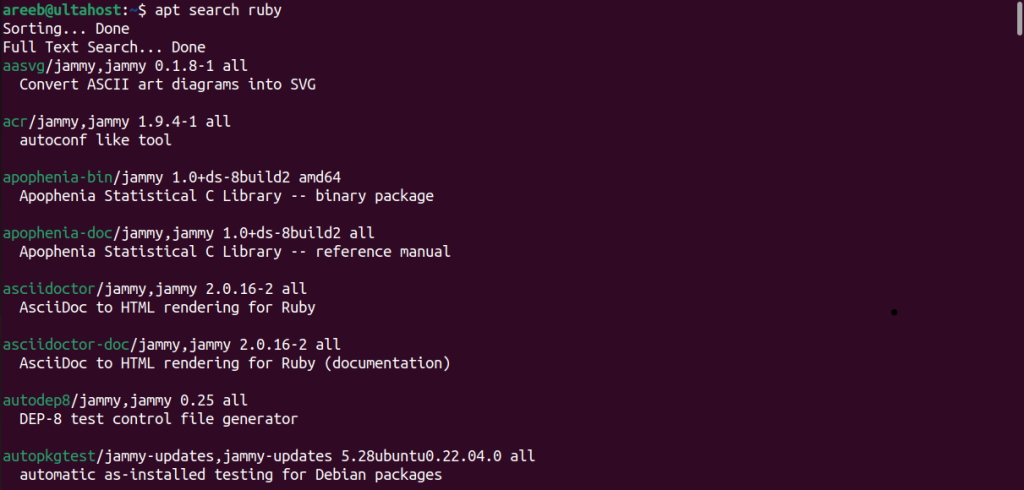
The available Ruby version in the repositories may not always be the latest. You can check the available versions by searching the repositories using the following command:
apt search ruby

3. Verify Installation
Once the installation is complete verify it by running the following command in your terminal.
ruby --version
This should display the installed Ruby version.

Pros
Cons
Method 2: Installing Ruby with Rbenv
Rbenv is a popular version manager for Ruby that allows you to install and manage multiple Ruby versions on your system. Here’s how to install Ruby with Rbenv:
1. Install Dependencies
Rbenv requires some dependencies to function correctly. Install them using the following command:
sudo apt install autoconf bison build-essential libssl-dev libreadline-dev libffi-dev zlib1g-dev libncurses5-dev libgdbm-dev
2. Clone Rbenv Repository
Clone the Rbenv repository from GitHub using the following command:
git clone https://github.com/rbenv/rbenv.git ~/.rbenv
3. Add Rbenv to PATH
Rbenv needs to be added to your shell’s PATH environment variable to access its commands from anywhere in your terminal. Edit your shell’s configuration file for example .bashrc for Linux and add the following lines:
export PATH="$HOME/.rbenv/bin:<span class="math-inline">PATH"
Replace ~/.bashrc with the path to your shell’s configuration file if it’s different. Once you’ve made the edits, save the file and source it using the following command:
source ~/.bashrc
4. Install Ruby Build
Rbenv requires an additional tool called ruby-build to compile and install Ruby versions. Install it using the following command:
git clone https://github.com/rbenv/ruby-build.git ~/.rbenv/
5. Install a Specific Ruby Version
With Rbenv set up, you can install a specific Ruby version. Use the following command, replacing the previous one with the desired version:
rbenv install 3.2.5
This will download, compile, and install the chosen Ruby version.
6. Set Global Ruby Version
Rbenv allows you to set a global Ruby version that will be used by default in your terminal. Use the following command replacing 3.2.5 with the version you want to set globally:
rbenv global 3.2.5
After that, you can verify the ruby installation by running the version command.
Pros
Cons
Install Ruby on Our Ubuntu VPS!
Get the reliability of the world’s most popular Linux distro and the flexibility of a virtual server. Enjoy blazing-fast speeds and low latency.
Method 3: Installing Ruby with Ruby Version Manager
RVM is another popular version manager for Ruby that offers similar functionalities to Rbenv. Here’s how to install Ruby with RVM:
1. Install GPG Key
RVM uses a GPG key to verify package authenticity. Install the GPG key using the following command:
gpg --keyserver hkp://keyserver.ubuntu.com:80 --recv-keys 409B6B866A14AE42
2. Add RVM Repository
Add the RVM repository to your system’s package list using the following command:
curl -sSL https://get.rvm.io | bash -s stable
3. Source RVM Script
Similar to Rbenv, you need to source the RVM script to make its commands available. Edit your shell’s configuration file and add the following line:
source /etc/profile.d/rvm.sh
Save the file and source it using the following command:
source ~/.bashrc
4. Install Ruby Version
Use the rvm install command to install a specific Ruby version. Replace the previous version with the desired version:
rvm install 3.2.5
Learn about How to Set Environment Variables in Linux.
5. Set Global Ruby Version
Set the global Ruby version using the rvm use command, followed by the version number:
rvm use 3.2.5 --default
The default flag sets the chosen version as the global default. Verify the installation by running the version command in your terminal. This should display the Ruby version installed with RVM.
Pros
Cons
The method you choose to install Ruby on Ubuntu depends on your specific needs and preferences. If you’re new to Ubuntu or Ruby and simply need to get started with development, using the Ubuntu repository is the easiest and most straightforward approach. It provides a pre-built package and requires minimal configuration. However, if you need more flexibility or control over Ruby versions, using a version manager like Rbenv or RVM is recommended.
Installing Ruby on Ubuntu procedure involving dependency management and potentially conflicting with Ruby versions. Upgrading to a Ultahost virtual dedicated server hosting plan offers robust solution which grants you root access and full control over your server environment. This empowers you to install specific Ruby versions using tools like RVM or through pre-built package repositories.
Ruby is a programming language used for web development and software creation.
Ubuntu is a popular operating system for developers, and installing Ruby on it allows you to start building web applications.
No, installing Ruby on Ubuntu is straightforward and can be done with a few commands.
Yes, Ruby can be installed on various operating systems including Windows and macOS but the process may differ slightly.
No, you don’t need prior programming knowledge to install Ruby on Ubuntu, just follow the installation instructions.