
How to Install PPTP VPN Server on Your VPS
In the modern digital world, where our online activitie...


The Simple Network Management Protocol (SNMP) serves as a highly popular and extensively employed protocol, enabling effective management and monitoring of network devices and systems. Discover the power of SNMP as it facilitates seamless control, analysis, and oversight, empowering administrators to ensure optimal performance and stability across their network infrastructure. It offers a standardized approach to gather and organize information about network devices, including routers, switches, and servers. This enables administrators to efficiently monitor and troubleshoot their networks.
In this blog post, we will delve into the process of setting up an SNMP Master Agent on two popular Linux distributions: CentOS 7.4 and Ubuntu 17.04. Both CentOS and Ubuntu are extensively used in various environments, emphasizing the significance of understanding SNMP configuration on these platforms.
By setting up an SNMP Master Agent, you can acquire valuable insights into the overall health and performance of your network infrastructure. SNMP allows you to monitor crucial metrics such as bandwidth usage, CPU utilization, memory consumption, and network errors, among others. These metrics play a pivotal role in identifying potential issues, planning capacity upgrades, and ensuring optimal network performance.
CentOS is a widely recognized Linux distribution that has gained popularity due to its stability, reliability, and long-term support. It is derived from the freely available source code of Red Hat Enterprise Linux (RHEL), making it an excellent choice for individuals and organizations in need of a secure and dependable operating system.
CentOS 7.4, part of the CentOS 7 series, brings numerous enhancements, bug fixes, and updated software packages. With its mature and thoroughly tested environment, CentOS 7.4 is suitable for both production and development environments.
Ubuntu is a user-friendly and widely adopted Linux distribution based on Debian. It has gained popularity due to its intuitive nature, regular release cycles, and extensive community support. Ubuntu aims to provide a powerful and accessible operating system suitable for desktops, servers, and cloud environments.
Ubuntu 17.04, code-named “Zesty Zapus,” was released in 2017 and introduced several notable features and improvements.
Both CentOS 7.4 and Ubuntu 17.04 serve as reliable platforms for running SNMP Master Agents, offering robust support for various network management and monitoring tasks. In the subsequent sections, we will explore the process of setting up SNMP Master Agents on these operating systems.
The Simple Network Management Protocol (SNMP) is a widely adopted protocol specifically designed for the management and monitoring of network devices. SNMP operates on a manager-agent architecture, where the SNMP manager is responsible for gathering and analyzing data from SNMP agents running on various network devices.
An SNMP Agent refers to the software that runs on a network device, collecting and storing management information related to the device’s operation. This information is made available to the SNMP manager through a standardized set of variables known as Management Information Bases (MIBs). The agent acts as a repository for this data, allowing the manager to retrieve specific information or perform actions on the device.
To set up SNMP Master Agent on CentOS 7.4 and UBUNTU 17.04, follow these steps:
sudo yum update
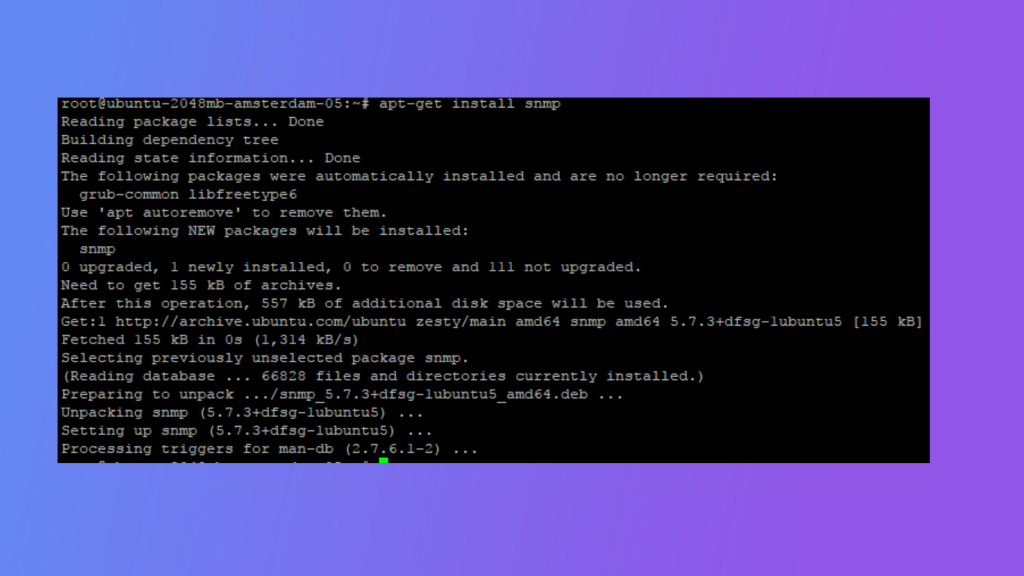
sudo yum install net-snmp net-snmp-utils
sudo vi /etc/snmp/snmpd.conf
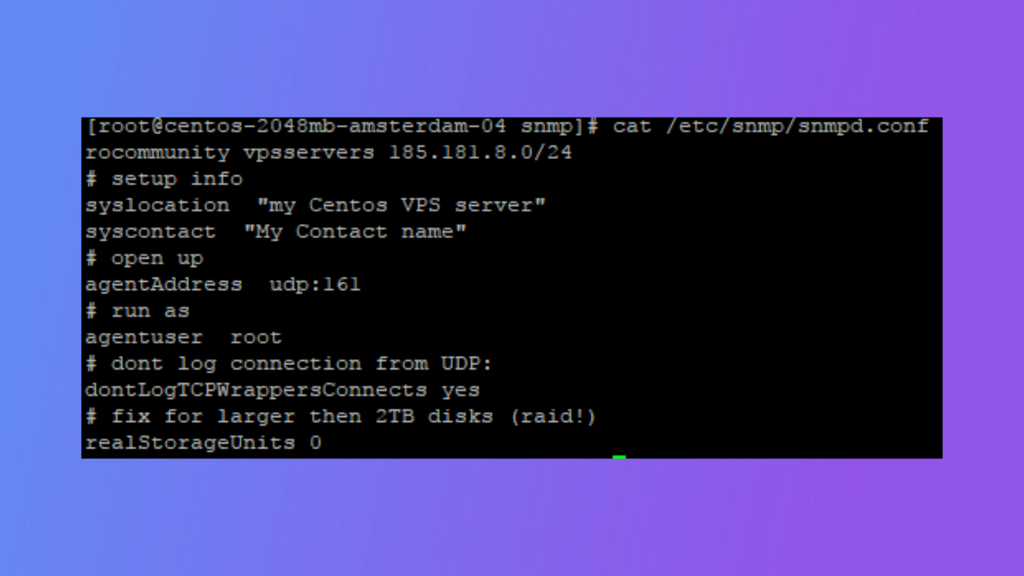
syscontact YourContactInformation
syslocation YourLocationInformation
rocommunity YourCommunityString IP_Address/Netmask
trapsink IP_Address YourCommunityString
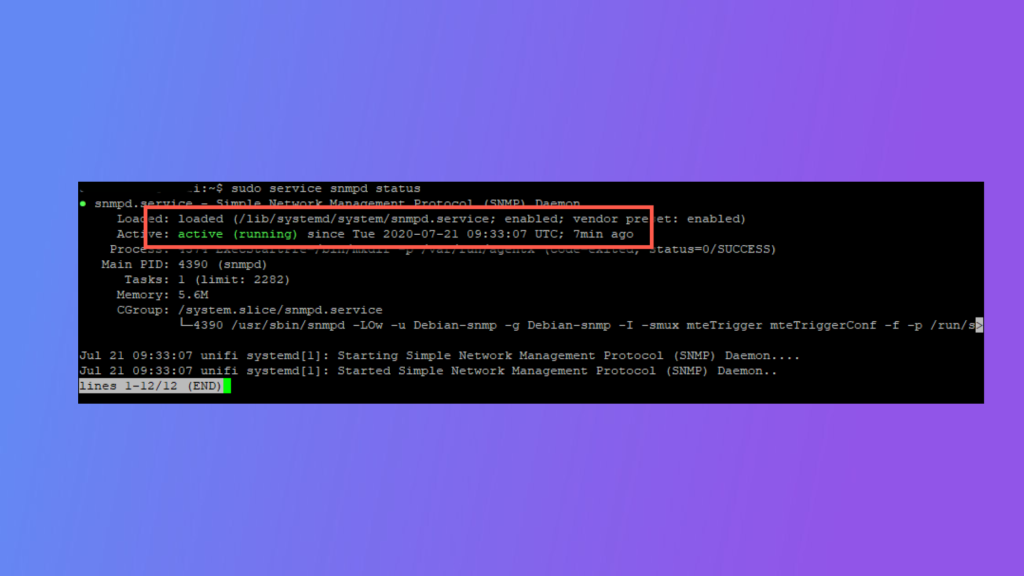
sudo systemctl start snmpd
sudo systemctl enable snmpd
snmpwalk -v2c -c YourCommunityString localhost system
In conclusion, deploying an SNMP Master Agent on CentOS 7.4 and Ubuntu 17.04 unlocks a wide range of possibilities for network monitoring and management. It provides a standardized and comprehensive approach to collect, organize, and analyze vital information about network devices, empowering administrators to make informed decisions and optimize network performance.