
How to Move WordPress from Local Server to Li...
Search engines like Google cannot index websites hosted...


Large files on your website negatively impact loading time and increase strain on your server. As your WordPress site grows to accommodate files, the ability to cover all of your media becomes critical for website performance. Inadequate loading speeds frustrate the user experience and can have a negative effect on search engines.
So what’s the easiest way to solve this? Offload your entire media files to Amazon S3 wordpress. By doing that, you are taking the load off of your hosting server storage capabilities. To improve speed even more, you can serve your media files through a Content Delivery Network (CDN), where all files are loading from the closest corresponding server to the visitor.
This tutorial will help you relocate your media from WordPress to Amazon S3, using the WP Offload Media Lite plugin, as well as connecting your CDN for increasing the time in which your media becomes available to those viewing your website. The tutorial will be clear with simple steps to follow, so anyone who has not worked with S3 or a CDN can take advantage of these options easily.
*First, log in to the AWS Management Console and open the S3 dashboard. When you get to the S3 screen, click the “Create bucket” button:

You will see a form asking you to name and choose a bucket region. Choose a name that is unique to you for the bucket. The name of the bucket must be globally unique with AWS, so yourdomain-media will work. Then, choose the closest AWS region to your primary audience to reduce latency.
Next, scroll down to the “Block Public Access” section. If you, like us, plan to serve media files using a CDN like CloudFront, you should leave all public access blocked. However, if you want files to be served directly on S3 URLs, you should disable this setting, but you’ll have to remember that you’ll need to configure permission later. If you aren’t sure what you want to do yet, feel free to leave public access blocked.
Leave the rest of the options as the defaults. Do scroll to the bottom and click the “Create bucket” button. Once created, the bucket should now be listed as ready to hold media from your WordPress website.
Integrate Amazon S3 With Our WordPress Hosting
Experience Ultahost’s fast, user-friendly, and secure WordPress hosting to improve the security of your website while integrating third-party services like S3 or CDN.
Open the AWS Management Console, the IAM (Identity and Access Management) section. This is where you will create a user that allows WordPress to connect to your S3 bucket:
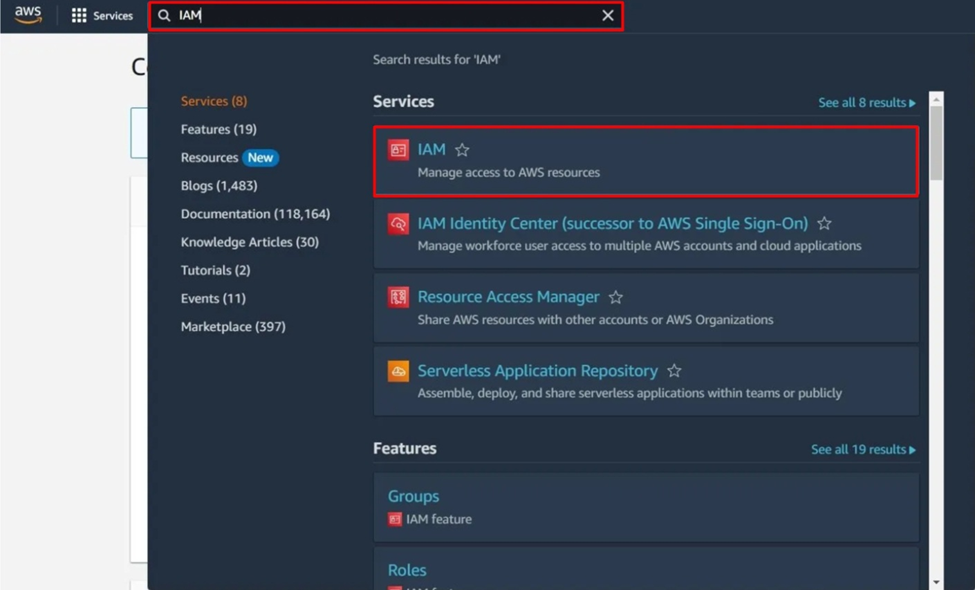
Select the option to add new user, and name it something that helps you identify its purpose (such as wordpress-s3-user). Choose programmatic access for these credentials meaning access through access keys rather than a login password.
On the permissions screen, attach the AmazonS3FullAccess policy. This policy gives full access to all S3 buckets in your account. You can create a policy if you want finer control and only provide access to the specific bucket you created above.
Once you have completed these steps, you will receive an Access Key ID and Secret Access Key. Save them securely, as you will need them when you connect from the plugin in WordPress. After you close the setup screen, you will not be able to see the secret key again, so it is critical you copy it and save it right away.
Your IAM user is ready for your WordPress plugin to use to connect to Amazon S3.
First, open your WordPress dashboard, go to Plugins and click on Add New, where you can search for new plugins.
In the search box, type WP Offload Media Lite and let it pull results. Clicking it will show you the plugin.
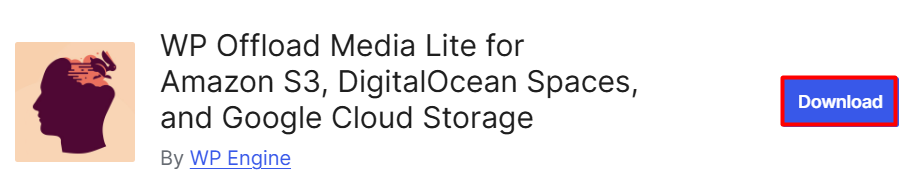
Watch the install button turn to Activate, and click on that. Now, you have installed and activated WP Offload Media Lite and can offload your media files to the Amazon S3 WordPress plugin. To manage your media files in your WordPress you may need to understand How to Offload Your Media on Google Cloud Storage to WordPress.
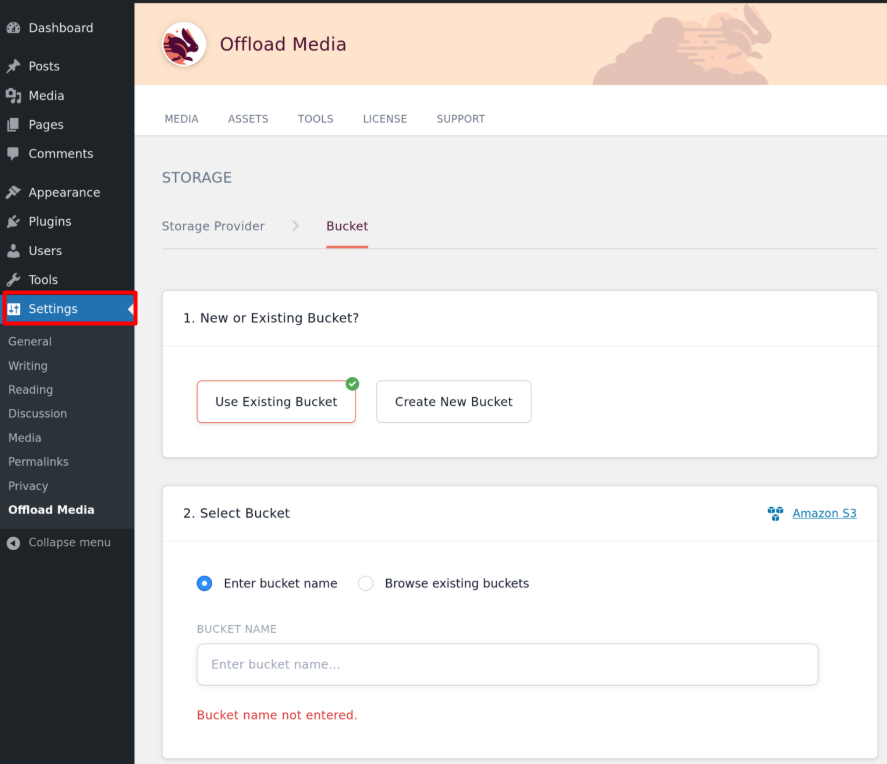
Now that you have activated the WP Offload Media plugin, go to Offload Media in your WordPress dashboard to access the configuration settings to connect the plugin to your Amazon S3 account:
In this section, you will enter your AWS Access Key and Secret Access Key. Paste these keys in to the appropriate boxes that you saved previously during the IAM user setup process in AWS.
You will then select the S3 bucket you created from a list in a dropdown box. This is how you will select the bucket for your specific WordPress site to store the media files you upload.
You also have the choice of changing the path options if you wanted to set up your media in a certain format in the S3 bucket. For most users, leaving the default settings will not be a problem.
After filling in all of the boxes, click the Save Changes button to save the settings in WP Offload Media. Your WordPress site is now setup with AWS S3, and any media files that are uploaded will now automatically offload to the cloud.
Once you have setup the WP Offload Media plugin, go to your WordPress dashboard, and go to Media > Library. Your existing media files will show in the media library.
To move them to Amazon S3, you can use the bulk offload tool that is included with the WP Offload Media plugin. The bulk offload tool is the most efficient way to offload multiple media files to wordpress S3 p, since you will be able to do it all at once, compared to manually uploading each media file individually.
Once you offload the existing media files, the WP Offload Media plugin will automatically start to upload any new media files directly to Amazon S3. After this time, any image, video, or file that you upload through WordPress, will be uploaded to your S3 bucket.
Once you have successfully offloaded your media files to Amazon S3, go back to the WP Offload Media settings and choose the plugin settings from your admin dashboard. You can now configure how your media will be delivered to your visitors.
On the Delivery tab, there is an option for Use Custom Domain (CDN URL). You’ll want to enable this to set a custom CDN URL for your media files.
At this point, you simply copy the CloudFront URL you created or any CDN URL in the provided space. This URL will be the endpoint which all your media will be delivered for your site visitors, improving load times and providing enhanced performance.
After copying the CDN URL, don’t forget to click Save Changes to start using CDN for your media files. Your WordPress instance will be serving media from a CDN, further increasing speed and user experience.
Once you’ve set up your CDN, it’s time to make sure everything is working. Start by navigating to a media file URL on your WordPress site. Make sure that the file loads and is coming from your CDN.
To validate, you can look at your browser DevTools (on “Network”) or a service like GTmetrix, look at the headers of the file to confirm that the media is being served from your Amazon S3 in using the CDN. Look for a response from your CDN (like CloudFront) instead of your Amazon S3 bucket.
Finally, ensure there are no broken links or 403 errors when accessing your media files. If everything loaded and you see no errors, then you’re done and everything is working as expected.
Learn also How to Install Cloudflare on Your WordPress Site.
Most WordPress websites get slower over time. As you upload more images, videos, and files, your hosting server gets overloaded. This impacts page load speed, which directly affects SEO rankings and user experience. Now here’s the thing—not everyone realizes how much media files hurt your site performance. That’s why offloading your WordPress media to Amazon S3 is not just a nice-to-have, it’s a smart move.
Let’s break it down simple. Your hosting plan is not made for storing hundreds of MBs of images or video files. Even a few large files can slow things down. And guess what—if your site loads slow, users leave. Google notices that and drops your ranking. So yeah, performance really matters.
Amazon S3 is great because it keeps your media safe, stored separately from your site. When you connect it with a CDN like CloudFront, your media is served lightning fast. Instead of your server doing all the work, the CDN handles the heavy lifting. Visitors get media from the closest server near them, which means your site loads faster for everyone no matter where they are.
Also, you’re reducing the backup size of your site, making migrations or updates easier. Offloading helps in the long run. You don’t just improve speed, but you also make your site more stable and scalable.
So, if you’re serious about growing your WordPress site, Amazon S3 with a CDN is a solid combo for performance. And with plugins like WP Offload Media, it’s not even hard to set up. Just follow the steps, and you’ll feel the speed boost instantly.
Using the WP Offload Media plugin to integrate Amazon S3 and a CDN with WordPress greatly enhances the storage and delivery of your media. By creating an S3 bucket, building IAM access to it, and configuring the settings of the plugin, your media files can be offloaded to the cloud while ensuring that they are served efficiently to your users. A CDN not only enables offloading from the cloud, but also serves as a means of enhancing the speed of your site – an Amazon S3 bucket is still only storing your media files while a CDN delivers them from locations around the globe.
Once your system has been tested, confirming correct operation is as simple as checking file headers and making sure that there are no issues loading media or broken links. This will help you verify that media is being delivered correctly from wordpress S3 plugin through the CDN. The offloading process will ideally improve your site’s performance and the user experience will improve, all while ensuring you optimize and secure your storage location for media.
Consider Ultahost’s Fully Managed Dedicated Servers that provide the tools and support you need to integrate or organize files, improve site speed, and ensure smooth performance, perfect for users with limited time or expertise.
Amazon S3 provides scalable cloud storage for your media files. It reduces the load on your hosting server and improves website performance.
You can start with the AWS free tier, which includes limited S3 storage and requests. However, for large sites, a paid plan is usually needed.
It connects your WordPress media library to Amazon S3. It automatically moves new and existing files to the S3 bucket.
Yes, you can integrate a CDN like CloudFront with S3. This helps deliver media faster across global locations.
No, WP Offload Media updates media URLs automatically. Existing links will continue to work if the setup is correct.
Yes, WP Offload Media has options to copy or remove files from S3. You can also use the remove from bucket option if needed.
The Lite version covers basic S3 integration. For advanced features like multiple bucket support or CDN rewrite rules, the paid version is required.