How to Fix Missed Scheduled Post Error in Wor...
Have you ever methodically created a blog post and sche...
WordPress is now the most used platform for building websites but its popularity also makes it a target for malicious actors. Brute-force attacks where bots or attackers try countless username and password combinations are a common threat. Limiting login attempts is an important security measure to protect your WordPress site from unauthorized access and potential damage.
In this article, we will discuss how to limit login attempt limitations in WordPress. We will explore the reasons behind implementing this security measure different methods for achieving it, and the best practices to ensure optimal protection.
During a brute-force attack on your WordPress login, an attacker performs repeated testing with different keys. By limiting login attempts you will introduce a significant obstacle for attackers. Here’s why it’s essential:
There are three primary approaches to limit login attempts in WordPress:
Implementing Login Attempt Limits with Plugins
Security plugins are the most user-friendly and widely used method for limiting login attempts. Here’s a breakdown of the process:
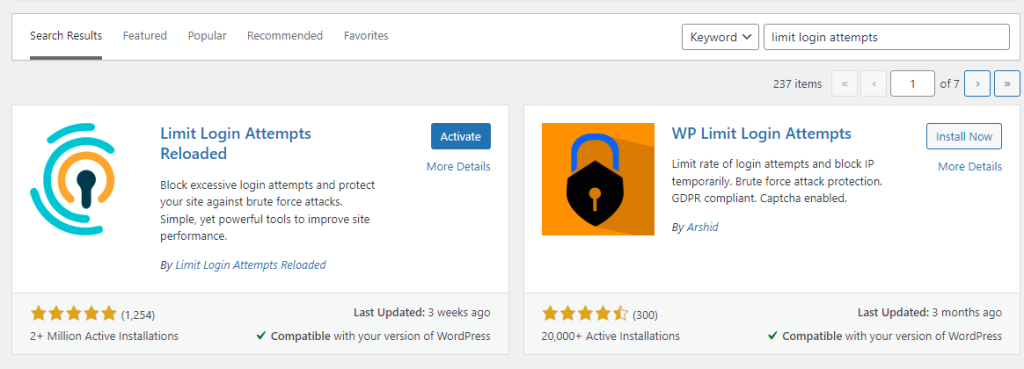
1. Popular options include Limit Login Attempts Reloaded, Wordfence Security, and Sucuri Security which includes free and premium versions, choosing the plugin according to your preferences.
2. Navigate to the WordPress admin panel, go to the “Plugins” section then “Add New” search for your chosen plugin for example I am using Limit Login Attempts, and click on the Activate button.

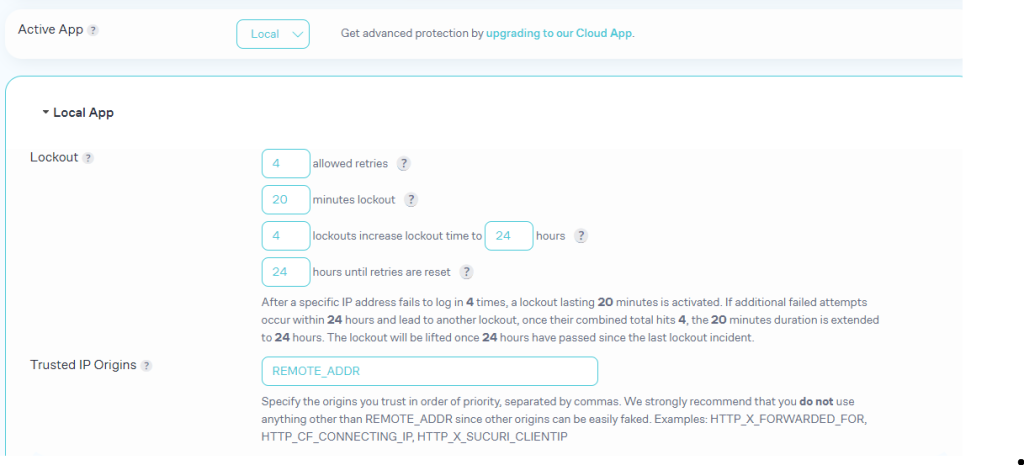
3. Each limit login attempts plugin has its own settings page. Look for options related to login attempts. You can typically define:

When configuring the plugin find a balance between security and user experience. Too few attempts can frustrate legitimate users, while too many can leave your site vulnerable.
Protect your Website with Our Secure WordPress Hosting
Protect your website with Ultahost’s secure WordPress hosting and provide your visitors with the best possible faster page-loading experience.
Implementing Login Attempt Limits with Editing wp-login file
This method requires editing a core WordPress file and should be attempted with caution. Here’s a simplified overview:
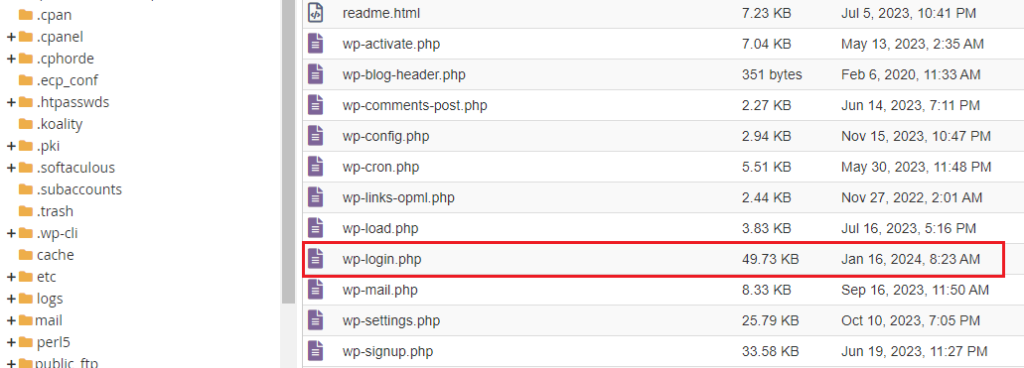
1. Always create a backup of the file before making any modifications. Use an FTP or file manager which in my case cPanel to access the wp-login.php file in your WordPress root directory.

2. You will need to add code to track and limit attempts. Here’s a simplified code snippet that demonstrates the core functionality of limiting login attempts:
<?php
$login_attempts = (int) get_transient( 'login_attempt_count' );
$lockout_duration = 3600;
if ( isset( $_POST['log'] ) && isset( $_POST['pwd'] ) ) {
  $user = wp_authenticate_username_password( null, $_POST['log'] );
  if ( is_wp_error( $user ) ) {
    $login_attempts = ( isset( $login_attempts ) ? $login_attempts + 1 : 1 );
    set_transient( 'login_attempt_count', $login_attempts, $lockout_duration );
    if ( $login_attempts > 3 ) {
      wp_die( __( 'Too many failed login attempts. Please try again later.' ) );
    }
  } else {
    delete_transient( 'login_attempt_count' );
  }
}
?>
3. Save the modified wp-login.php file and upload it back to your server.
Implementing Login Attempt Limits Using .htaccess File
Modifying .htaccess incorrectly can break your website functionality. It’s strongly recommended to consider the plugin or manual wp-login.php editing methods before attempting this approach.
1. Use your FTP client or web hosting control panel file manager to access the .htaccess file located in your WordPress root directory.
2. Ensure the mod_rewrite Apache module is enabled on your server. This module is essential for utilizing the rewrite rules within .htaccess.
3. Add the following code snippet to the beginning of your .htaccess file:
<IfModule mod_rewrite.c>
RewriteEngine On
RewriteCond %{REQUEST_URI} ^wp-login.php$ [OR]
RewriteCond %{REQUEST_URI} ^xmlrpc.php$
RewriteRule ^(.*)$ - [F,L]
RewriteRule ^ index.php?action=login_attempt_check&unique_id=%{UNIQUE_ID}&request_time=%{REQUEST_TIME}&limit=3&lockout_duration=3600 [L]
</IfModule>
4. This step requires creating a custom PHP script named index.php within your WordPress root directory you can also use the above login script. The script will need to:
For a more robust solution, consider integrating Fail2ban which is a server-side tool for blocking IP addresses exhibiting suspicious behavior. You can modify the .htaccess code to send information about exceeding login attempts to Fail2ban, which can then automatically add the IP address to a temporary blacklist.
Read also How to Install Fail2ban on Ubuntu 22.04.
Following are the important notes on the topic of how to limit login attempts in WordPress:
Limiting login attempts is an important security measure for any WordPress website. By implementing one of the methods discussed in this article and following the best practices, you can significantly reduce the risk of unauthorized access and protect your website from malicious activity.
While limiting login attempts on your WordPress website adds a layer of security, it is not a foolproof solution. For comprehensive website security rent a VPS from Ultahost which grants root access and full control over your server environment. This empowers you to implement advanced security measures beyond limiting login functionality.
Limiting login attempts helps protect your site from brute-force attacks.
You can use plugins like Limit Login Attempts Reloaded or Wordfence Security.
No, most security plugins are easy to install and configure without technical skills.
No, it typically does not affect site performance and enhances security.
No, it’s one of several steps also consider using strong passwords and keeping your site updated.