
How to change your MySQL root password in WHM
Managing databases is an important aspect of web hostin...


MongoDB is a NoSQL database that stores data as flexible, JSON-like documents. While relational databases use fixed, rigid tables and rows to structure data, MongoDB uses dynamic schemas to structure data. Therefore, semi-structured or unstructured data is also easier to manage with MongoDB.
Collections are essential to the MongoDB database. In MongoDB, collections group related documents, not unlike tables in a SQL database. Each operation you perform, whether it is reading, writing, and updating data, begins with a collection. In fact, collections are central to MongoDB’s data model.
This guide will show Ubuntu users how to create collection MongoDB using both shell-based methods and script-based methods. We will cover manual creation, auto-creation via document insertion, and how to verify that your collection(s) exist using terminal commands. This tutorial is meant for command line workflows on an Ubuntu system.
To follow this guide and successfully create a collection in MongoDB on Ubuntu, make sure the following conditions are met:
You should be working on an Ubuntu system (20.04 or later) with access to the terminal. If you’re connected to a remote server, ensure you have SSH access and sudo privileges for administrative tasks.
Launch MongoDB Instantly on Our Ubuntu VPS!
Deploy MongoDB collections in minutes on Ultahost’s high-speed Ubuntu VPS. Experience seamless setup, optimized performance, and 24/7 expert support!
Ensure MongoDB is already installed on your system. You can verify this by checking the version while showing the list of Installed Packages on Ubuntu system:
mongod --version

If MongoDB isn’t installed, follow the official MongoDB installation guide for Ubuntu or run:
sudo apt update
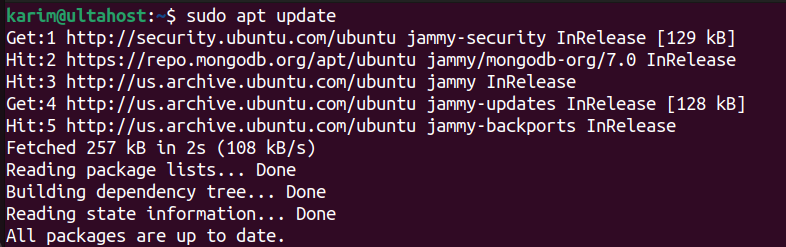
sudo apt install -y mongodb-org

Make sure the MongoDB daemon (mongod) is active. Use the following command to check its status:
sudo systemctl status mongod

If it’s inactive, start it:
sudo systemctl start mongod

This tutorial uses the newer MongoDB shell (mongosh). If it’s not available, install it using:
sudo apt install mongosh
Then run the below command to open a session:
mongosh
When authentication is enabled, ensure your user account has the appropriate permissions to create collections. Otherwise, you may encounter authorization errors.
Read also How to Install MongoDB on Windows
The createCollection() method gives you full control over collection creation. It lets you configure size limits, document caps, and validation rules up front. Follow the steps for mongodb create collection if not exists:
In the MongoDB shell, switch to the desired database:
use mydatabase
This command sets the context to the database where the mongo create collection.
To create a basic collection, use the following command:
db.createCollection("users")
If the collection is created successfully, the shell will return:
{ ok: 1 }
This indicates that MongoDB has successfully added the collection to the selected database.
The createCollection() method supports additional parameters. For example, you can create a capped collection with a fixed size and optional document count limit:
db.createCollection("logs", {

  capped: true,

  size: 5242880,

  max: 1000

})
In this script,
capped: true makes the collection fixed in size. Older documents are overwritten when the limit is reached.
size defines the maximum size of the collection in bytes.
max sets the maximum number of documents allowed in the collection.
These options are often used for use cases like logs or telemetry data.
To confirm the collection has been created, run:
show collections
This command lists all collections in the current database. You should see the names of the collections you just created, such as users and logs.
Use this method when you need structure, indexing, or control over the collection’s behavior from the start. It’s ideal for production environments or systems that handle high-volume or sensitive data.
You can create a MongoDB collection without calling createCollection(). MongoDB automatically creates it when you insert data into a new collection.
To create a new collection implicitly, first connect to your target database in the MongoDB shell:
use mydatabase
Then insert a document into a collection that does not yet exist:
db.users.insertOne({ name: "karim", email: "[email protected]" })
Since users did not previously exist, MongoDB automatically creates the users collection and inserts the given document into it.
If the user’s collection didn’t exist before, MongoDB creates it and adds the document.
To verify that the collection was created and the data was inserted, use the find() method:
db.users.find()
This command retrieves the documents inside the users collection. You should see the newly added document returned in the output.
The difference between these two methods lies in control and intent:
Both methods are valid, and the choice depends on your specific use case.
When creating collections in MongoDB, following best practices can help maintain consistency, improve performance, and reduce future maintenance. Whether you’re building a small project or a large-scale system, these guidelines will support better database design.
Collection names should be written in lowercase and avoid spaces or special characters. If needed, use underscores to separate words for readability. For example:
Recommended: user_profiles, order_history
Consistent naming improves query readability and prevents confusion when working across multiple environments or with large teams.
Although MongoDB is flexible, it’s best to avoid using names that conflict with reserved database terms or internal MongoDB functions. Names like admin, system, or config may cause conflicts or unexpected behavior, especially during upgrades or replication setup.
Before inserting large volumes of data, identify which fields will be frequently queried or filtered. Creating indexes on those fields early can significantly improve performance. For example, if your application frequently searches users by email, consider indexing the email field when creating the collection.
If you’re storing log data or time-based events, capped collections can be a good choice. These collections have a fixed size and automatically remove the oldest documents when the size limit is reached. This is useful for maintaining lightweight log storage without manual cleanup.
MongoDB allows you to enforce rules on the structure of documents using schema validation. This is especially helpful when you want to restrict certain fields, types, or patterns without losing the flexibility of a NoSQL database.
For complex validation rules and setup, consider referring to a separate guide on MongoDB schema validation.
Once you have created collections in a MongoDB database, you may want to list them to verify their existence or inspect your database structure. MongoDB provides simple commands to display all collections within the currently selected database.
To list all collections in the current database, use the following command in the MongoDB shell:
show collections
This command returns a list of all existing collections. Make sure you are in the correct database by using the use command before running this.
For scripting or programmatic access, you can use the db.getCollectionNames() method. This returns the list of collection names as an array, which can be used in loops or automation scripts.
Example:
db.getCollectionNames()
This method is especially useful when writing administrative scripts, exporting data, or building custom tools that need to process multiple collections.
Creating collections in MongoDB is a foundational skill for anyone managing data with this flexible NoSQL database. On Ubuntu, this process is straightforward whether you use the createCollection() method for explicit control or rely on MongoDB’s ability to create collections dynamically through document insertion.
The explicit approach is better suited for production environments where collection size, indexing, or validation rules must be enforced from the beginning. On the other hand, the implicit method offers convenience during development or when rapidly prototyping applications.
By following the steps and best practices outlined in this guide, you can confidently structure your MongoDB databases for scalability, performance, and long-term maintainability on Ubuntu systems. Whether you’re managing logs, storing user data, or building large-scale applications, understanding how collections work will give you greater control over your data layer.
Deploy MongoDB on UltaHost’s DDoS-Protected VPS Hosting for Maximum Stability and Speed. Run MongoDB effortlessly with full root access, high-speed NVMe SSD storage, and up to 3500+ Gbps DDoS protection. Streamline database operations on lightning-fast VPS servers built for developers and businesses. Protect your data with enterprise-grade firewalls and scale confidently at unbeatable prices!
Use the db.createCollection("name") command inside the mongosh shell. It explicitly creates a collection in the selected database.
To backup redis data from docker containers, bash file interface tools could be used (save command, BGSAVE using redis-cli), as with the example command: docker exec my-redis redis-cli BGSAVE. You can also retrieve the saved files using mounted volumes. Alternatively, you may use docker cp to copy the container volume or copy the volume folder from the host’s mounted directory.
Yes, MongoDB creates a collection automatically when you insert a document into a non-existent collection. This is known as implicit creation.
createCollection() and insert-based creation?Use the show collections command in the MongoDB shell. It displays all collections in the current database context.
mongosh show ECONNREFUSED on Ubuntu?createCollection() gives more control with options like size or capped limits. Insert-based creation is faster and simpler but lacks those configuration features.
It means the MongoDB server isn’t running or is misconfigured. Ensure mongod is active using sudo systemctl start mongod.
Run sudo systemctl start mongod in your terminal. You can enable it at boot with sudo systemctl enable mongod.
UltaAI – Smart AI Assistant for Ultahost Clients
UltaAI is your advisor for anything related to domain or hosting. Experience personalised suggestions.
Managing databases is an important aspect of web hostin...
A fault occurs in the management of the database. The "...
XAMPP is a software package that allows users to set up...

MySQL is an open-source relational database system that...
phpPgAdmin is a free, web-based interface for managing ...
SQL Server Management Studio (SSMS) is a comprehensive,...