


Domain DNS management with VPS, VDS, and Dedicated Server plans
This is a full guide on how to link domain names to your VPS, VDS, or Dedicated Server only, and manage its DNS records.
For instructions on how to manage DNS for domains linked to Shared or WordPress hosting plans, please refer to this guide: Domain DNS management with Shared and WordPress Hosting plans
Note: This guide applies to domain names using Ultahost’s nameservers, if the domain is registered by another domain provider, then you’ll need to edit its nameservers, and point it to Ultahost’s:
ns1.ultahost.com
ns2.ultahost.com
ns3.ultahost.com
ns4.ultahost.com
1. Adding a domain in your DNS Manager
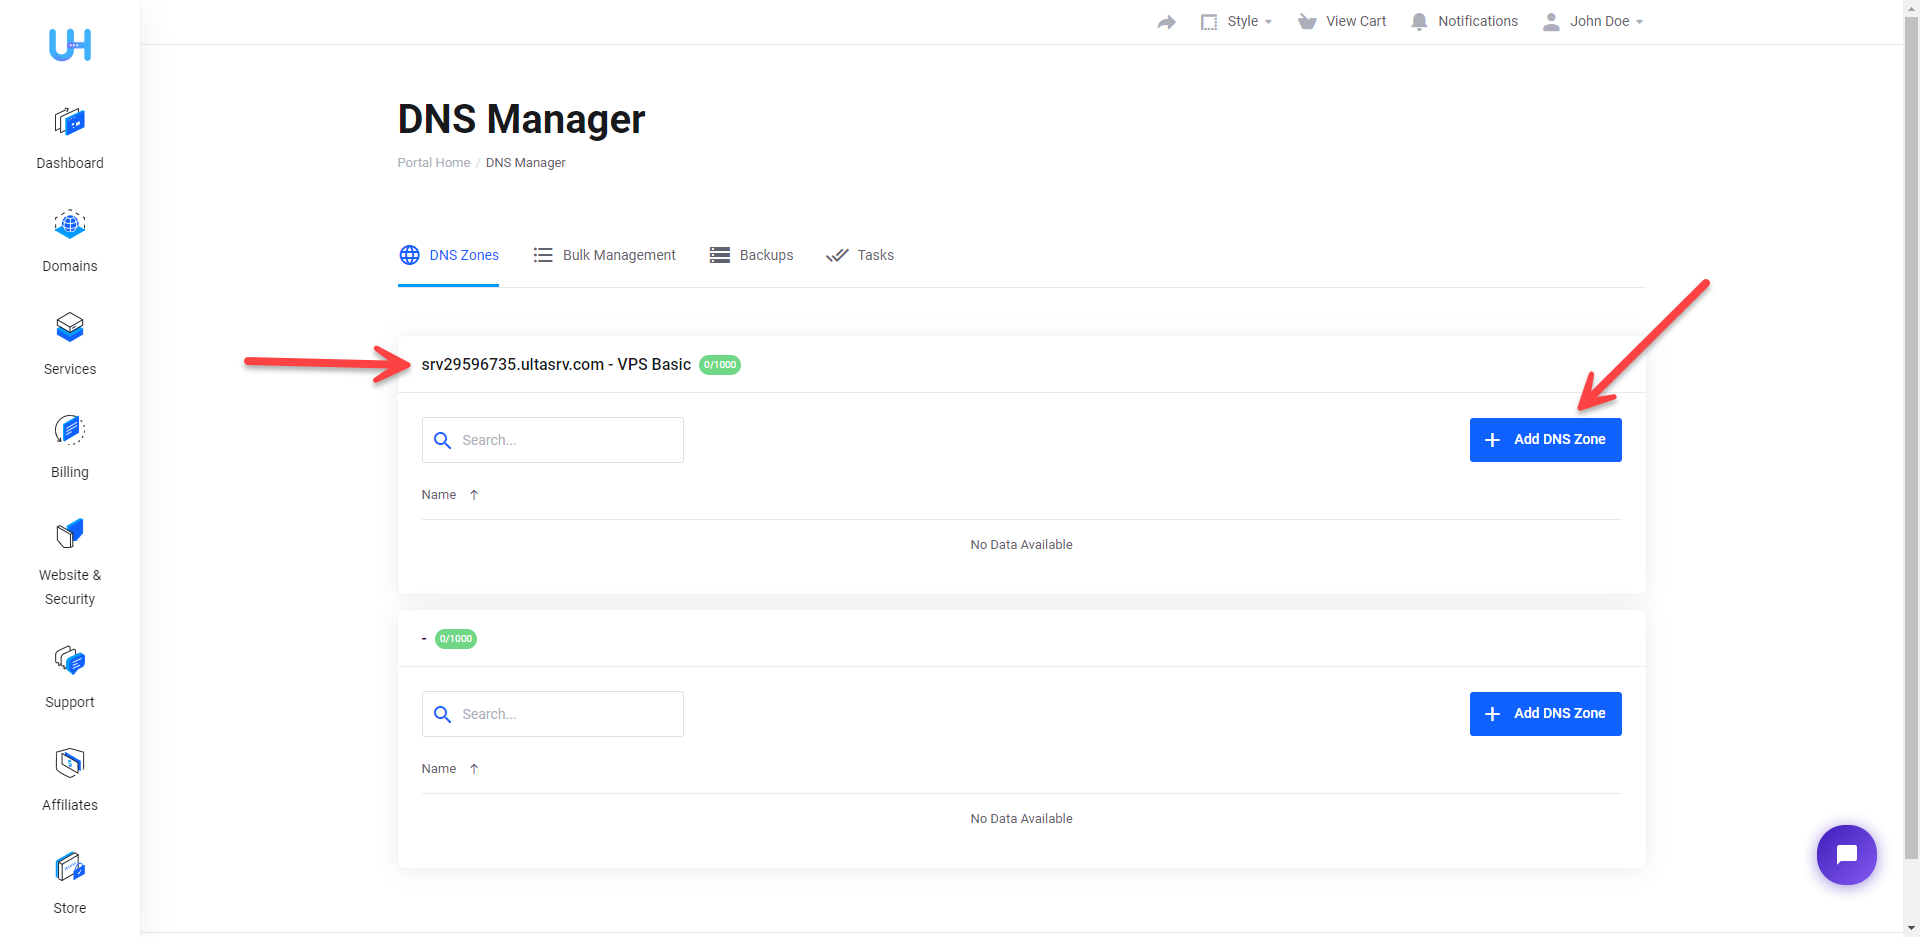
All domains registered by Ultahost, or by another registrar but using Ultahost’s nameservers, should be added in the DNS Manager.
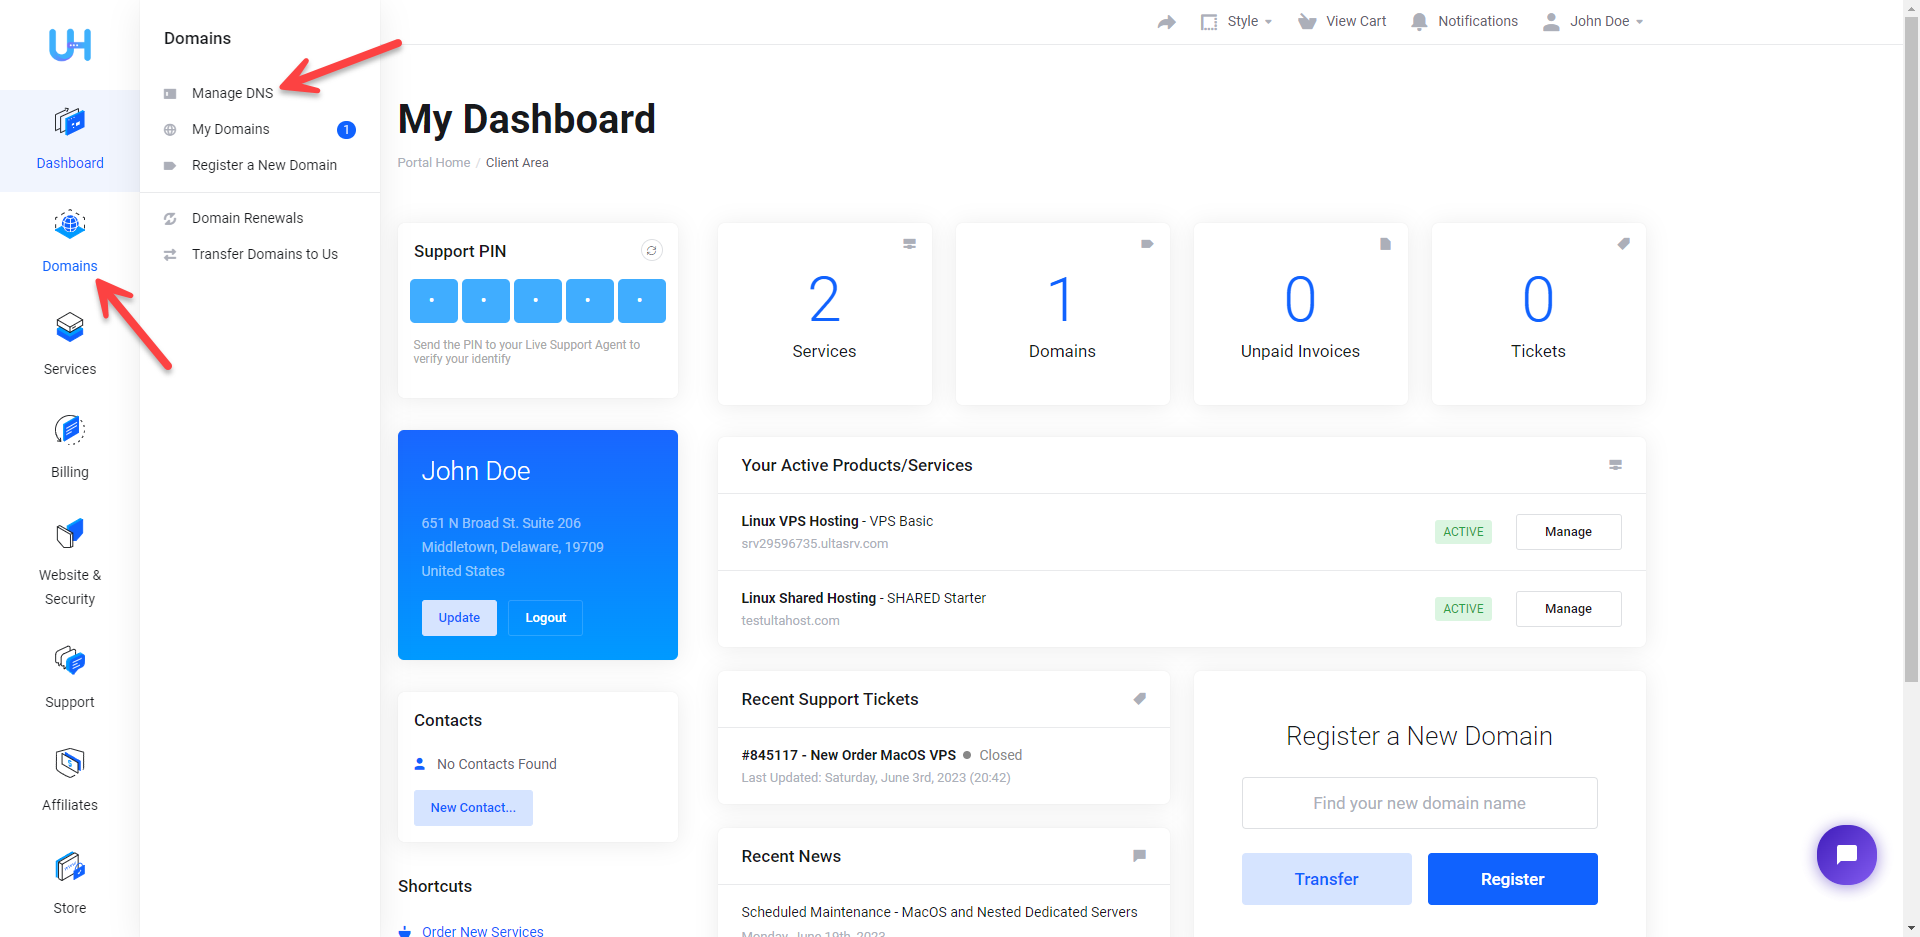
1) Log into your Client Area, and head to Domains > Manage DNS
2) Click the ‘Add DNS Zone‘ button under the server you’re adding the domain to, (srv29596735.ultasrv.com – VPS Basic) in this example
3) Enter your domain without www in the ‘DNS Zone Name‘ field, and click ‘Confirm‘
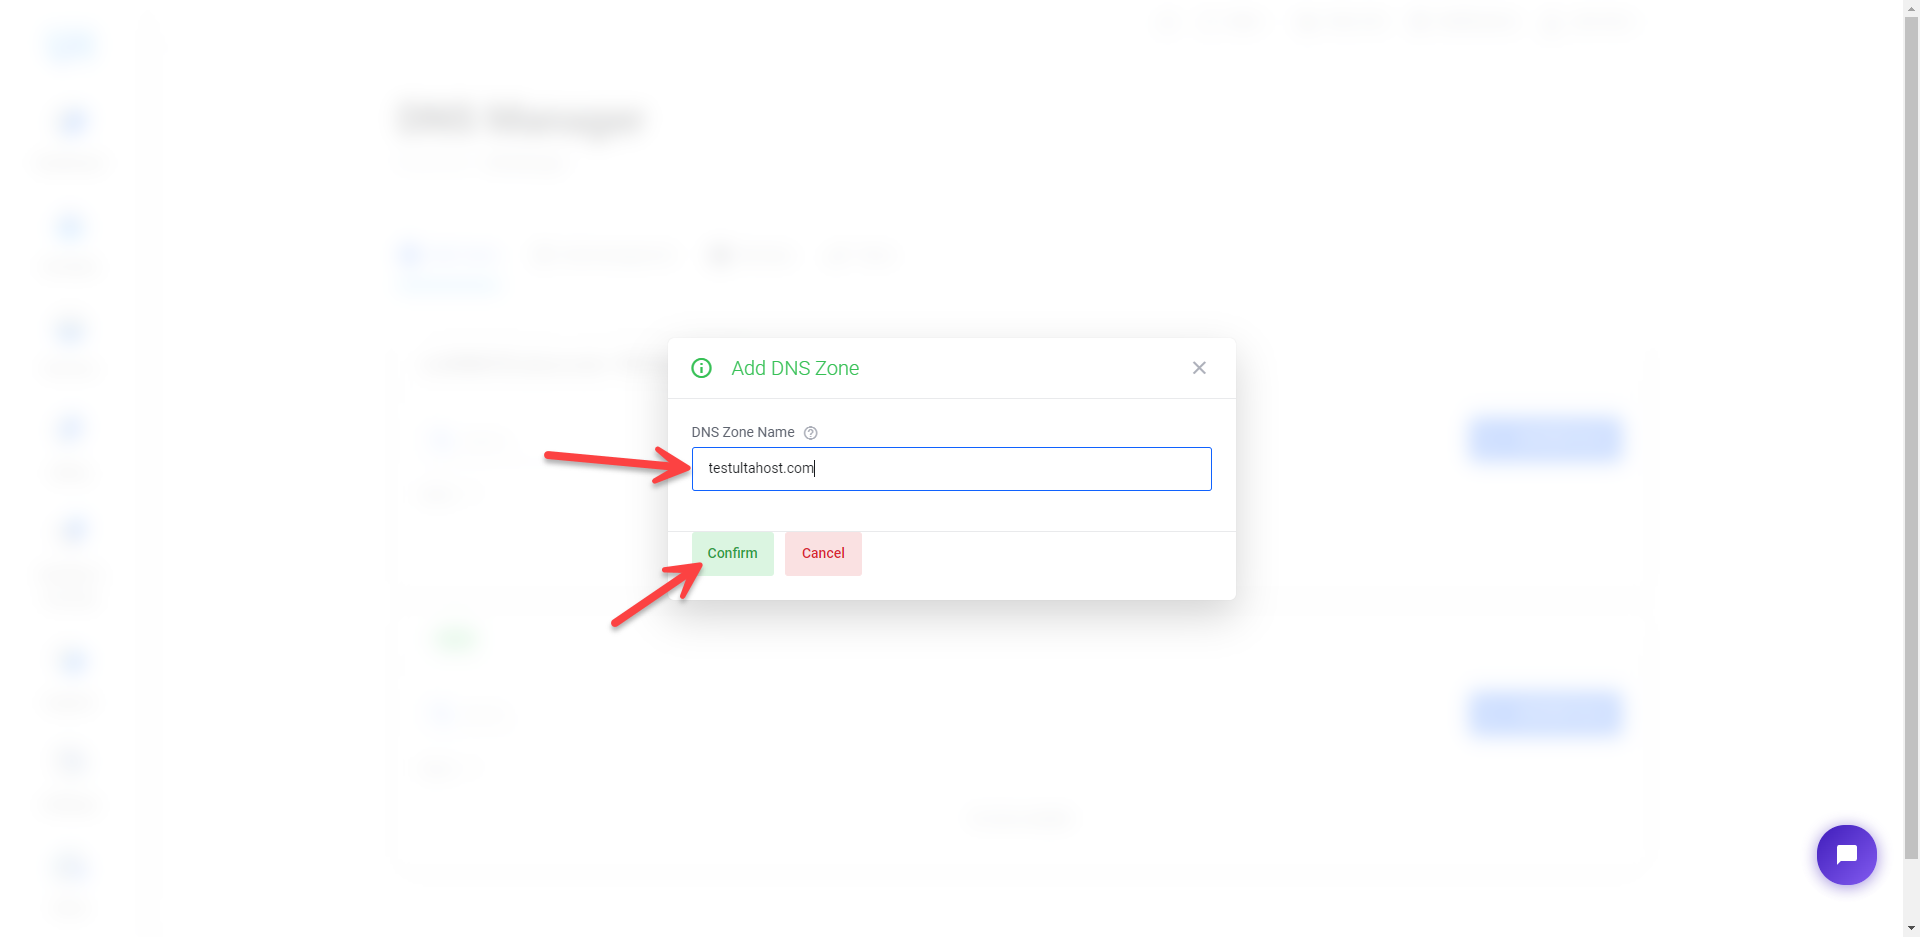
4) After you click ‘Confirm’, don’t reload the page, and wait for a few seconds as the system is creating the DNS Zone and adding all the default Ultahost DNS records, you will see a success message once this process is completed.
2. Adding / Editing / Removing DNS Records
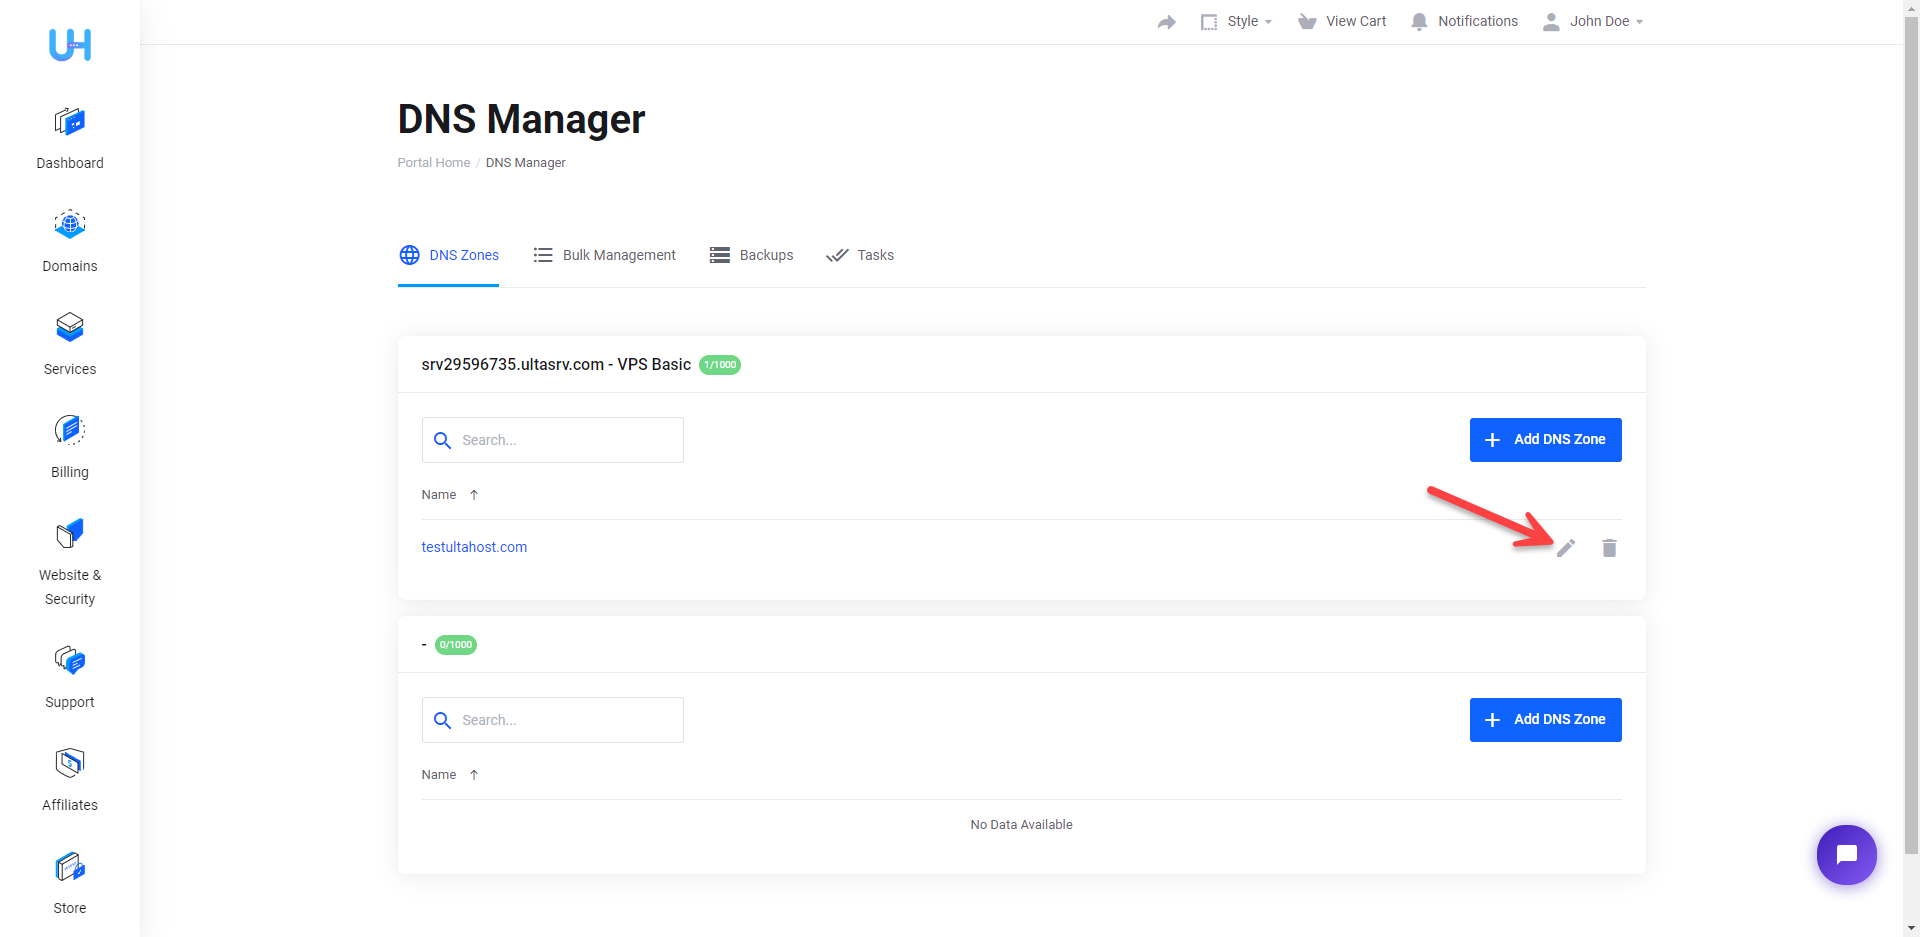
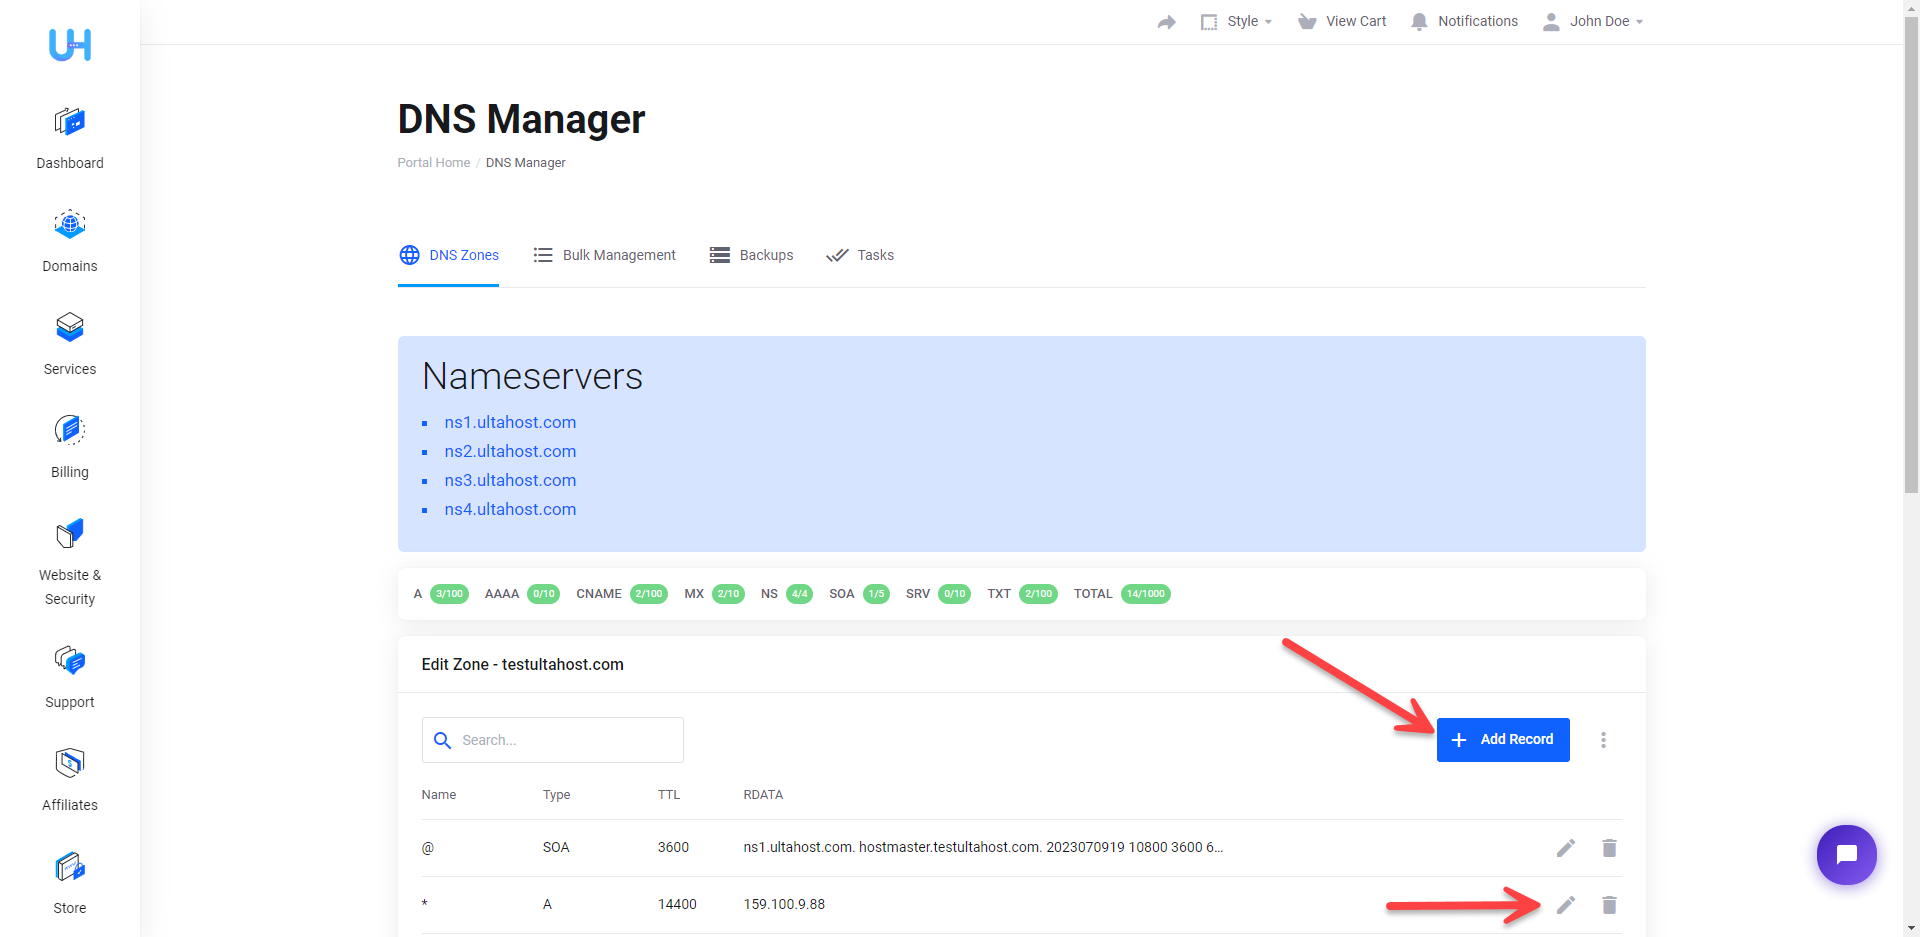
Now that your domain is added successfully to the DNS Manager, you can edit, remove, or add new DNS records by clicking the Pen icon next to the domain.
Once you’re on the DNS Zone details page, you can add new records for the domain by clicking the ‘Add Record‘ button, or edit/remove the existing records by clicking the Pen/Bin icon next to them accordingly.
Finally, you need to give it some time (Usually 1 – 24 hours) for the new DNS records to fully propagate, you can keep checking for updates using a service like DNS Checker: https://dnschecker.org/
