How to Setup a Subdomain Using cPanel
Subdomains serve as a means to establish distinct secti...
Remote Desktop Protocol short for RDP offers a powerful tool for accessing and managing computer systems remotely. While the ability to see and interact with the remote desktop is important audio capabilities can significantly enhance the experience. Imagine troubleshooting an application with sound issues or conducting a remote presentation audio becomes vital for effective communication workflow.
In this post, we will dive on how to enable sound in Remote Desktop sessions covering configuration steps for both the remote computer and the local machine you are connecting from.
There are two main aspects to consider when enabling RDP audio:
Enabling audio redirection in RDP can consume additional bandwidth. Understand your internet connection limitations especially when dealing with high-quality audio or heavy audio workloads. If you want to change the screen resolution of the remote server refer to our guide on how to change RDP screen resolution.
The first step involves ensuring the remote computer is set up for audio redirection. Here’s a breakdown of the process for Windows systems:
1. Verify Windows Audio Service
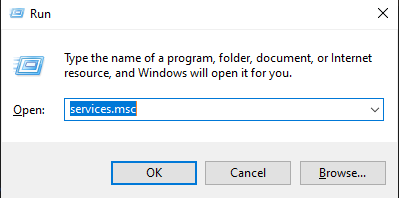
Press Win + R to open the Run dialog box. Type services.msc and press enter to launch the Services window.
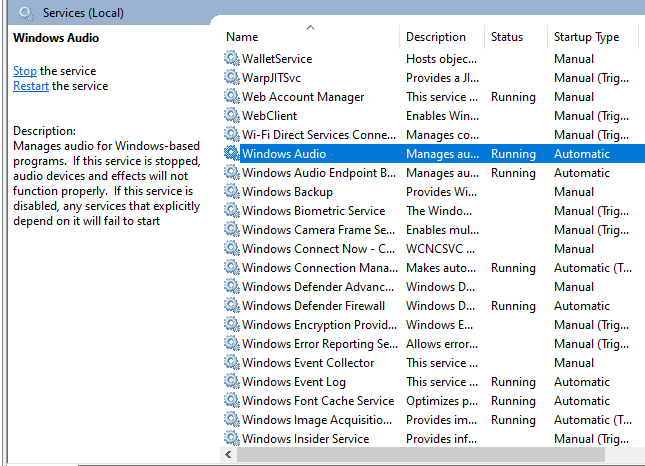
Once the screen dialog box appears locate the “Windows Audio” service.
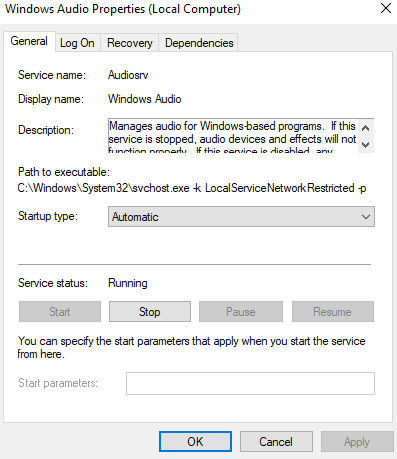
Right-click on the service and select “Properties”. Ensure the “Startup type” is set to “Automatic” and the service is running. If not, click “Start” and then “OK” to apply the changes.
2. Configure Default Audio Devices
In some cases, you might need to configure the default audio playback and recording devices on the remote computer. For this Right-click on the speaker icon in the system tray and select “Sounds”.
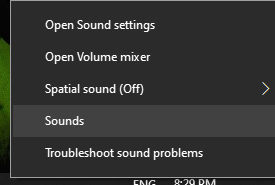
Go to the “Playback” and “Recording” tabs respectively. Set the desired audio devices as defaults for playback and recording.

Get a Reliable RDP VPS Server Hosting
Unlock the power of remote computing with a remarkably affordable RDP Hosting service that ensures speedy, safe access to your system from any corner of the world.
Once the remote computer is prepared you will need to configure your local machine to receive and potentially transmit audio during the RDP session.
Open the Start menu and search for “Remote Desktop Connection”. Alternatively, press Win + R type mstsc.exe, and press enter.
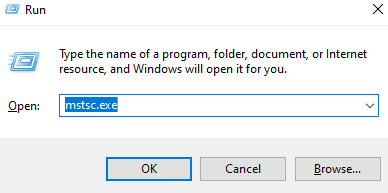
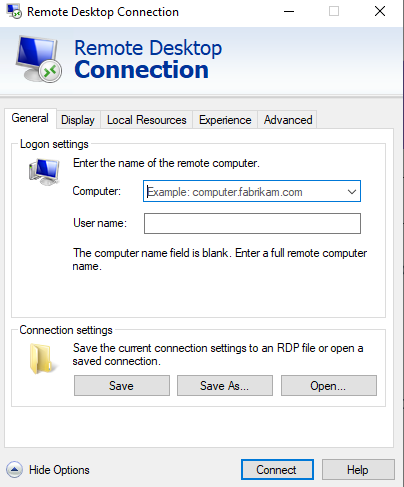
To enable remote audio navigate to the Remote Desktop Connection window and enter the address or hostname of the remote computer you want to connect to. Click “Show Options” to expand the connection settings.
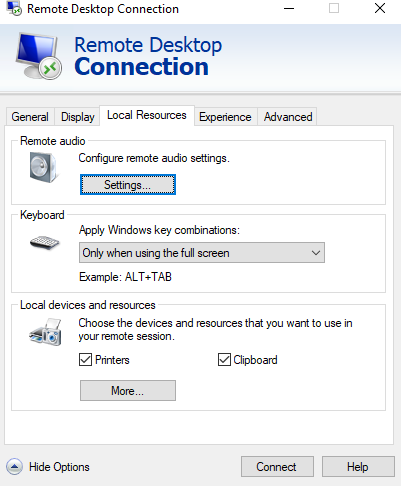
Navigate to the “Local Resources” tab. Under “Remote Audio” click “Settings”.
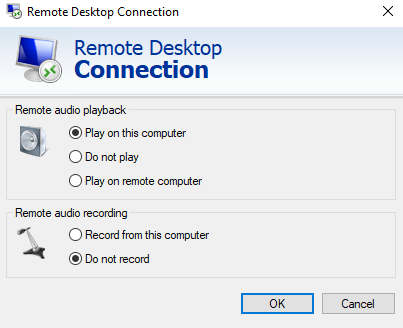
In the “Remote Audio Playback” section choose “Play on this computer” to hear sounds from the remote computer on your local machine.
To enable microphone recording head to the “Remote Audio Recording” section, and select “Record from this computer” to enable microphone use on the remote computer.
Click “Connect” to establish the remote desktop session. Once connected play a media file or open an application with sound output on the remote computer to test playback. You can also test microphone recording by using a sound recording application on the remote desktop.
Read also How To Connect To Linux Server Remotely.
If remote desktop audio not working here are some troubleshooting tips:
Following are some important notes after enabling audio in remote desktop sessions:
By following these steps and addressing any troubleshooting points you should be able to successfully enable audio playback and recording in your Remote Desktop sessions. This will significantly enhance your remote desktop experience allowing you to hear system sounds, application audio, and media playback from the remote computer. Additionally, microphone recording capabilities will enable features like voice chat, dictation, and more. Remember that enabling audio redirection can consume additional bandwidth, so be aware of your internet connection limitations.
While setting up audio on a remote desktop connection offers some control on a local machine it can be limiting for managing remote servers. If you are managing remote connections from Asia, consider the Ultahost Asia VPS hosting plan which provides you with greater flexibility and a smoother remote desktop experience that grants you full control over your server configuration including audio settings.
Go to Remote Desktop settings and ensure the audio option is enabled under Local Resources.
Check if audio is enabled in Remote Desktop settings and make sure your local machine’s sound is not muted.
Yes, enable audio recording in Remote Desktop settings to use your microphone.
Yes, it is supported you can enable audio playback in the Remote Desktop settings under Local Resources.
Verify audio settings in Remote Desktop and check your local device’s sound settings.