
Installing and Securing phpMyAdmin on Ubuntu ...
Managing MySQL databases is a crucial part of web devel...


In the realm of modern technology, data plays a pivotal role in numerous applications and systems. Efficiently managing and organizing this data is crucial for businesses and developers alike. This is where MySQL comes into the picture – it is a widely adopted relational database management system (RDBMS).
MySQL is an open-source RDBMS that offers a robust, scalable, and reliable platform for storing, retrieving, and managing structured data. It encompasses a wide array of features, such as support for multiple data types, high-performance query execution, data integrity and security mechanisms, and exceptional scalability options.
From small-scale web applications to large enterprise systems, MySQL has emerged as the go-to choice for developers, businesses, and organizations across diverse industries. Its versatility, user-friendly nature, and extensive community support make it the preferred option for constructing database-driven applications. By selecting Ubuntu as your operating system for MySQL installation, you gain advantages such as a user-friendly interface, stability, security, and compatibility.
When it comes to selecting an operating system for running MySQL, Ubuntu stands out as a popular choice among developers and system administrators. Ubuntu server is a Linux-based operating system renowned for its user-friendly interface, stability, security, and extensive community support. Ubuntu’s widespread usage for MySQL installation stems from these reasons:”
For Ubuntu 21.04 and 20.04, the minimum hardware specifications are as follows:
Keep in mind that these are minimum requirements, and depending on your specific use case and workload, you may need more resources to ensure smooth operation of Ubuntu and MySQL.
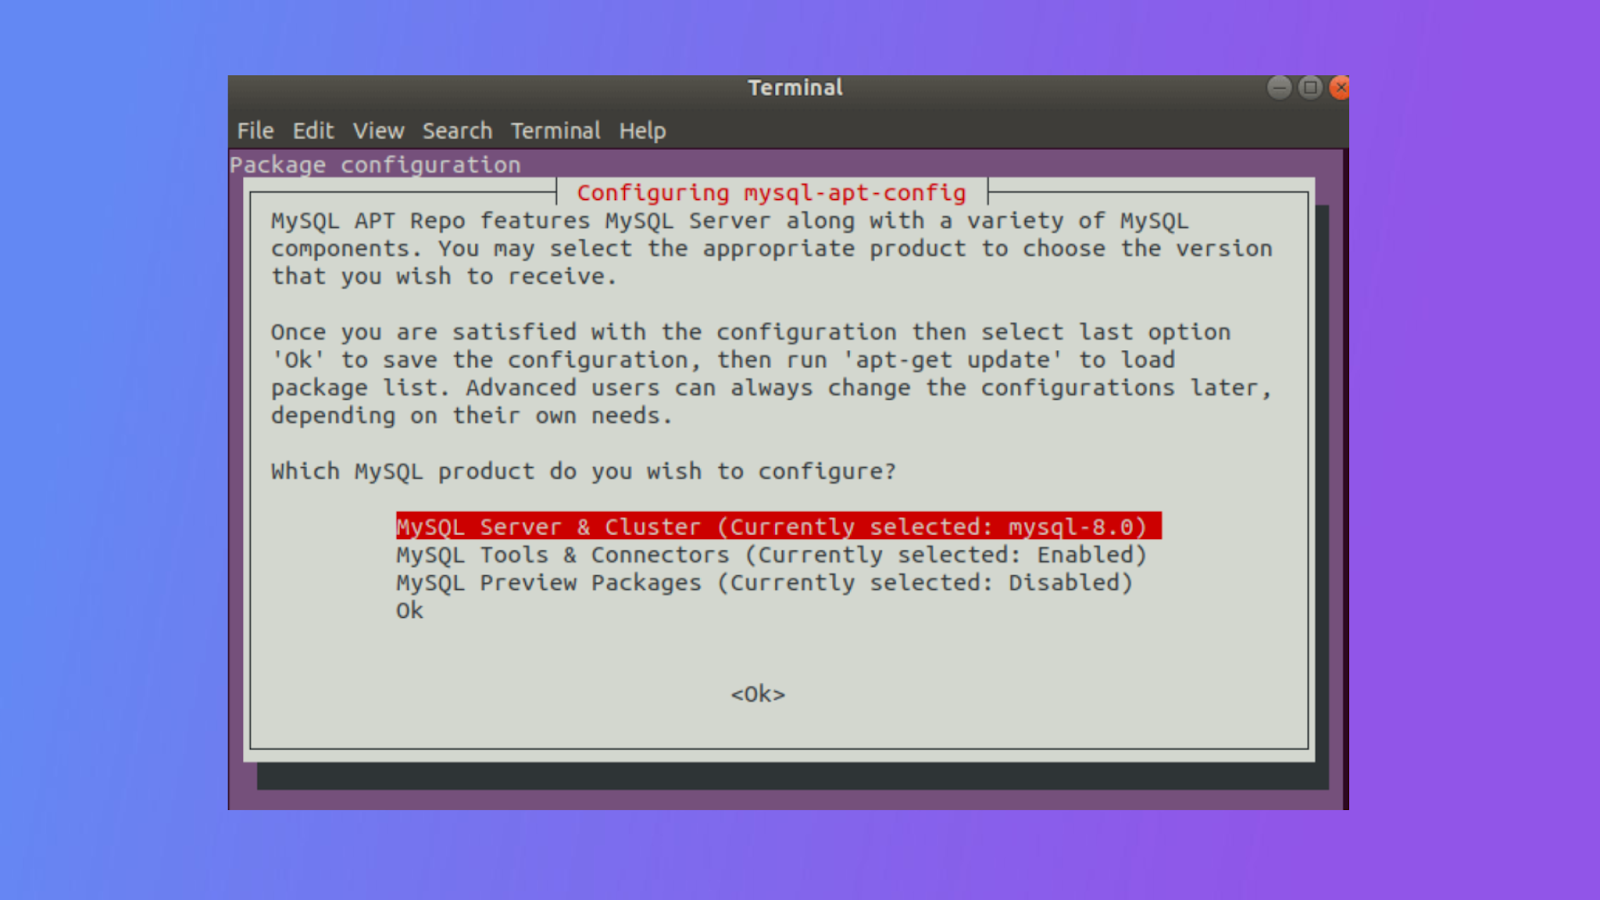
wget https://dev.mysql.com/get/mysql-apt-config_0.8.19-1_all.deb
sudo dpkg -i mysql-apt-config_0.8.19-1_all.deb

sudo apt update
sudo apt install mysql-server
Run the MySQL security script to improve the installation security:
sudo mysql_secure_installation
The script will prompt you to validate the password for the MySQL root user, remove anonymous users, disallow root login remotely, and remove the test database. Follow the prompts and answer “Y” to all the questions for a more secure installation.
sudo systemctl start mysql
sudo systemctl stop mysql
sudo systemctl disable mysql
sudo systemctl enable mysql
This will configure MySQL to start automatically whenever the system boots up.
To check the status of the MySQL server, run the following command:
sudo systemctl status mysql
If the MySQL server is running correctly, you should see a message indicating that it is active and running. You may encounter issues, error messages, or warnings, and you will need to troubleshoot accordingly.
To summarize, setting up MySQL on Ubuntu 21.04 or 20.04 is a simple process that can be achieved using either the Ubuntu package manager or the MySQL official repository. This guide provides step-by-step instructions to help you establish a strong and dependable database management system on your Ubuntu system. Thanks to its robust features and scalability options, MySQL finds widespread use in various applications and systems. Being open-source, versatile, and having a supportive community attributes to its popularity.
You can also read about how you can Install LAMP on ubuntu server.