
How to Install Gnome on Centos 8
In the world of Linux operating systems, CentOS 8 stand...


The installation of Fedora using VirtualBox is a great option to test this Linux distribution without impacting the primary operating system. Fedora is a cutting-edge Linux distribution that is the best choice to test the latest open-source technologies. It enables users, including students, developers, and IT professionals, to try out software, master Linux functions, and discover the features of Fedora in a secure, protected, isolated environment.
This comprehensive article will guide you through every step of installing Fedora on VirtualBox.
VirtualBox allows you to make snapshots, revert changes, and effectively manage resources. This setup can also be useful to test the performance and compatibility before installing Fedora on hardware.
Before beginning the installation process, make sure you meet these requirements:
Experience Ultahost’s Cheap Linux VPS!
Experience Ultahost’s affordable Linux VPS plans with full customization, rock-solid performance, and built-in security. Enjoy nonstop uptime backed by proactive support!
VirtualBox is a free Oracle virtualization tool that allows you to operate multiple operating systems concurrently on your PC. You can easily install VirtualBox on Windows or any other operating system by following the appropriate instructions.
For Windows Users
macOS Users
For Linux Users
The majority of Linux distributions come with VirtualBox in their repository. Make use of your package manager for the installation of VirtualBox:
Ubuntu/Debian
sudo apt install virtualbox
CentOS/RHEL
sudo install VirtualBox
Arch Linux
sudo pacman -S virtualbox
The Fedora ISO file contains the entire operating system you’ll install on the virtual machine.
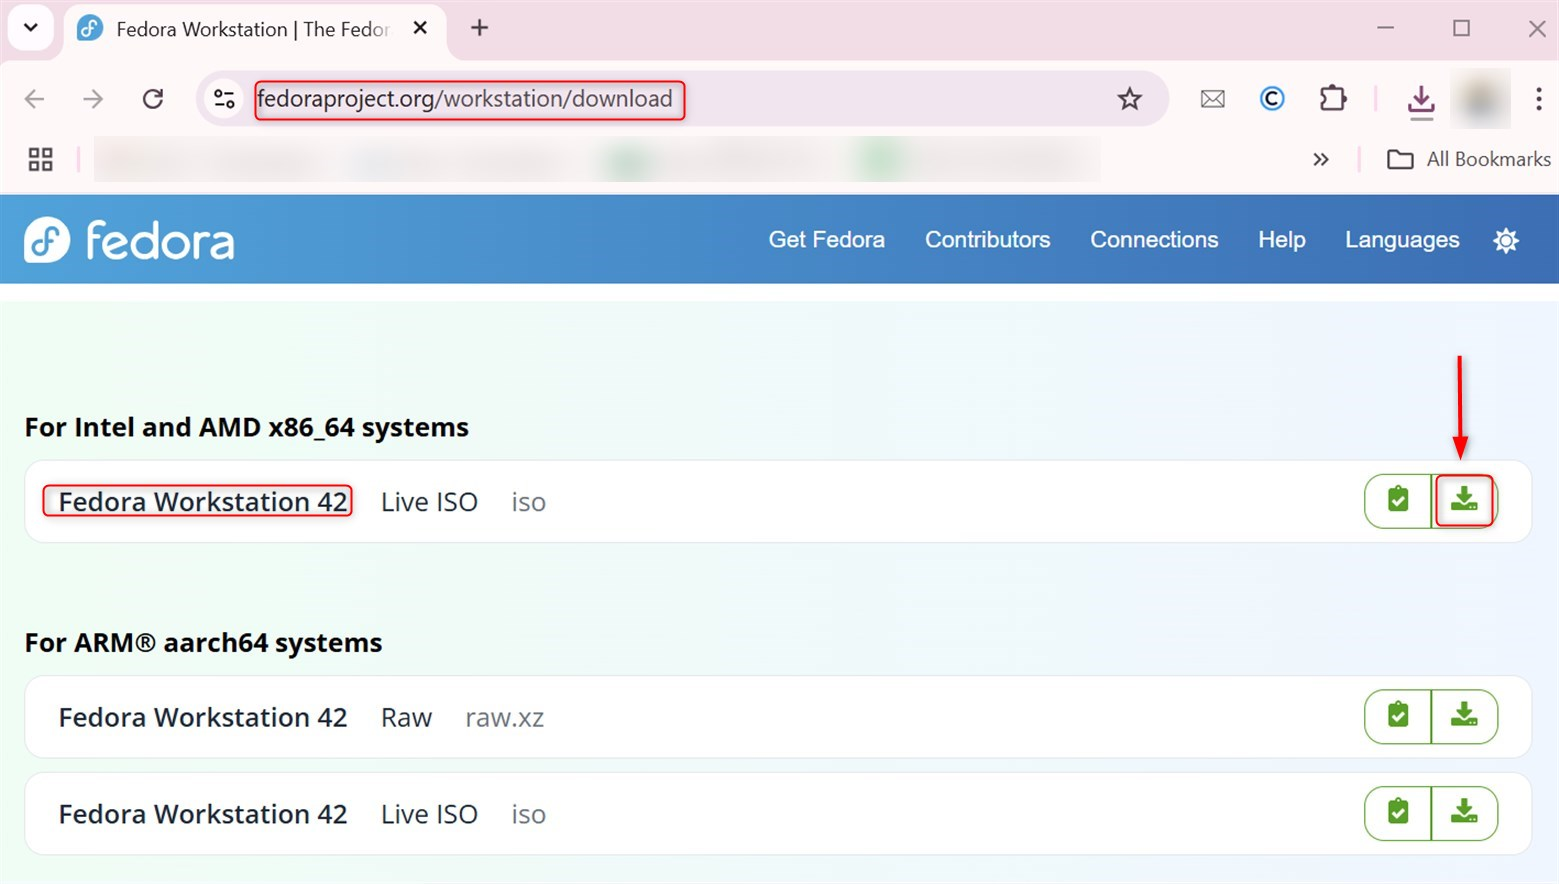
Then you’ll create a virtual world where Fedora can be loaded.
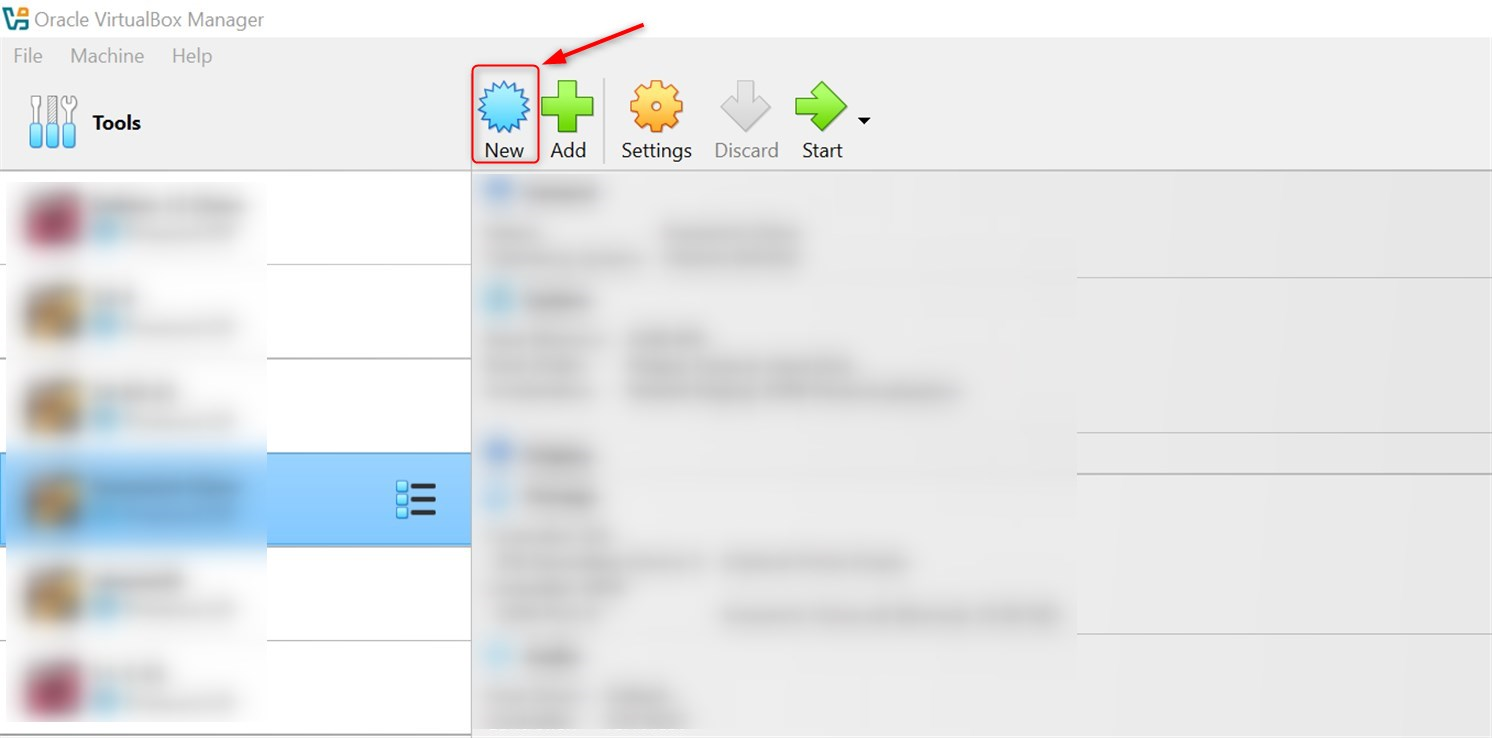
Start VirtualBox and then click on the “New” button in the toolbar:
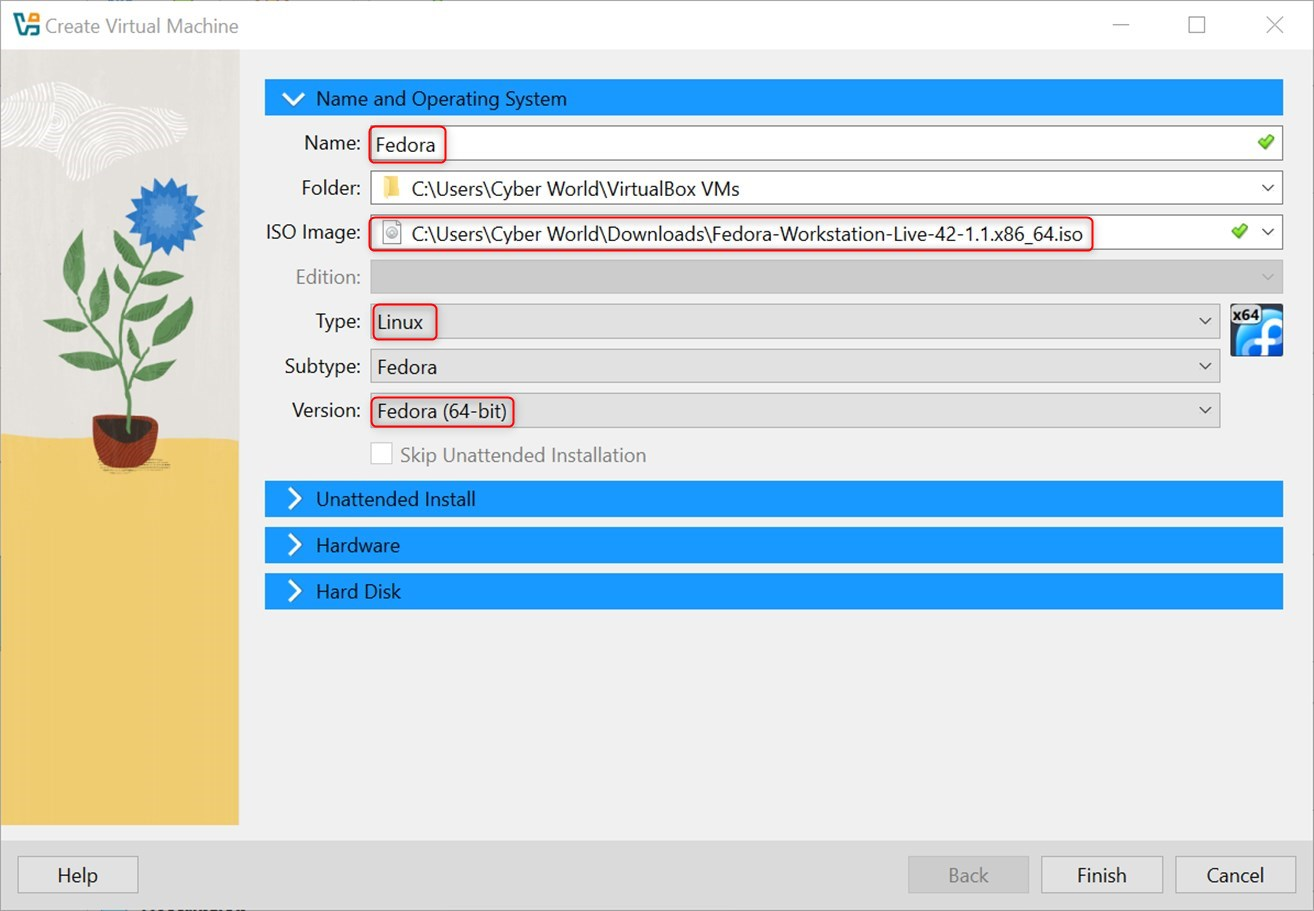
Make sure you name your Virtual Machine: Type “Fedora” or any descriptive name. After this, select Type: Linux and Version: Fedora (64-bit). Then browse and select your downloaded Fedora ISO file:
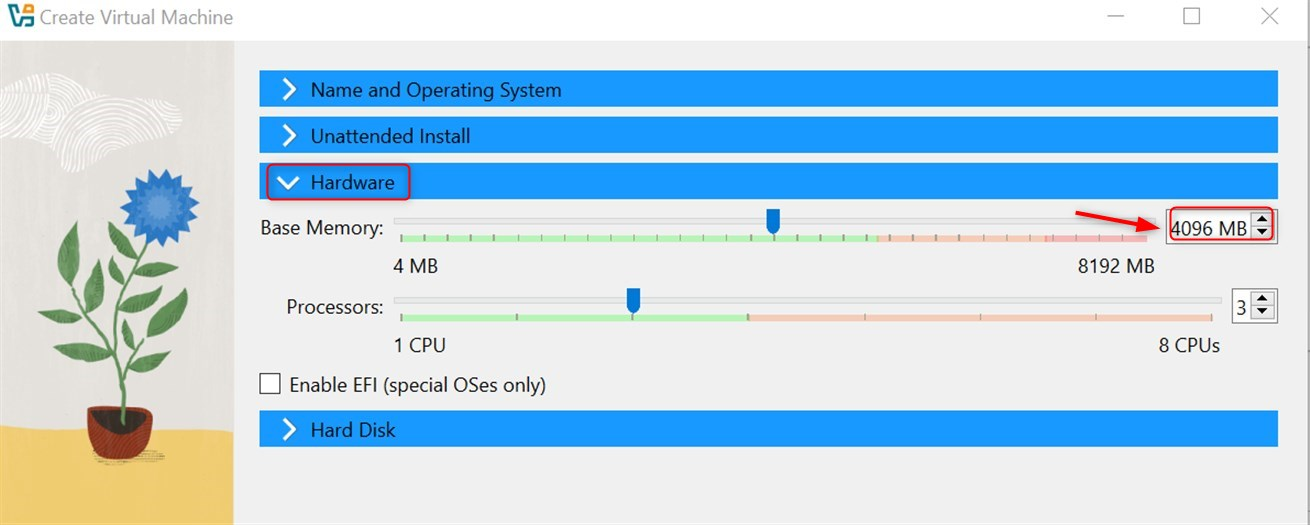
Allocate Memory
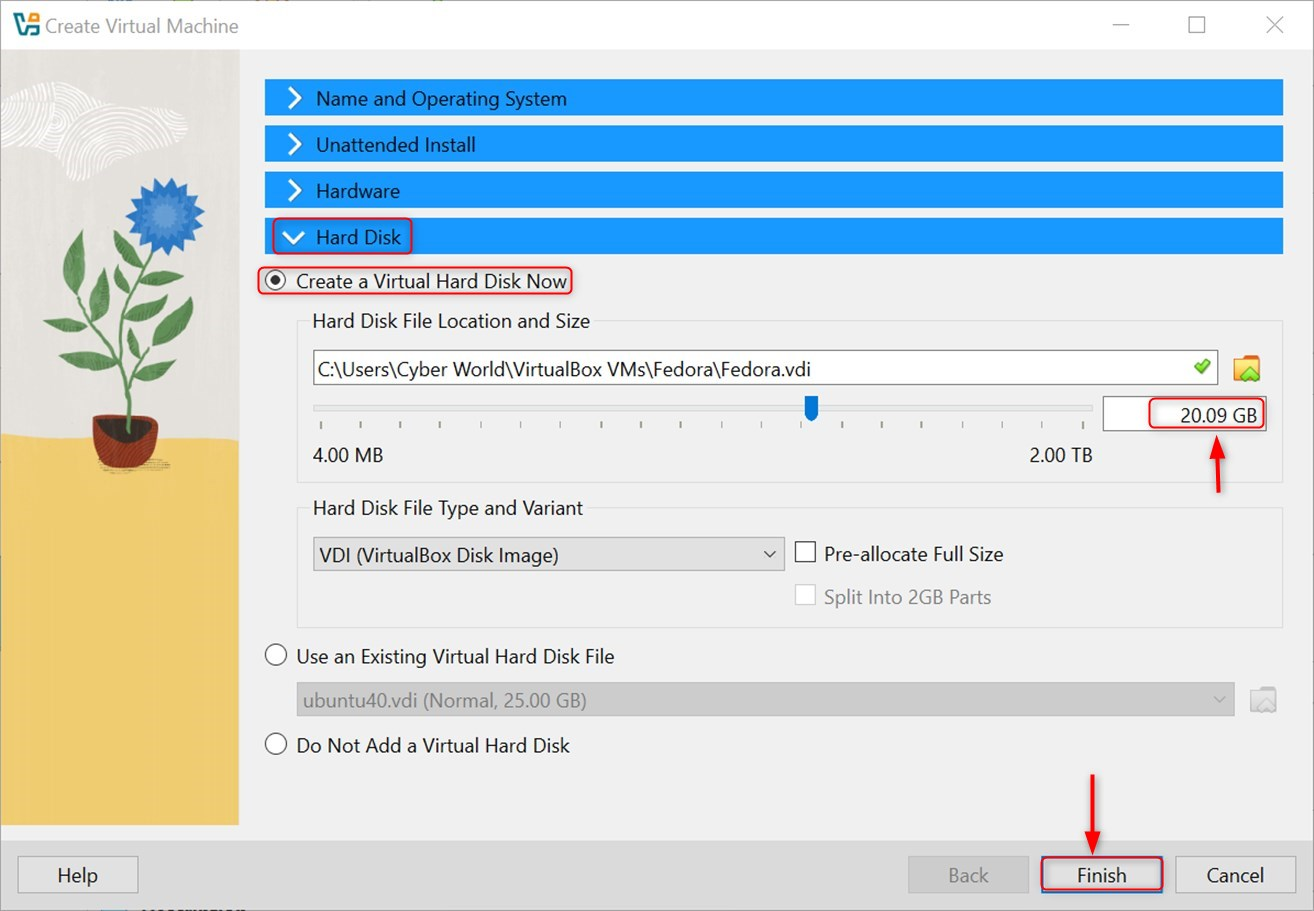
Create Virtual Hard Disk
The correct configuration is essential to ensure the best functionality and compatibility.
System Settings
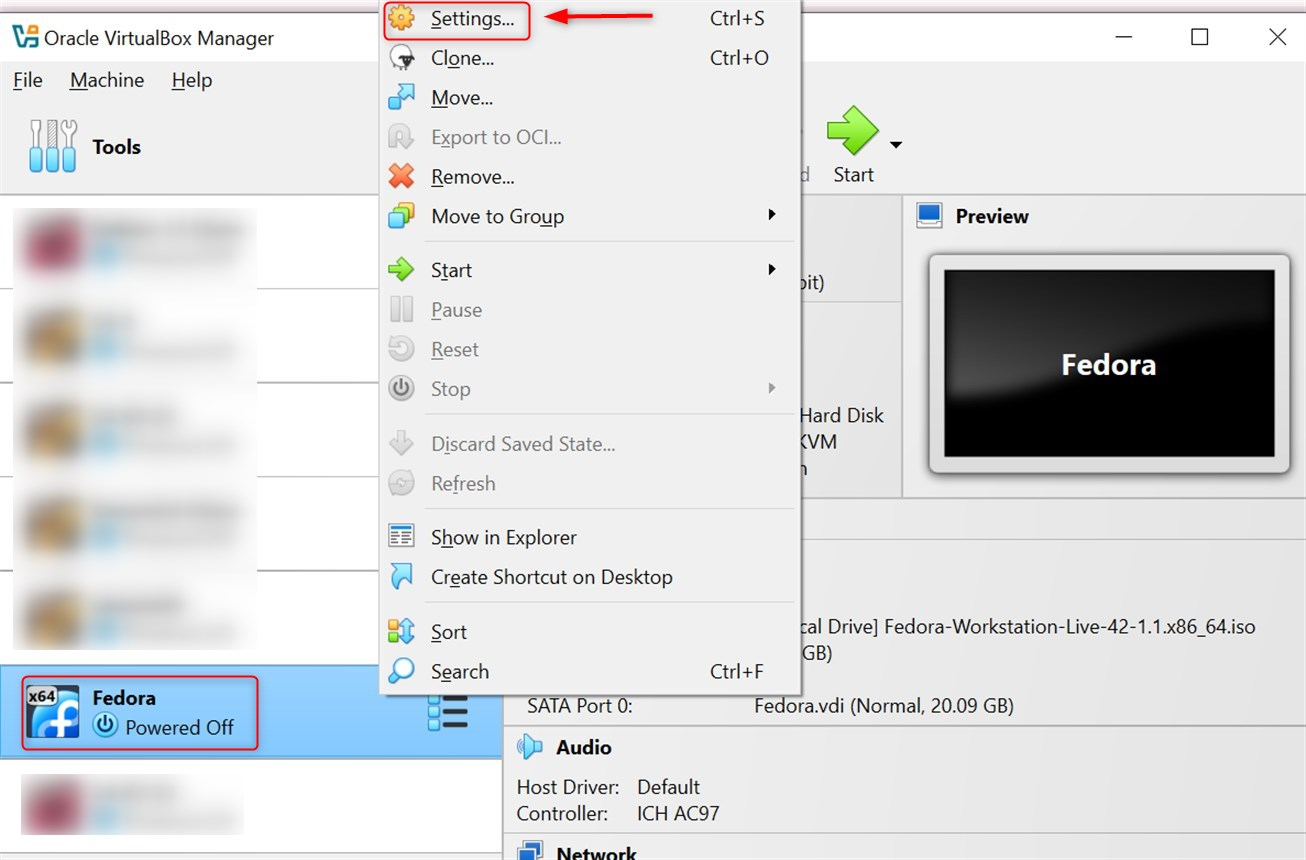
Right-click on your new VM and then select “Settings…”
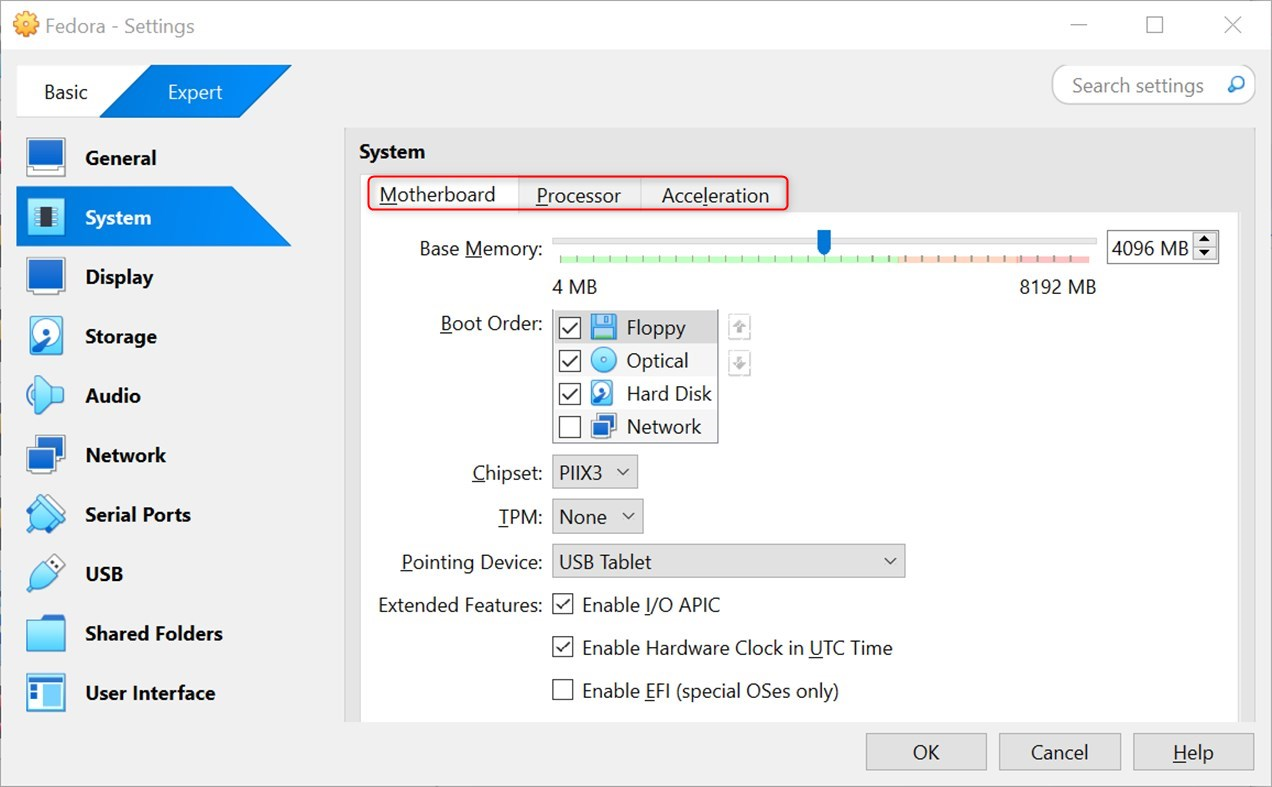
In the System tab, ensure the following configurations are made:
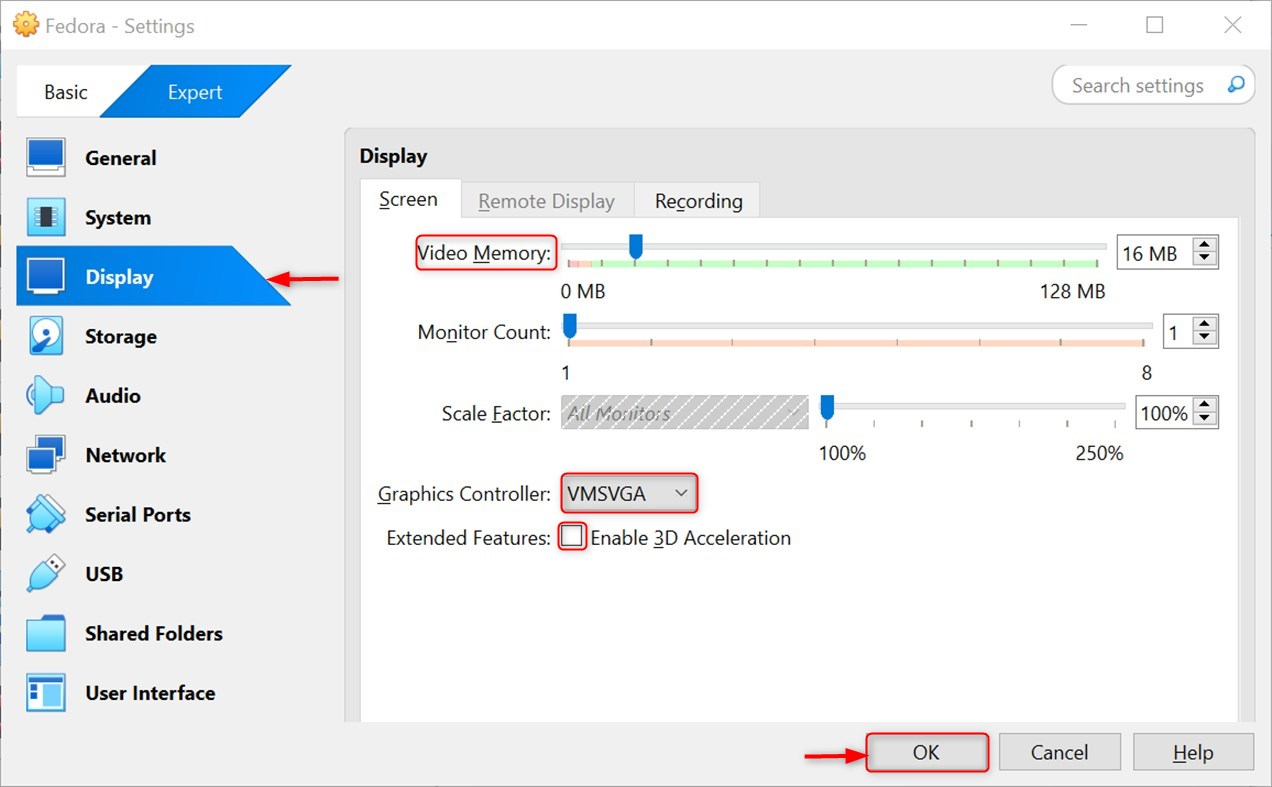
Display Settings
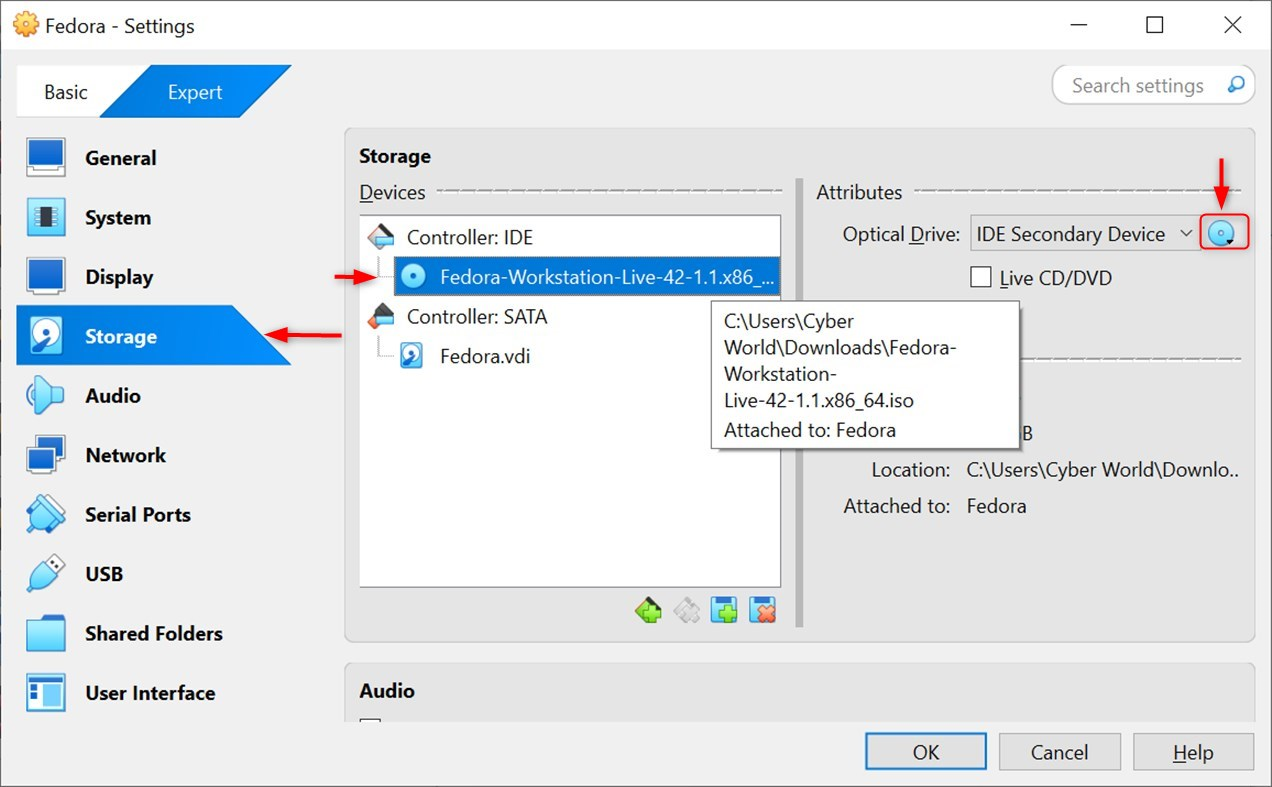
Storage Configuration
Click on the “Storage” tab:
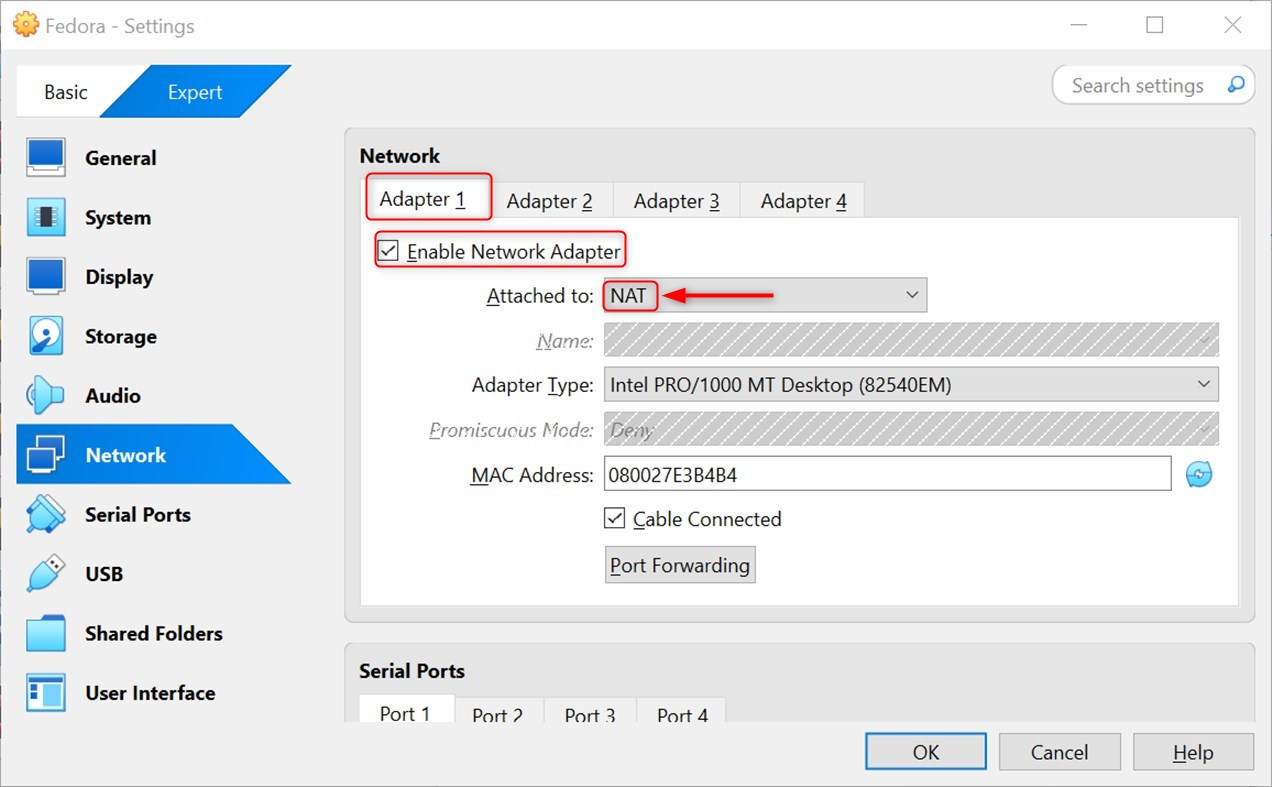
Network Settings
Click on the “Network” tab:
With everything set, it’s time to boot Fedora for the very first time.
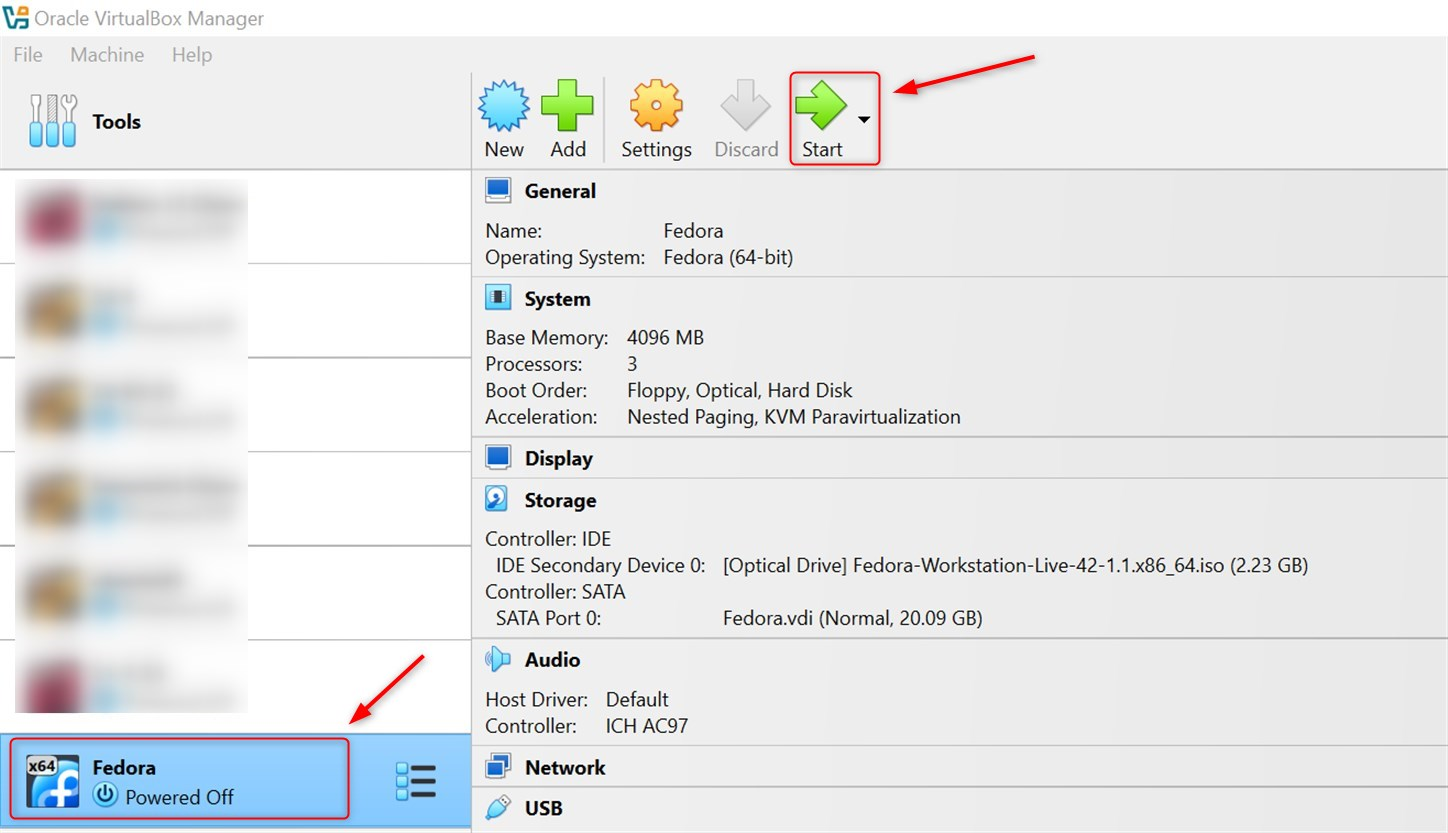
Start the VM: Highlight your Fedora VM and press “Start”:
This will bring you to the Fedora live environment. Pick the language of your choice for the installation:
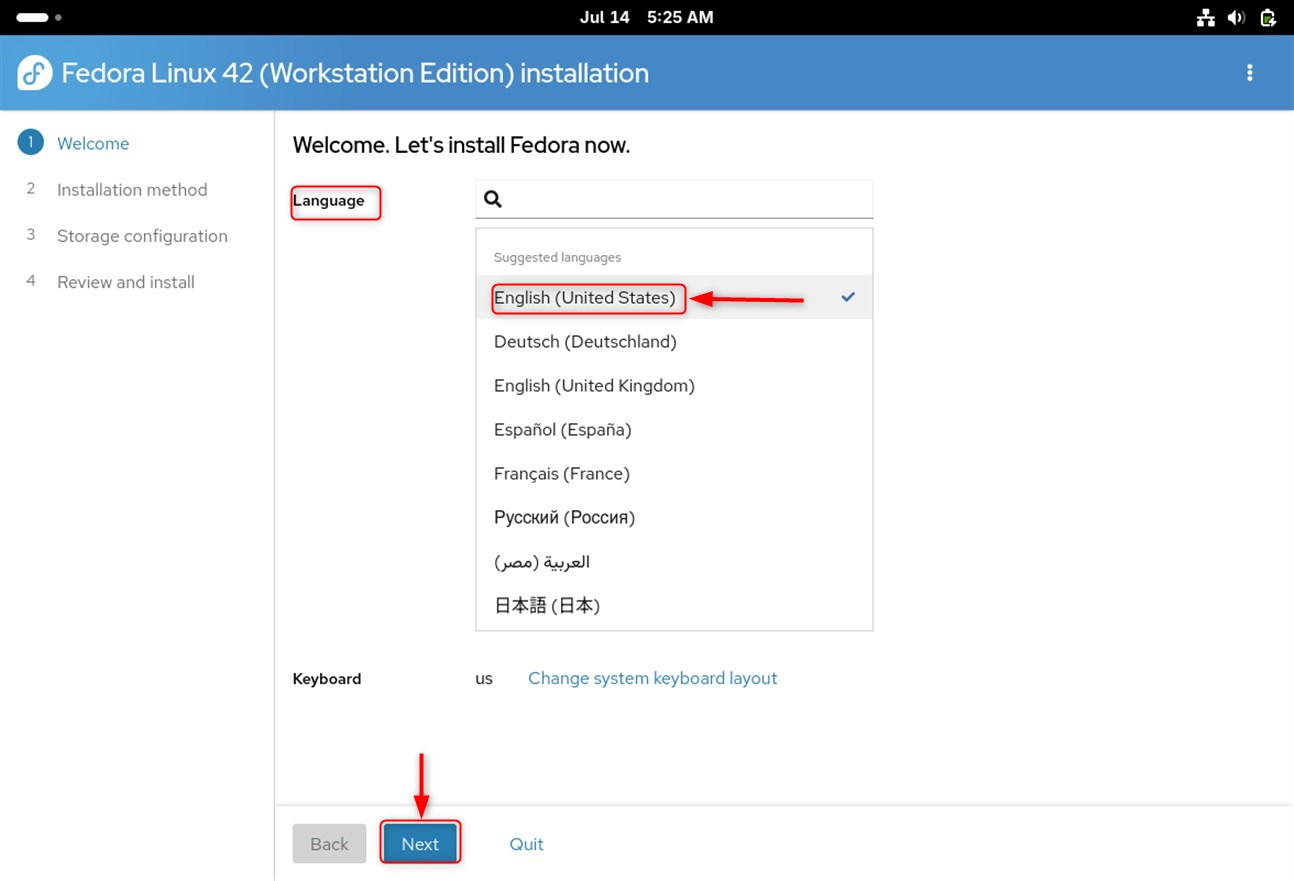
On the desktop, click the “Install Fedora” button to proceed with the Installation:

Anaconda, the Fedora installer, will take you through the steps to complete the installation.
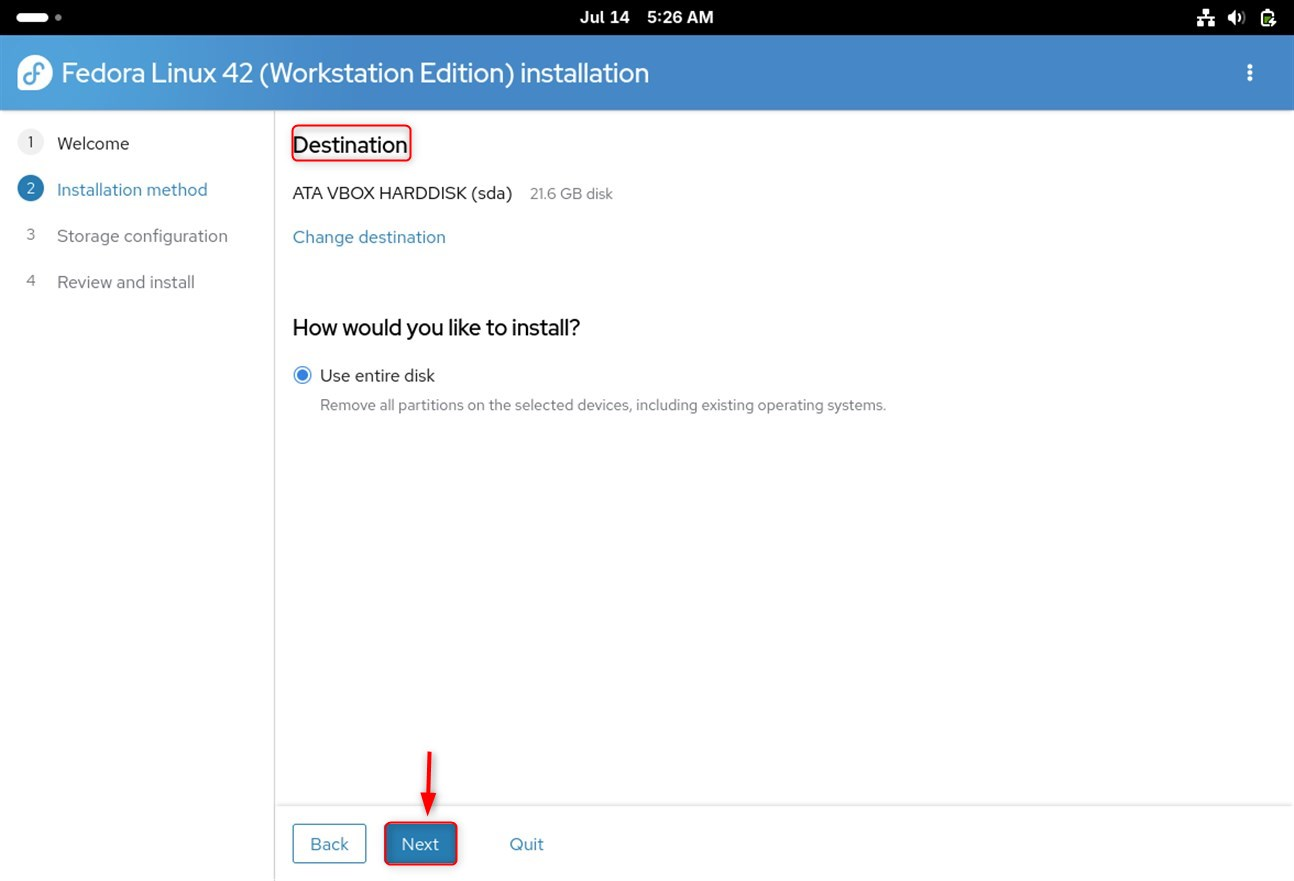
Installation Summary Screen: All options for the installation are shown here. Resolve any issues that have warning signs next to them.
Installation Destination
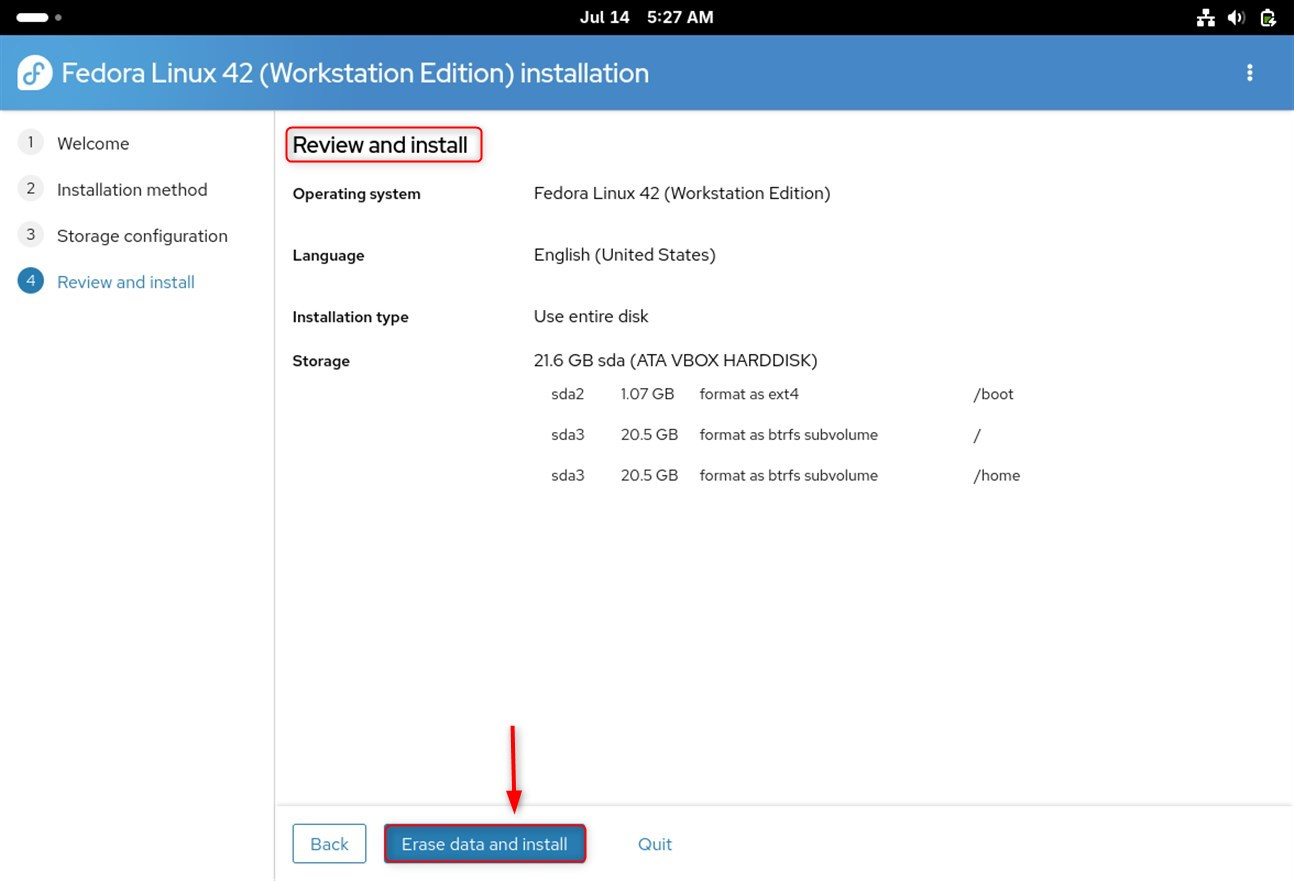
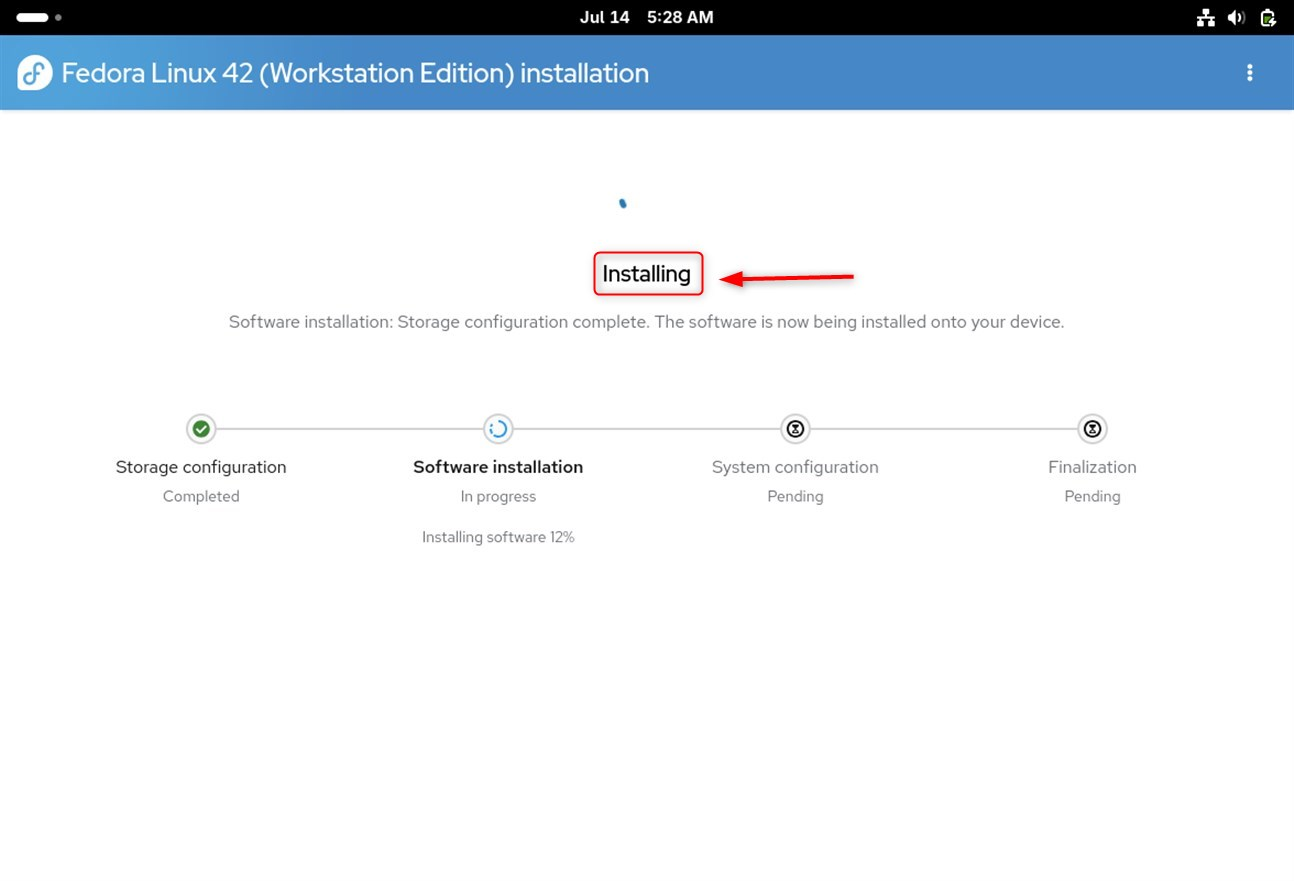
Completing these steps usually takes 30 minutes, depending on system specifications. Interruption during the process is strongly discouraged:
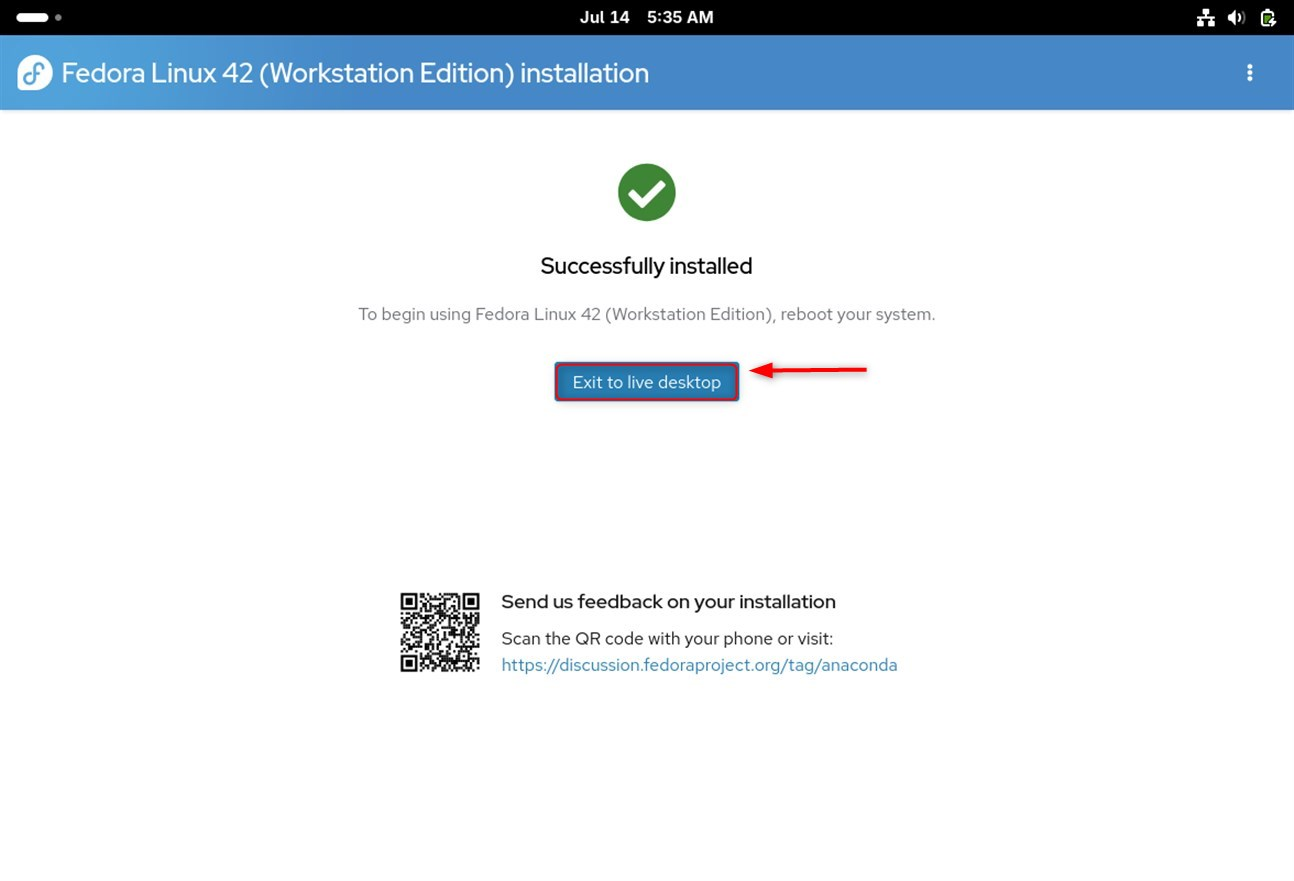
Select the “Exit to live desktop” option and restart the virtual machine:
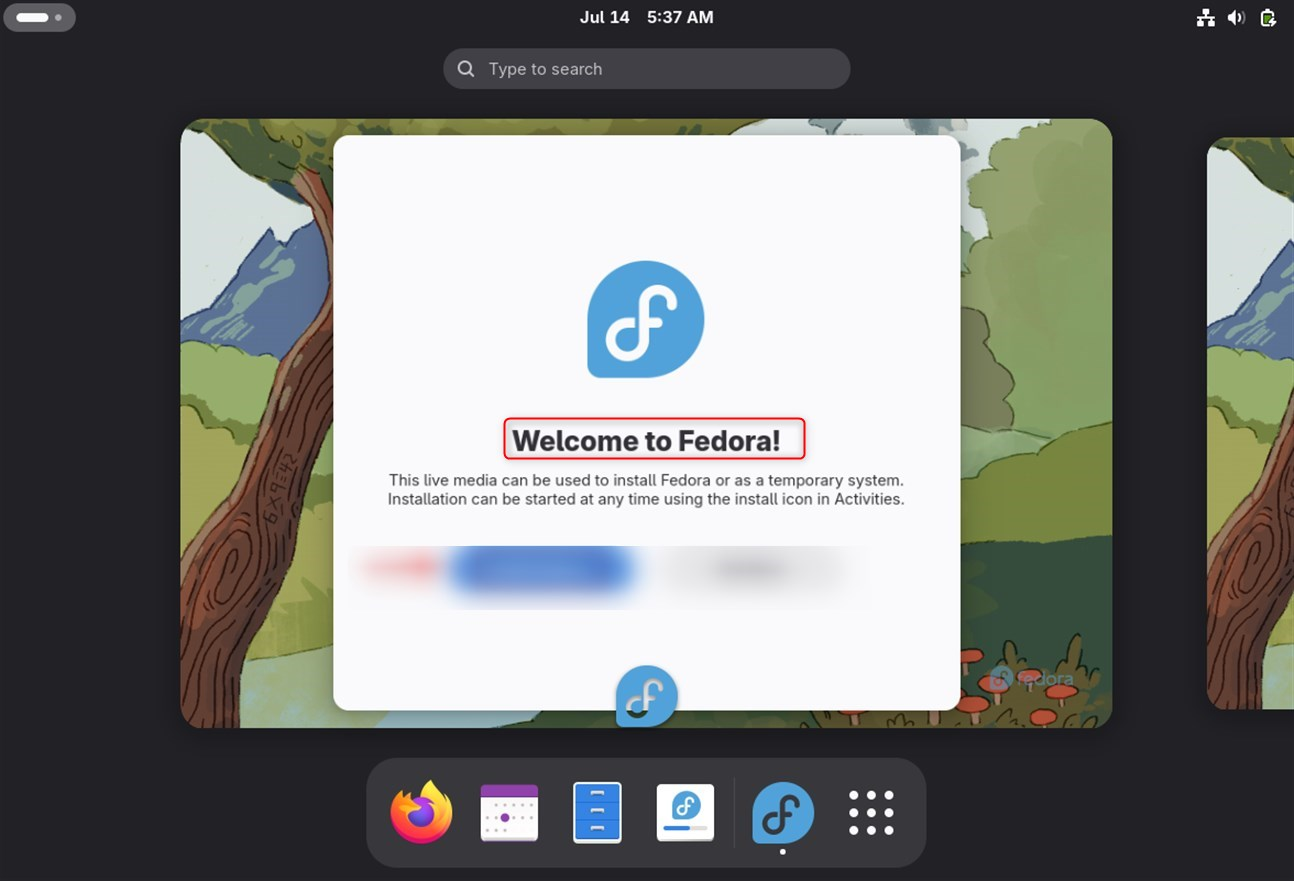
After reboot, you’ll go through Fedora’s initial setup:
To receive optimal integration with host and guest systems, prioritize system updates. To do so, open Terminal and enter the following commands:
sudo dnf update

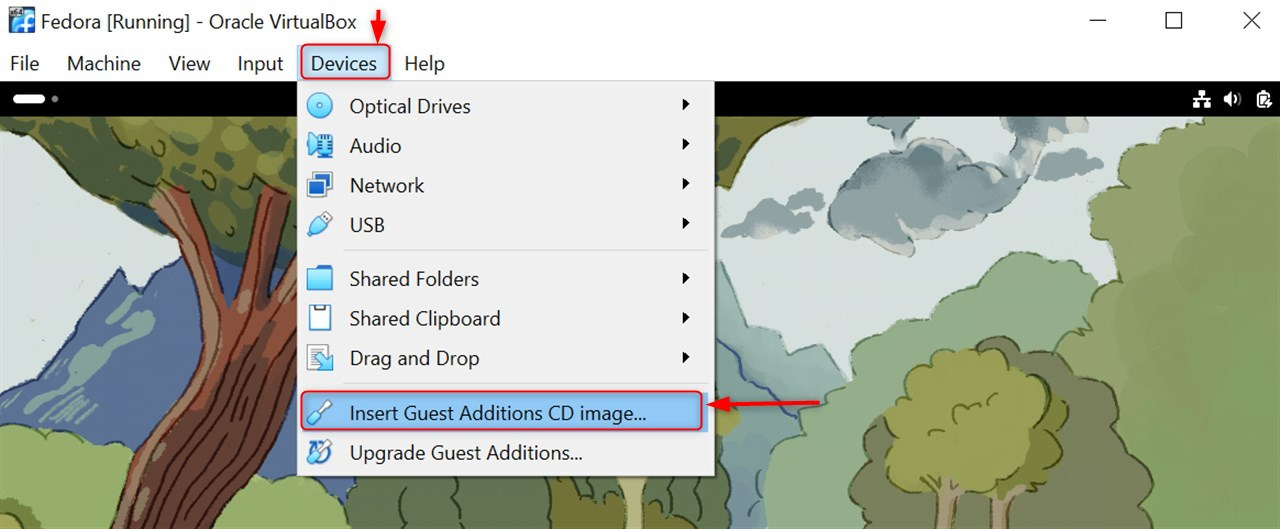
Insert Guest Additions CD
In VirtualBox menu: Devices > Insert Guest Additions CD image:
Then, opening the CD with a file explorer, right-clicking that folder, and clicking “Open in Terminal”
Install Guest Additions
Afterwards, run these commands to install:
sudo ./VBoxLinuxAdditions.run
Then, finally completes the process by restarting the virtual machine to fully activate the Additions. You can confirm with the command:
cat /etc/os-release

To get the best experience from your Fedora virtual machine:
Enable Shared Clipboard
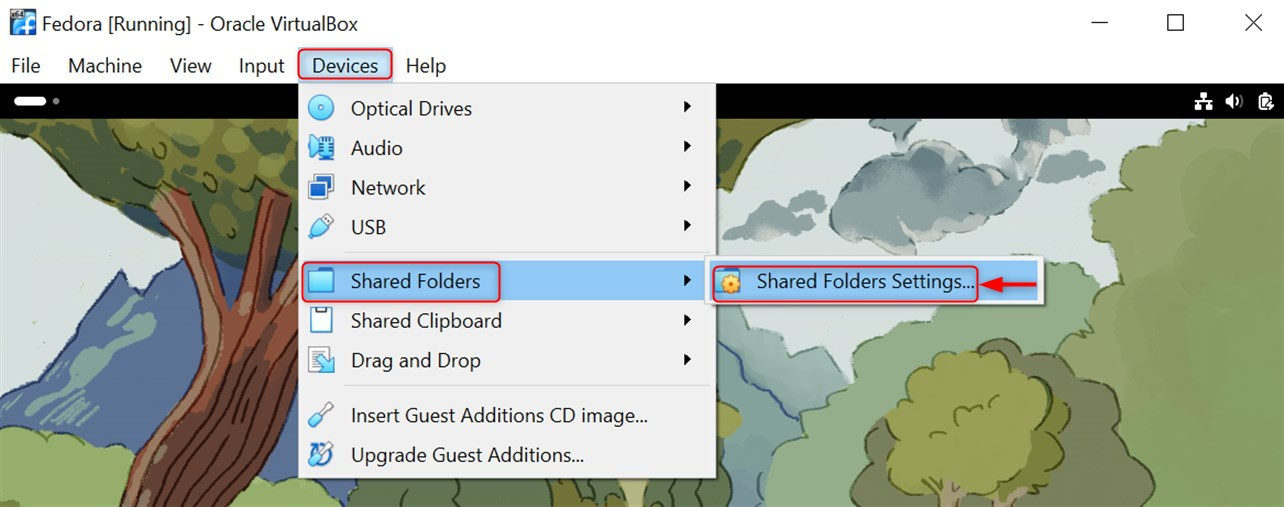
Configure Shared Folders
With the successful installation of Fedora in VirtualBox, you can learn Linux, test software, or delve into open-source development.
The features of Fedora, paired with the virtualization options offered by VBox, make it easy for both new and experienced users to polish their Linux skills on a single, versatile platform. Working in a virtualized environment lets you freely experiment with the newest features of Fedora without the risk of impacting your primary operating system.
Don’t forget to use sudo dnf update to keep your virtual machine up to date and check on Fedora’s software repositories. Don’t miss out on Fedora’s one-of-a-kind features, including its newest desktop interface, a number of apps, and powerful developer tools.
Set up Fedora effortlessly on a powerful Virtual Machine with UltaHost’s cheapest VM Hosting plans. Enjoy blazing-fast SSD NVMe storage, seamless Windows or Linux deployment, and scalable performance to match your growing needs. Backed by robust DDoS protection and enterprise-grade reliability, our hosting ensures your virtual environment runs smoothly, whether you’re testing, developing, or managing services.
Fedora’s minimum system requirements state that the minimum amount of RAM is 2GB. This number increases to 4GB for optimal performance. If the host system RAM is greater than 16GB, then it is safe to allocate 6-8GB to the VM. However, never go beyond 50% of the host system’s total RAM, as that will create performance issues.
Of course, it’s possible, but because of system restrictions, there are some trade-offs. With just 4GB of RAM on your system, it is feasible to set aside 2GB of RAM for the Fedora VM. Please note that this setup will be quite sluggish, especially if you have multiple applications running at the same time. To improve performance on the VM, try to close all unused applications on your host system. To further improve performance, try upgrading the RAM on your host system to 8GB or higher.
The following issues can lead to poor performance of the VM: Not enough allocated RAM or CPU cores (minimum of 4GB RAM and two CPU cores). Ensure that you have installed VirtualBox Guest Additions, as it greatly improves overall performance and compatibility with other installed programs. Free up system resources and close background applications, especially resource-hungry ones like browsers.
NAT (Network Address Translation) is the default networking mode that permits your VM to use the internet via your host’s connection. From a security standpoint, this is advantageous because the VM sits behind your host’s IP address. With bridged networking, your VM is on the local network and has its IP address. Thus, it can communicate with other devices on the network without any restrictions.
Resizing your virtual hard disk is possible; however, it involves several processes. To begin, completely power off the VM. In VirtualBox, navigate to File > Virtual Media Manager, select your VM’s disk, and increase the size using the resize tool. Adding increased disk space will require file system expansion, which can be done through GParted or command-line tools like fdisk and resize2fs. Attempting to resize is always easier than allocating sufficient space to begin with, so try 30 GB or more.
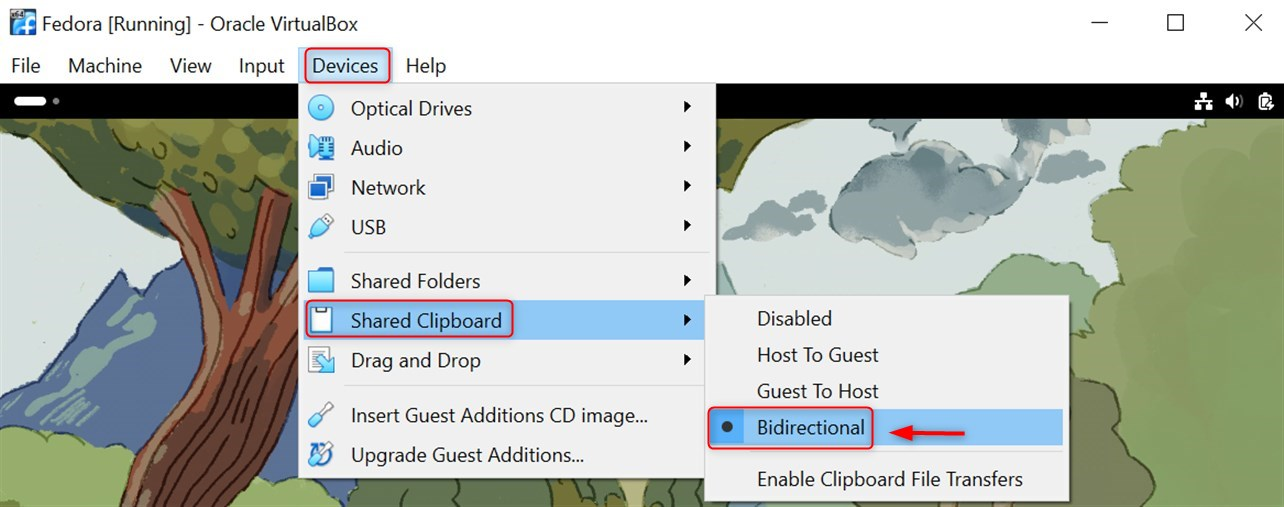
If you want bidirectional copy-paste functionality, you need to install VirtualBox Guest Additions on your Fedora VM. After installation is done, go to your VM settings in VirtualBox, and under General > Advanced, set “Shared Clipboard” to “Bidirectional.” With this, you can copy text, files, and other information from the host operating system to the Fedora virtual machine and the other way around without any hassle.
Fedora Workstation is recommended for most users since it has a fully functional desktop environment and is tailored for laptop and desktop usage. It has a GUI which makes it fitting for Linux beginners, for development activities, and everyday computing.
Experience Ultahost’s Cloudflare VPS Hosting!
UltaHost’s managed VPS Cloudflare delivers fast, secure, and reliable performance. The Cloudflare CDN enhances website speed, blocks threats, and ensures seamless traffic distribution.