
Explore the uniq Command in Linux with Exampl...
The uniq command in Linux is used to remove duplicate l...


Rsync, which stands for “remote sync,” is a powerful and versatile command for synchronizing and transferring files and directories between systems. It is widely used for its ability to efficiently copy and synchronize data, making it an essential tool for system administrators and users alike.
In this article, we will explore the various uses of the rsync command in Linux, along with multiple examples and different options.
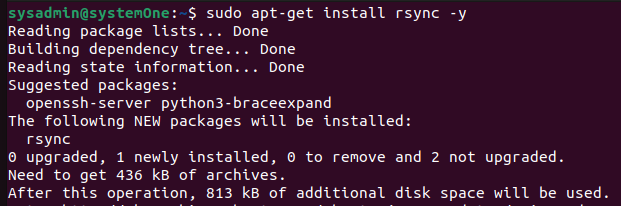
Rsync is pre-installed on most Linux distributions, including Debian, Ubuntu, and CentOS. But what to do if it’s not installed on your computer? You can install it using:
For Debian/Ubuntu:
$ sudo apt-get install rsync -y
For Fedora, CentOS and AlmaLinux:
$ sudo dnf install rsync
Using the rsync Linux command can be very tricky. Its basic syntax is as follows:
rsync [options] source destination
Here:
– `source`: Specifies the source file(s) or directory.
– `destination`: Specifies the destination directory.
We will explore the options through the following usage examples.
Let’s start by exploring a couple of scenarios that help illustrate the usage of rsync Linux command with examples.
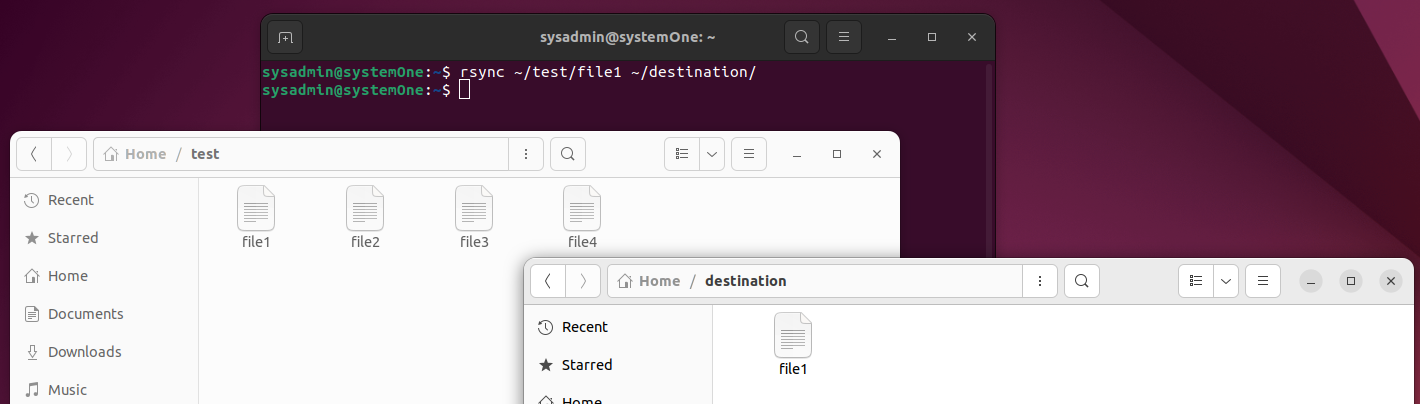
To copy a single file from one location to another, use the following command:
$ rsync /path/to/source/file /path/to/destination/
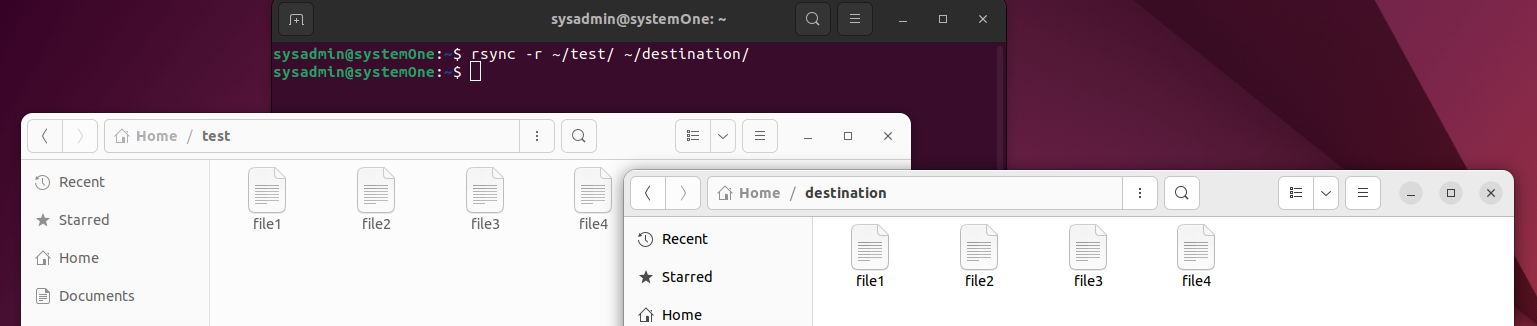
To copy an entire directory and its contents, use the `-r` (or `–recursive`) option:
rsync -r /path/to/source/directory /path/to/destination/
So, I’m going to continue the last example and copy the test directory into the destination.
$ rsync -r ~/test/ ~/destination/
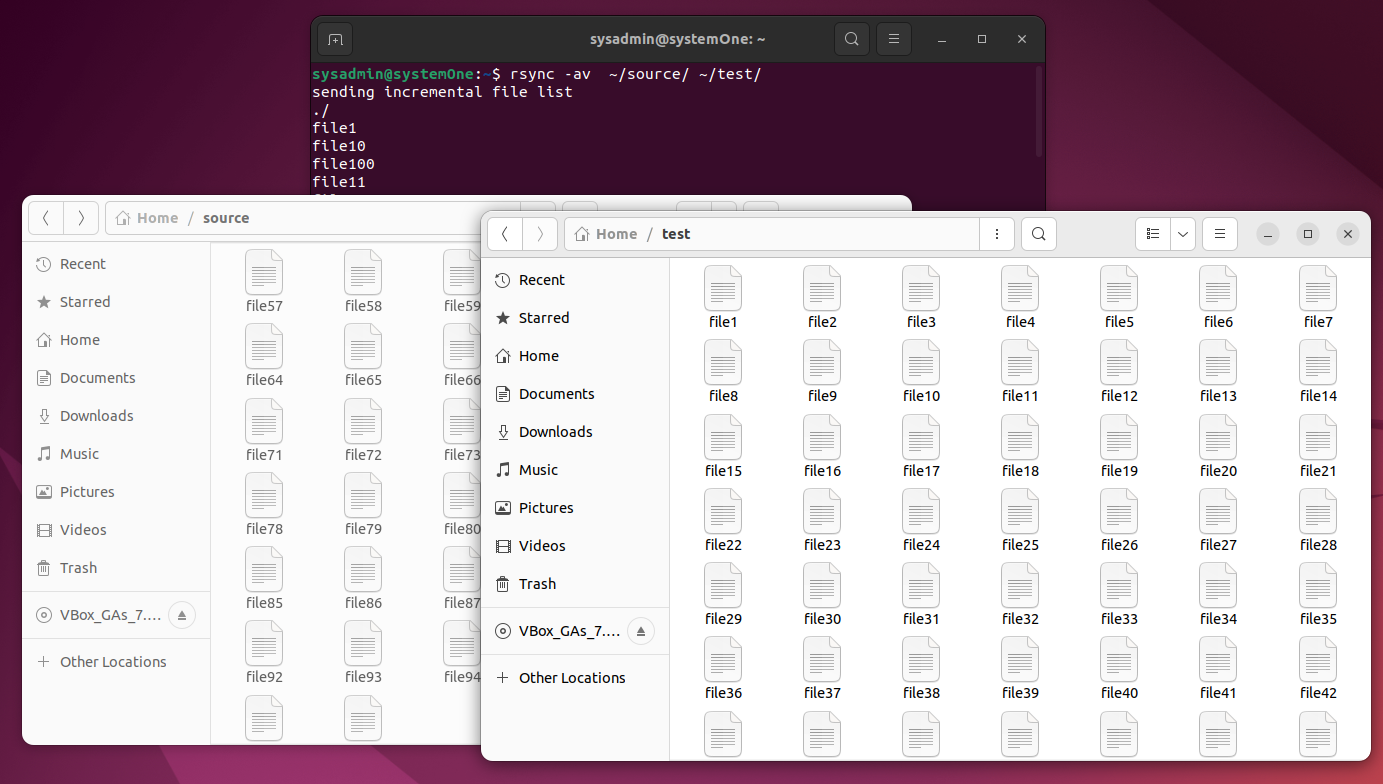
You can use the `-v` (or `–verbose`) option to display detailed information about the files being transferred:
$ rsync -av /path/to/source/directory /path/to/destination/
For this example, let’s pick files from the source directory and put them in the test directory.
$ rsync -av ~/source/ ~/test/
The `-n` (or `–dry-run`) option can be used to perform a trial run without making any changes:
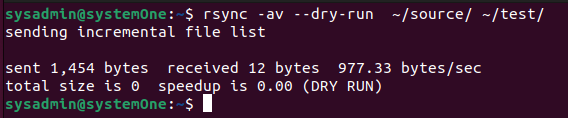
This will come in handy when sending a large number of files to another host. You can use the following syntax
$ rsync -av --dry-run /path/to/source/ user@remote_host:/path/to/destination/
Unlock seamless performance with a Ubuntu Virtual Private Server (VPS)
Step into a heightened realm of reliability and flexibility by choosing Ubuntu VPS for a resilient and tailored hosting solution.
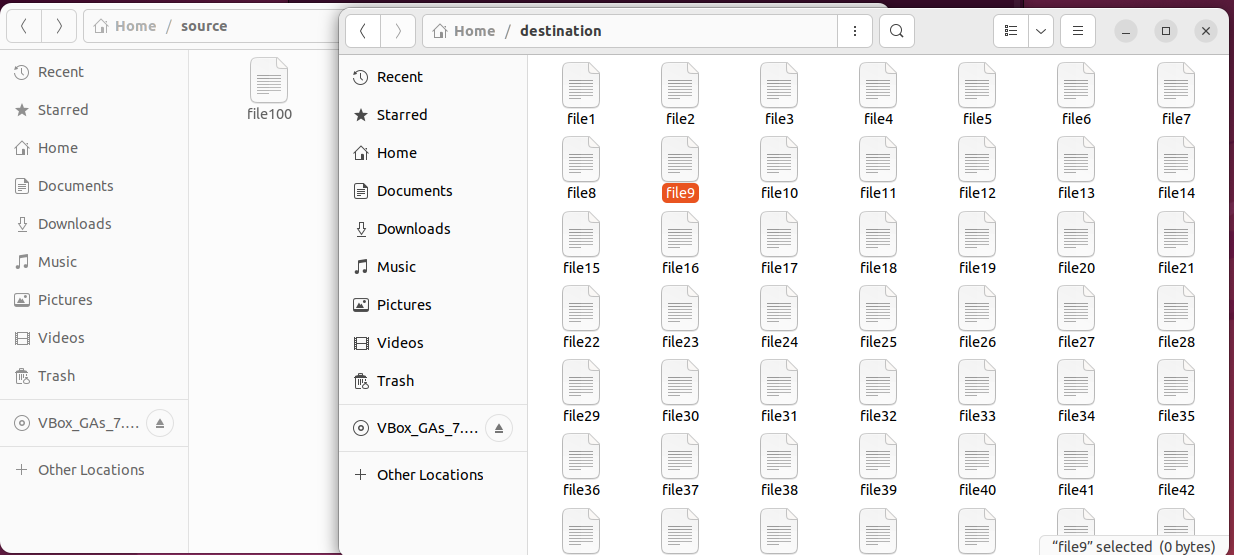
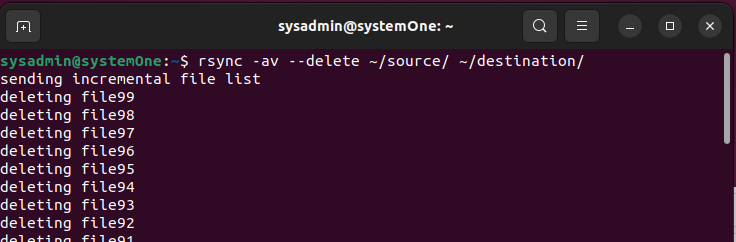
The `–delete` option removes any files from the destination that are not present in the source. So here we have the source with single file titled “file100” and the destination has all 100 files.
Let’s use the following:
$ rsync -av --delete ~/source/ ~/destination/
Similarly, if you want to perform it with a remote host, here is the syntax.
$ rsync -av --delete /path/to/source/ user@remote_host:/path/to/destination/
You can also use the rsync command to share files between systems over SSH.
To copy a file from the local system to a remote system, use the following syntax:
$ rsync /path/to/local/file user@remote_host:/path/to/destination/
Let’s set up the scene. We have two hosts “systemOne” and “systemTwo”. I will send file from one to the other.
$ rsync ~/source/file100 admin@systemTwo:~/destination
To copy a file from a remote system to the local system, use this command:
$ rsync user@remote_host:/path/to/remote/file /path/to/destination/
You can limit the bandwidth used by rsync with the `–bwlimit` option:
$ rsync -av --bwlimit=1000 /path/to/source/ user@remote_host:/path/to/destination/
Rsync is a versatile and efficient tool for file synchronization and transfer in Linux. Its ability to work both locally and over a network, along with its numerous options, makes it an essential utility for managing data. By mastering the rsync command and its various options, users can effectively manage their file synchronization needs reliably and flexibly.
In conclusion, rsync is a powerful utility that offers a wide range of options for file synchronization and transfer in Linux. By understanding its basic syntax and various options, users can effectively manage their data transfer needs with efficiency and precision.
Whether you are a system administrator or a regular Linux user, mastering the rsync command can greatly enhance your ability to manage and transfer files across different systems. With its flexibility and robust feature set, rsync remains a fundamental tool for data synchronization in the Linux environment.
Thank you for choosing Ultahost! Your confidence means a lot to us. Explore our reliable VPS hosting solutions at Ultahost, where innovation meets dependability. Enhance your online presence with us, as your success is our foremost priority!
rsync is a command-line utility in Unix and Linux systems used for efficiently copying and synchronizing files and directories between two locations. It is often used for backup and mirroring purposes.
rsync works by only copying the parts of files that have changed since the last synchronization, reducing the amount of data transferred over the network. It achieves this by using a combination of checksums and a delta-transfer algorithm.
By default, rsync preserves the permissions of files and directories during the synchronization process. The -a (or --archive) option, which includes -rlptgoD, ensures the preservation of permissions.
Yes, rsync is commonly used for incremental backups. By only copying the changes in files, it minimizes the amount of data transferred and storage space required.

The uniq command in Linux is used to remove duplicate l...
The shutdown command is a powerful tool in the Linux op...
The Linux cut command is a powerful utility that allows...
Environment variables are useful when working with scri...
Linux is a powerful operating system that offers a mult...
Linux system administration needs to have efficient man...