
How to Install MATLAB on Ubuntu
MATLAB, short for Matrix Laboratory, is a powerful soft...


NVM (Node Version Manager) is a command-line tool for installation and managing multiple versions of Node.js on a given system. NVM makes it easier to switch between Node.js versions without impacting system-wide settings, which is useful for developers working on projects requiring different versions of Node.js.
Most Ubuntu users install Node.js using the system package manager. However, this generally leads to far less flexibility or even installing very outdated versions. NVM allows users to install the most up to date version or a specific version directly from the source.
This guide will show you how to install NVM in Ubuntu via the terminal. We will cover prerequisites, installation steps, how to use the version management commands, and finally its features.
Node Version Manager (NVM) is a small script that allows you to control which version of Node.js runs on your operating system. It runs as a command line tool that allows you to change your environment without messing up global packages or the entire system.
NVM is unlike other package managers where a specific version of Node.js is installed. In NVM, you can now switch between versions in seconds. This flexibility is helpful when using specific versions of Node.js that differ per project. You will have the flexibility to remove, upgrade, install and use versions with a few commands, without impacting other versions installed.
This is useful for developers that want flexibility, especially when testing or debugging applications, and deploying JavaScript applications for production. NVM is especially viable when multiple projects managed or codebases are maintained that require legacy versions. NVM offers the opportunity that allows matching each project requirements without deterring any other projects created.
Installing Node Version Manager (NVM) on Ubuntu will allow you to easily manage and switch between multiple versions of Node.js. Below is a full installation guide for installing NVM on Ubuntu.
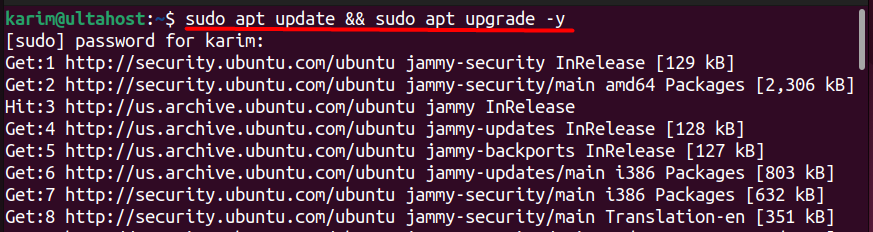
To start, make sure all of your system packages are current:
sudo apt update && sudo apt upgrade -y
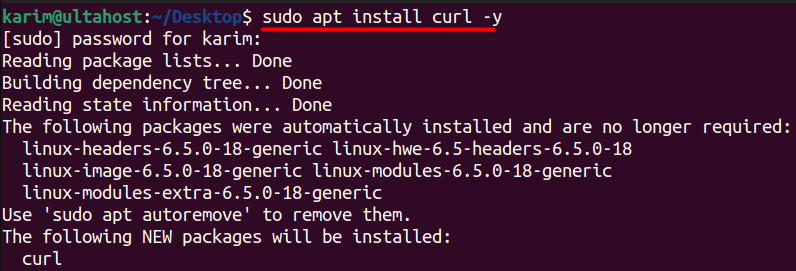
There are two recommended methods for downloading the official NVM installation script: curl or wget. Use one of the following commands, depending on what you already have installed on your system:
sudo apt install curl -y
Now run the below script to download and nvm install ubuntu:
curl -o- https://raw.githubusercontent.com/nvm-sh/nvm/v0.40.3/install.sh | bash

The above commands are downloading the script from the official NVM GitHub repository and running the script in your shell. The script installs the latest stable NVM (v0.40.3 as of the writing of this guide).
Install NVM Efficiently with our Ubuntu VPS!
Install NVM effortlessly with Ultahost’s reliable Ubuntu VPS hosting. Enjoy quick setup, seamless performance, and expert support for all your development projects!
After NVM is installed and properly sourced, make sure to test that the command works:
nvm --version

If correctly installed, this should return the version number, such as:
0.40.3
If you see “command not found”, then make sure you sourced the appropriate shell configuration file.
NVM allows you to install any version of Node.js without changing system files. This is extremely helpful when you use different versions of Node.js in multiple environments.
You may need to know about How To Install Node.js on Ubuntu 22.04.
To install the latest Node.js version, use the following commands:
nvm install node
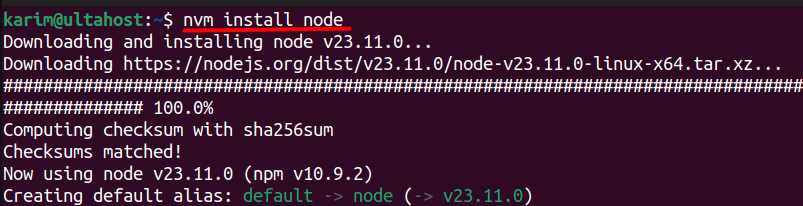
This command installs the latest stable version. Once the installation is completed, you can verify it using the following command:
node -v

To install the latest LTS (Long-Term Support) version, you can use:
nvm install --lts
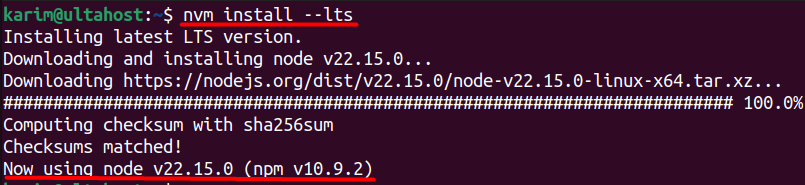
This is usually better for production environments.
Soon after downloading NVM and installing it onto your machine, familiarizing yourself with the most common commands will greatly improve your workflow. These commands allow for easy installation, swapping, and management of Node.js versions. Below are some of the more commonly used commands you’ll find yourself using all the time.
To view all Node.js versions installed via NVM, run:
nvm ls
This command will show which versions of Node.js are installed locally along with an arrow indicating which version is currently in use. To check about the versions of Node.js learn also How To Install Node.js and Check Node.js Version.
To see all versions available for installation:
nvm ls-remote
This will print every official release of Node.js in order from most recent to oldest, making it tremendously easier to find the version your project requires.
If you have multiple Node.js versions installed, switch by using:
nvm use <version>
Replace <version> with a specific version number, such as nvm use 18.17.1.
To remove a version you no longer use:
nvm uninstall <version>
This keeps your setup clean by freeing up unnecessary space.
Create simple version shortcuts using aliases:
nvm alias default 18.17.1
This will set Node.js version 18.17.1 automatically as the default every time you start a new terminal window.
If you are finished using Node Version Manager on your system, and you want to uninstall it altogether, you can complete this in just a few steps. Uninstalling NVM means that you will be deleting the files, and any configuration entries to your shell profile.
NVM stores its files inside a hidden file called .nvm in your home folder. To delete it, you can do this with one command:
rm -rf ~/.nvm

This would delete the NVM installation completely including all Node.js version installed and managed by NVM.
The Node Version Manager (NVM) provides several tangible advantages for individuals developing on Ubuntu using Node.js. It allows for easier version control, helps avoid conflicts and ultimately improves your workflow. In the following sub-sections are the main reasons NVM is a better choice than traditional methods of installing Node.js.
NVM allows you to install and manage multiple Node.js versions on the same machine. This is very useful if you are working on two projects that require different Node.js versions. Switching versions is just one command and does not affect the other project.
NVM installs Node.js into the user directory and doesn’t touch system files at all (not needing root permission). Thus, it is safer than using apt or snap, especially in a shared environment, or if you don’t want to affect other apps already using Node.js.
Read also How to Setup Next JS in Node JS.
If you are upgrading Node.js to the latest stable, or LTS, version, it is easy to do with NVM, as you don’t have to remove the old version manually. NVM will handle both the installation and code switching cleanly.
NVM allows you to set a default Node.js version that will be loaded every time you open the terminal. This works well to make sure all your projects and scripts are using the same version of Node.js, without having to remember to switch manually.
NVM only installs what you need, and you can easily uninstall versions to regain space. Therefore managing the system is easier and prevents wasted clutter.
Node Version Manager (NVM) is essential for developers who work with Node.js in a fast-paced world. With traditional installations, you are always going to be tied to just one Nodejs version, but NVM gives developers complete flexibility by allowing any number of versions to run on the same Ubuntu machine. This can be incredibly useful if you are managing multiple projects, or preserving applications that rely on older versions. The best part is that NVM allows you to install, switch and remove Node.js versions easily without requiring administrative permissions or affecting your overall system configuration.
This article covered a lot, from install NVM linux and things to help manage with NVM (including troubleshooting and removal). But we also highlighted the key elements that makes NVM demonstrably superior— ease of updates, no system-wide change, and easy version control.
Installing the Node Version Manager on Ubuntu provides a way to manage Node versions. You can upgrade to an Ultahost Linux VPS hosting plan for complex server environments, giving you enhanced control and advanced real time server.
NVM is used to install, manage, and switch between multiple versions of Node.js on a single system. It works through the command line and avoids system-wide changes.
Run the command nvm –version. If installed correctly, it will display the current NVM version.
Yes, run nvm install node to install the latest stable version. Use nvm install –lts for the latest long-term support release.
To prevent conflicts, it’s recommended that you remove system-installed Node.js. NVM manages Node.js versions independently in your user directory.
NVM stores all files in the ~/.nvm directory. Each version is kept in a separate folder inside this directory.
Use nvm alias default <version> to set your preferred default version. This version will auto-load in new terminal sessions.
Delete the .nvm directory using rm -rf ~/.nvm and remove related lines from your shell config file. Then reload the shell using source ~/.bashrc or source ~/.zshrc.