How to Install Swift on Ubuntu
Swift is a powerful, modern programming language develo...
TeamViewer is a popular remote desktop software that enables users to access and control another computer remotely. It is widely used for online meetings, remote support, and computer file transfer. With TeamViewer, users can access their office computer from home, provide technical support to clients, or collaborate with team members remotely. The software is available for various operating systems, including Windows, macOS, and Linux.
For Ubuntu users, TeamViewer can be a game-changer. It allows them to access their Ubuntu machine from anywhere, making it easier to work remotely or provide technical support to others. Additionally, TeamViewer provides a secure and reliable connection, ensuring that data is protected during remote sessions.
In this article, we will guide you through the process to install TeamViewer Ubuntu, so you can start enjoying the benefits of remote access and control.
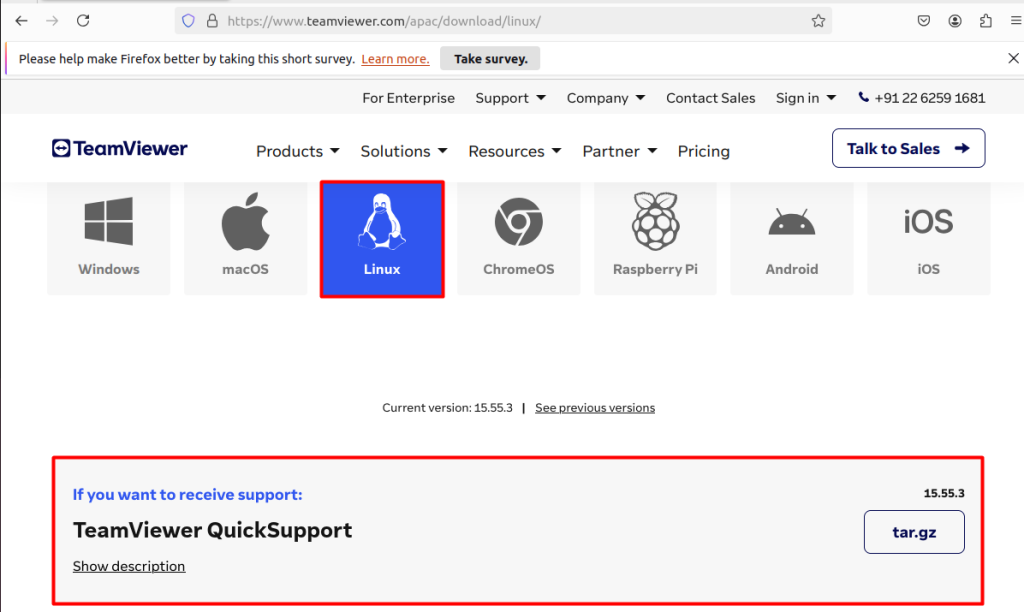
To install TeamViewer on Ubuntu, you can download the package from the official TeamViewer website. Open a web browser and navigate to the TeamViewer download page. Click on the “Download” button to download the TeamViewer package for Linux. The package will be in the form of a .tar.gz file.

Once the download is complete, extract the package using the tar command. Open a terminal and navigate to the directory where you saved the package. Use the following command to extract the package:
tar -xvf teamviewer_qs.tar.gz

The tar command extracts the contents of the .tar.gz file. The -x option tells tar to extract the contents, and the -v option tells tar to display the extraction process. The -f option specifies the file to extract.
Install TeamViewer on Our Ubuntu Server!
Upgrading to an Ultahost best Ubuntu VPS server. This pre-configured environment can help you to install, automate, and streamline your workflow.
After extracting the package, navigate to the extracted directory using the cd command:
cd teamviewerqs/

Inside the extracted directory, you will find the TeamViewer executable file. Run the following command to start the installation:
./teamviewer

This will launch the TeamViewer installation process.
Follow the installation prompts to complete the installation process. You may be asked to accept the license agreement:

Once the installation is complete, you can launch TeamViewer by searching for it in the Ubuntu dash or by running the TeamViewer command again:

Alternatively, you can also download and install TeamViewer using the wget command. This method allows you to download the TeamViewer package directly from the official website and install it on your Ubuntu system.
To download the TeamViewer package using wget, run the following command:
wget https://download.teamviewer.com/download/linux/teamviewer_amd64.deb

This command will download the TeamViewer package in the form of a .deb file.
Once the download is complete, you can install the TeamViewer package using the dpkg command:
sudo dpkg -i teamviewer_amd64.deb

This command will install the TeamViewer package on your Ubuntu system.
After installing the TeamViewer package, you may need to install additional dependencies to ensure that TeamViewer works properly. You can install the dependencies using the following command:
sudo apt install -f

This command will install any missing dependencies required by TeamViewer.
Once the installation is complete, you can launch TeamViewer by searching for it in the Ubuntu teamviewer cdash or by running the command.
This method is an alternative to the first method, and both methods are official and supported by TeamViewer.
Learn about How to Install TeamViewer on Windows.
TeamViewer offers several benefits to users, including:
TeamViewer offers several features that make it a powerful remote desktop software, including:
TeamViewer takes security seriously and provides several features to ensure the security and integrity of your remote connections. Here are some security features provided by TeamViewer:
In this article, we have covered two methods for TeamViewer Ubuntu install by using the .tar.gz file and the .deb file. Both methods are official and supported by TeamViewer, and they provide a convenient way to install the software on your Ubuntu system. The first method involves downloading the .tar.gz file from the official TeamViewer website, extracting .tar.gz files in Linux, and then running the installation script. This method allows you to install TeamViewer manually and provides more control over the installation process.
The second method involves downloading the .deb file using the wget command and then installing it using the dpkg command. This method is faster and more convenient than the first method, as it allows you to download and install TeamViewer directly from the official website. Both methods are easy to follow and require minimal technical expertise. By following these methods, you can easily download TeamViewer Ubuntu system and start using it to remotely access and control other computers.
Ultimately, the best web server for you depends on your unique project requirements. Rent a VPS server reliable to you with scalability that adapts your resources to meet your growing needs. Explore Ultahost VPS plans and find the perfect fit.
TeamViewer is a remote access and remote control software that allows you to connect to another computer over the internet. It’s useful for remote support, desktop sharing, and online meetings.
Yes, TeamViewer offers a version that is compatible with Ubuntu and other Linux distributions.
You can start TeamViewer from the terminal by running:
teamviewer
Alternatively, you can find it in your application menu.
After starting TeamViewer, follow the on-screen instructions to complete the initial setup, which usually involves accepting the license agreement and setting up your TeamViewer account if necessary.
Yes, TeamViewer provides a GUI for managing remote connections. You can access it from the application menu or by running the teamviewer command in the terminal.