TeamSpeak is a highly robust voice communication software that has gained significant popularity, particularly within the gaming community. Its primary objective is to facilitate real-time communication over the internet, enabling users to effectively coordinate strategies, engage in gameplay discussions, and foster communities.
The software functions on a client-server architecture, wherein users connect to a central server to interact with one another. This server acts as a central hub, enabling multiple users to engage in voice communication simultaneously. This architecture ensures minimal delays, superior audio quality, and efficient utilization of bandwidth.
TeamSpeak offers a wide array of features designed to enhance the communication experience. Notably, it boasts exceptional voice clarity, delivering clear and crisp audio for seamless communication. The software incorporates advanced echo cancellation and noise reduction capabilities, which contribute to an overall improvement in sound quality.
Benefits of TeamSpeak Server
Creating a TeamSpeak server on the Windows Server platform brings numerous benefits that enhance the overall performance and user experience. Here are some key advantages:
Stability and Reliability: Windows Server is known for its stability and reliability, providing a dependable platform for hosting your TeamSpeak server. It is designed to handle demanding workloads, ensuring uninterrupted service and minimizing downtime.
Scalability: Windows Server offers excellent scalability options, allowing you to accommodate a growing user base or expanding community. You can easily scale up your TeamSpeak server’s capacity to handle increased demand and maintain optimal performance.
Active Directory Integration: Windows Server seamlessly integrates with Active Directory, simplifying user management. By syncing your TeamSpeak server with Active Directory, you can centrally manage user accounts, authentication, and access control, streamlining administration.
Enhanced Security: Windows Server provides robust security features to protect your TeamSpeak server and user data. It includes built-in firewall capabilities, advanced access control mechanisms, and the ability to enforce security policies, ensuring the server remains secure against unauthorized access.
Management Tools: Windows Server offers a variety of management tools and utilities for easy administration and maintenance of your TeamSpeak server. These tools provide a user-friendly interface to configure server settings, manage user permissions, and customize the server according to your needs.
Compatibility: Windows Server is compatible with a wide range of software and applications, simplifying integration with other systems or services. Whether you need to connect your server to a web interface, database, or other applications, Windows Server ensures seamless compatibility and support.
Community Support: Windows Server has a large user community, providing access to extensive online resources, forums, and communities for support and troubleshooting. You can rely on the active community to find guidance, tips, and solutions to any issues you may encounter.
Setting up TeamSpeak Server
Creating a TeamSpeak server on Windows Server involves several steps. Here’s a step-by-step guide to help you set it up:
Ensure that you have a Windows Server installed and configured on your system, meeting the minimum system requirements.
Download the latest version of the TeamSpeak server software from the official TeamSpeak website (https://www.teamspeak.com/).
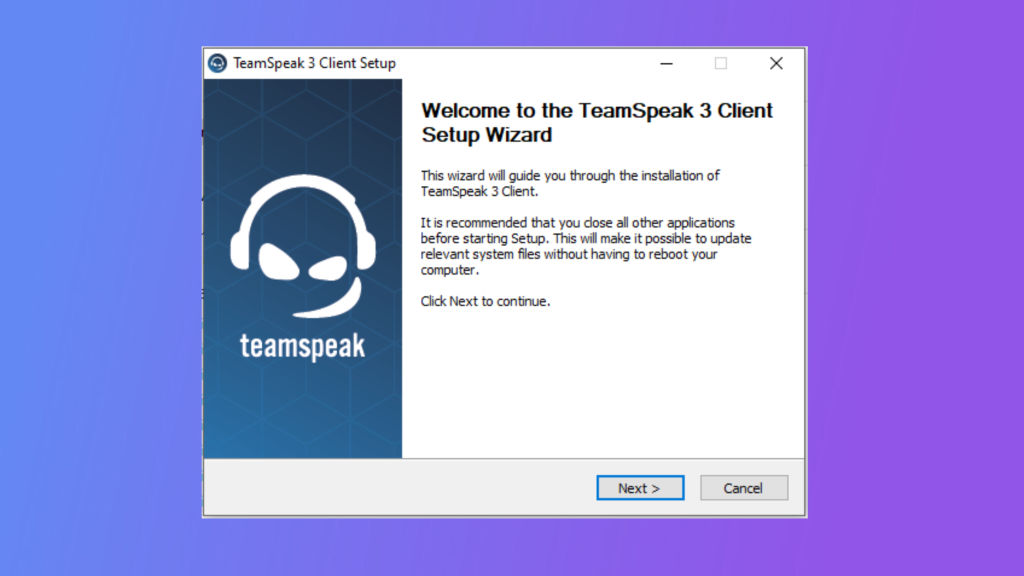
Once the download is complete, locate the downloaded installation file and run it.
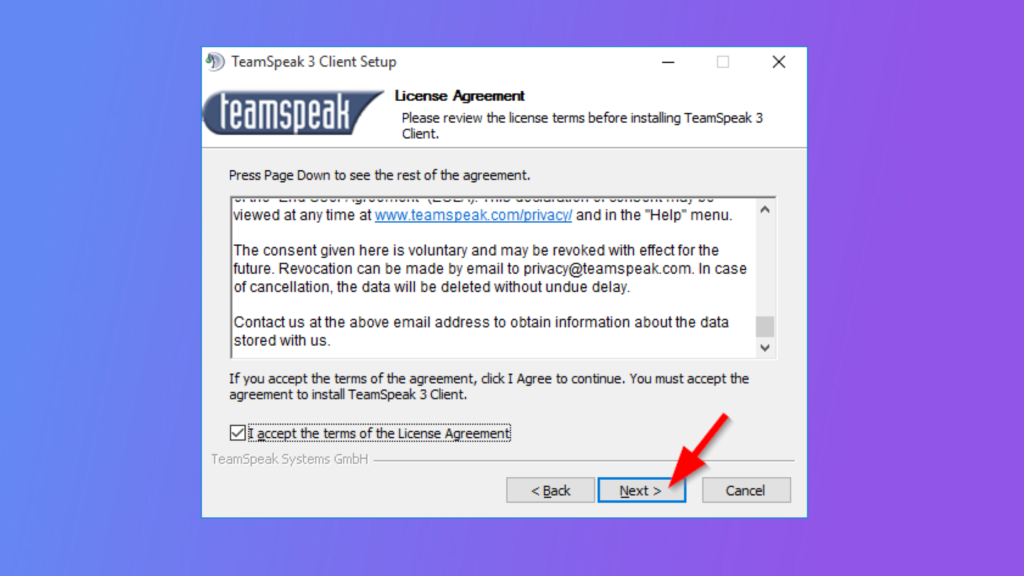
Follow the on-screen instructions to install the TeamSpeak server software. Choose the installation directory and agree to the license terms when prompted.
During the installation process, you will be asked to create an administrator privilege key. Make sure to securely save this key as it will be necessary to gain administrative access to your TeamSpeak server.
After the installation is complete, launch the TeamSpeak server software.
In the TeamSpeak server console, you will see important information such as the server’s unique identifier (ServerID) and the server query admin account credentials. Take note of this information for future reference.
Configure the Server Settings:
Choose a server name that is descriptive and recognizable.
Set a server password to restrict access to authorized users.
Adjust other server preferences such as maximum clients, voice quality, and bandwidth usage based on your requirements.
Create User Groups And Assign Permissions:
Create server groups based on user roles or permissions required.
Assign administrative privileges to the appropriate server group(s).
Customize and assign permissions to user groups, granting access to specific features and functionalities.
Configure Channels And Subchannels:
Create main channels to provide structure for conversations.
Set channel names and determine their visibility (public or password-protected).
Create subchannels within main channels for further organization.
Set permissions for channels and subchannels to control user access and interaction.
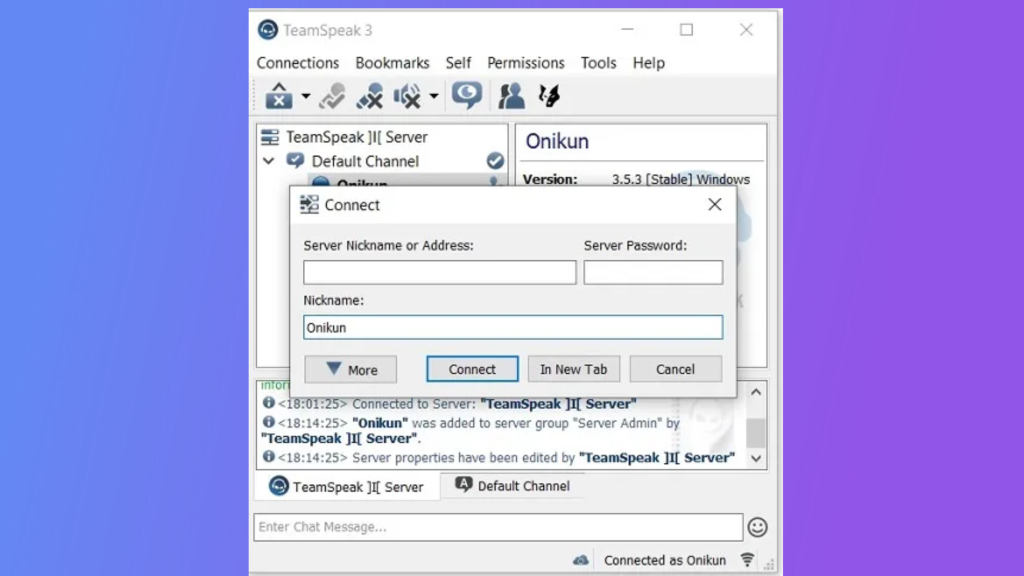
Once you have completed the necessary configurations, you can share the server’s IP address and port number with your intended users. They can connect to the TeamSpeak server using the TeamSpeak client software, which is available for various platforms.
Remember to regularly update and maintain your TeamSpeak server software to ensure stability, security, and access to the latest features.
By following these steps, you can successfully create and configure a TeamSpeak server on Windows Server, providing a reliable and efficient voice communication platform for your community or organization.
Customizing TeamSpeak Server
Installing and configuring plugins in TeamSpeak allows you to enhance the functionality and customize your server according to your specific needs. Here’s a step-by-step guide:
Research and identify plugins: Explore the available plugins on the TeamSpeak website or trusted sources to find those that suit your requirements. Consider features like server management, moderation, security, or additional functionality.
Download plugins: Once you have identified the desired plugins, download them from reliable sources. Make sure to download the compatible version for your TeamSpeak server.
Install plugins: Locate the installation files for the downloaded plugins and follow the instructions provided by the plugin developer to install them. This typically involves placing the plugin files in the appropriate TeamSpeak server directory.
Launch TeamSpeak server and access Plugin Manager: Start the TeamSpeak server and open the server administration interface or the ServerQuery interface. Navigate to the Plugin Manager section, usually accessible from the server administration tools.
Enable plugins: In the Plugin Manager, enable the installed plugins by toggling the corresponding settings. Ensure that the plugins are activated and loaded successfully.
Configure plugin settings: Once the plugins are enabled, configure their settings according to your preferences. This may involve specifying permissions, adjusting behavior, or customizing options provided by each plugin. Refer to the plugin documentation or instructions for detailed configuration steps.
Test functionality: After configuring the plugins, test their functionality to ensure they are working as expected. Join the server, interact with the plugins’ features, and verify that they enhance the desired aspects of your TeamSpeak server.
Conclusion
In conclusion, creating a TeamSpeak server on Windows Server provides a powerful and customizable platform for real-time voice communication. By following the steps outlined in this guide, you can set up a stable and secure server environment that meets the needs of your community or organization.