
How to Install Oracle Database on Windows 10
Oracle Database is a highly efficient relational databa...


Installing PrestaShop Windows setup is a straightforward process that allows you to manage your e-commerce store directly from your desktop. PrestaShop, a popular open-source platform, offers robust features to help you create and run an online store with ease. Whether you’re setting up a new business or migrating from another platform, knowing how to install PrestaShop on your Windows system can give you greater control and flexibility.
This guide will walk you through each step of the installation process, from downloading the necessary software to configuring your store settings. By the end, you’ll be ready to start customizing your online store, making it accessible to customers around the world.
Before installing PrestaShop on your Windows system, you’ll need to ensure that your environment meets the necessary requirements. In this section, we’ll outline the essential prerequisites to get started.
To run the PrestaShop Windows server on your system, you’ll need a local web server environment. XAMPP is a popular, free, and open-source solution that provides a comprehensive suite of tools to create a local web server. XAMPP stands for:
XAMPP provides a user-friendly interface to manage your local web server, making it easy to install, configure, and run web applications like PrestaShop.
In addition to XAMPP, your Windows system should meet the following requirements:
After installing XAMPP on Windows, we can enable Apache, PHP, and MySQL directly from this application.
To ensure a smooth installation process, you’ll also need:
By meeting these prerequisites, you’ll be well-prepared to install PrestaShop on your Windows system using XAMPP. In the next section, we’ll walk you through the step-by-step installation process.
Now that you’ve met the prerequisites, you’re ready to download and install PrestaShop on your Windows system.
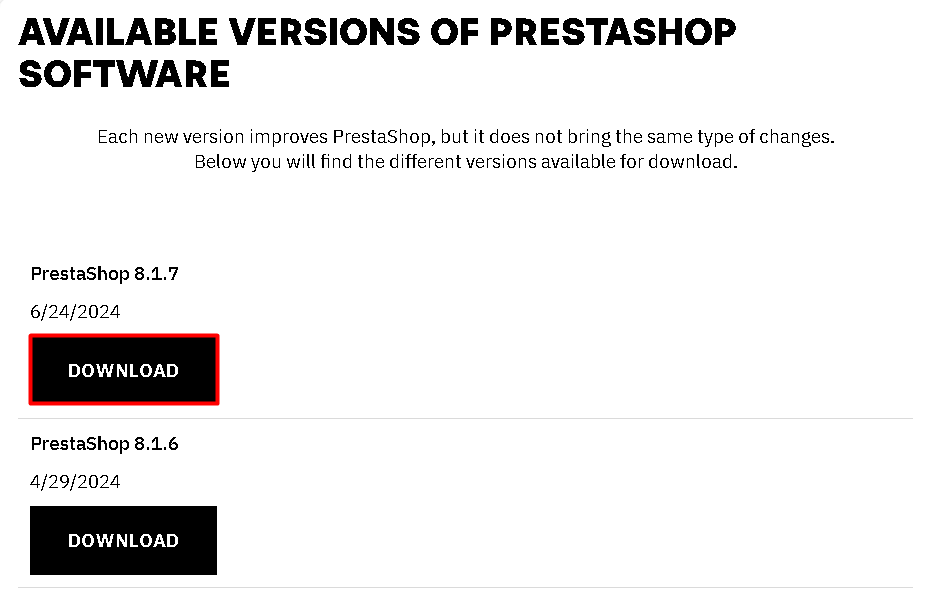
First, you need to download the Zip file of PrestaShop from its official website:
After downloading the PrestaShop zip file, you need to extract its contents to the htdocs directory of your XAMPP installation. But what is htdocs, and why is it necessary to extract the files here?
The htdocs is a directory in your XAMPP installation where you store your website files. It’s a shortened form of “hypertext documents” and is the default directory for serving web content. When you access http://localhost in your web browser, XAMPP looks for files in the htdocs directory to display.
Extracting the PrestaShop files to the htdocs directory allows XAMPP to serve the files as a website. This is necessary because PrestaShop is a web application that requires a web server to function. By placing the files in htdocs, you’re telling XAMPP to serve the PrestaShop application when you access http://localhost/prestashop in your web browser.
To extract the PrestaShop files to htdocs, follow these steps:
prestashop_edition_basic_version_8.1.7.zip file.C:\xampp\htdocs or C:\xampp\htdocs\prestashop).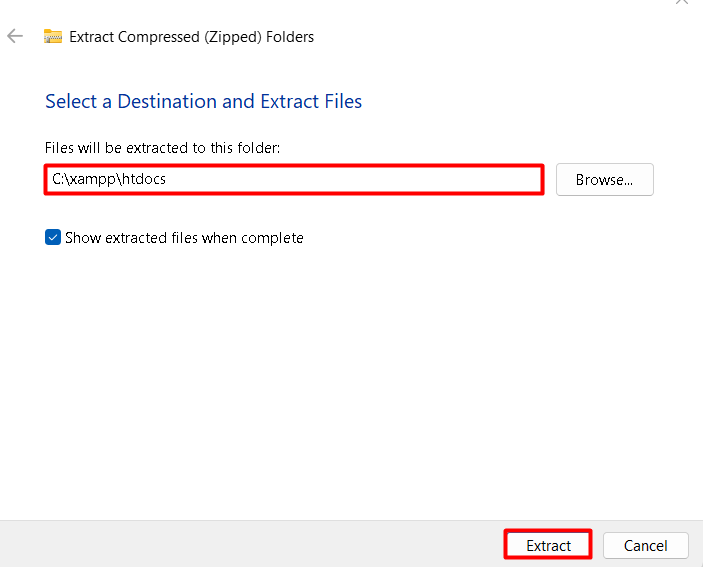
Wait for the extraction process to complete. Once finished, you’ll see a Prestashop directory inside htdocs containing all the necessary files for your PrestaShop Windows installation.
Explore the Blazing Fast Speed of Windows Server!
Hosting a Windows VPS with Ultahost is now easier and faster than ever. Experience lightning-fast SSD NVMe speeds with no interruptions or slowdowns.
Creating a database is a crucial step in the PrestaShop installation process. A database is necessary to store all the data related to your online store, including products, customers, orders, and settings. PrestaShop uses a database to manage and retrieve this data, making it essential to create a database before proceeding with the installation.
To create a database for PrestaShop, you can use the phpMyAdmin tool, which is included in the XAMPP package. Here’s how to create a database using phpMyAdmin:
http://localhost/phpmyadmin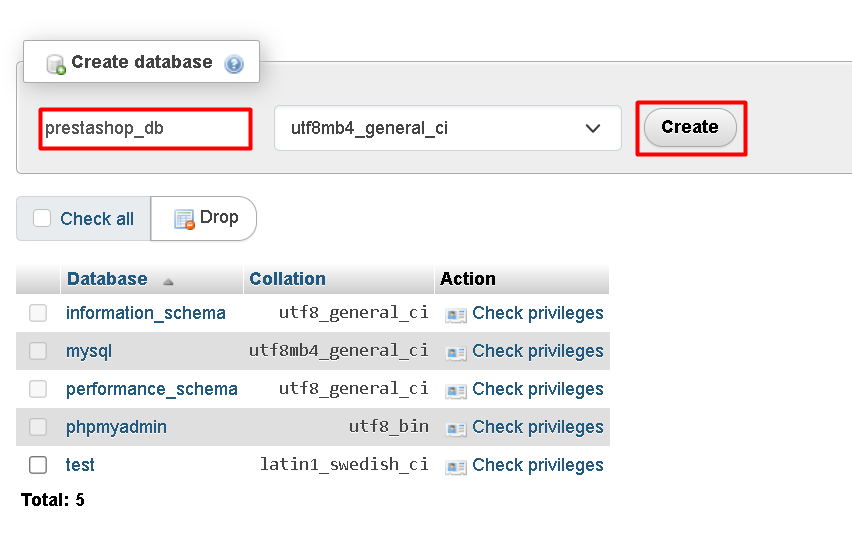
Now that you have created a database, you can proceed with installing PrestaShop. To do this, follow these steps:
Open a web browser and navigate to the URL: http://localhost/yourstorename. Replace yourstorename with the name of the directory where you extracted the PrestaShop files (e.g., prestashop)

Next, you will see the PrestaShop installation wizard, which will guide you through the installation process. After that follow the wizard’s instructions to complete the installation process, which includes:

Once you have completed the installation process, you will be redirected to the PrestaShop dashboard, where you can start configuring your online store.
Read also How to Install Java on Windows.
In this guide, we walked you through the step-by-step process of installing PrestaShop on your Windows system using XAMPP. We covered the prerequisites, including downloading and installing XAMPP, and ensuring that your system meets the necessary requirements. We also explained the importance of creating a database for PrestaShop using phpMyAdmin and extracting the PrestaShop files to the htdocs directory.
By following these steps, you have successfully installed PrestaShop on your Windows system. The PrestaShop installation wizard guided you through the installation process, from selecting the language and country to configuring the store settings. With PrestaShop now installed, you can start customizing your online store, managing products, customers, and orders, and taking your e-commerce business to the next level.
After completing these steps, PrestaShop will be successfully installed on your Windows system. To make sure optimal performance and a smooth development process, always follow best practices and keep your software up to date. consider using Ultahost’s best Windows hosting. You get reliable and high-speed hosting tailored to your needs.
To install PrestaShop on a Windows system, you need: