How to Generate Report Using MTR on Windows
MTR (My Traceroute) is a powerful network diagnostic to...
Apache Spark is a powerful, open-source data processing framework that enables fast and efficient analysis of large datasets. It provides a unified engine for distributed data processing, supporting batch processing, real-time streaming, machine learning, and graph processing. Installing Apache Spark on Windows allows developers and data scientists to leverage its capabilities on their local machines, facilitating development, testing, and experimentation.
This guide presents a step-by-step approach to install Spark Windows, covering the necessary prerequisites, downloading and extracting the Spark distribution, setting up environment variables, configuring Spark, and running Spark applications. It also explores integrating Spark with popular IDEs and addresses common issues that may arise during the installation process.
By following this guide, you will gain the ability to harness the power of Apache Spark on your Windows machine, enabling you to process and analyze large datasets efficiently, build machine learning models, and develop data-driven applications.
Apache Spark is a unified analytics engine for large-scale data processing, offering high-level APIs in Java, Python, and Scala. To begin working with Spark on your Windows machine, you need to download and install the appropriate Spark binary package. This section provides a detailed, step-by-step guide to downloading and installing Apache Spark on your Windows operating system.
Prerequisites
Before proceeding with the installation, ensure you have Java Development Kit (JDK) 8 or later installed. Spark relies on Java for execution, so a compatible JDK is essential. You can download the appropriate JDK installer from the Oracle website or adopt an open-source distribution like OpenJDK.
Once install Java on Windows, set the JAVA_HOME environment variable to your JDK installation path and add the JDK’s bin directory to your system’s PATH environment variable. This ensures that your system can locate and execute Java commands required by Spark.
Before Spark download for Windows, it’s essential to verify that Java is correctly installed and configured in your environment variables. Failing to do so may result in errors when attempting to run Spark commands. To verify your Java installation, open a new Command Prompt window and type:
java --version

If Java is installed and configured correctly, the command prompt will display the installed Java version.
Step 1: Download the Apache Spark Binary Package
To download the Apache Spark binary package, you need to open a web browser and navigate to the official Apache Spark download page.
On the downloads page, you’ll see a dropdown menu listing available Spark versions. Select the specific Spark version you want to install. For this tutorial, we’ll use Spark 3.5.1, the latest version at the time of writing. However, you can choose a different version based on your project requirements and compatibility needs.

Under the chosen Spark version, locate the “Pre-built for Apache Hadoop” section. This section offers packages bundled with a specific Hadoop version. Select the Hadoop version that aligns with your environment or choose a “Hadoop free” option if you don’t require Hadoop integration. Here, we’ll proceed with “Pre-built for Apache Hadoop 3.3 and later” for demonstration purposes.
Click on the download link corresponding to your chosen Spark version, Hadoop distribution, and package format. This action will start downloading the Spark binary package to your computer.

Step 2: Extract the Spark Binary Package
Once the Spark binary package download is complete, you need to extract its contents to a desired directory on your Windows system. Open File Explorer and navigate to the directory where you install Spark on Windows 10.
Right-click on the downloaded Spark package file and select “Extract All” or “Extract Here” from the context menu. This action will initiate the extraction process.
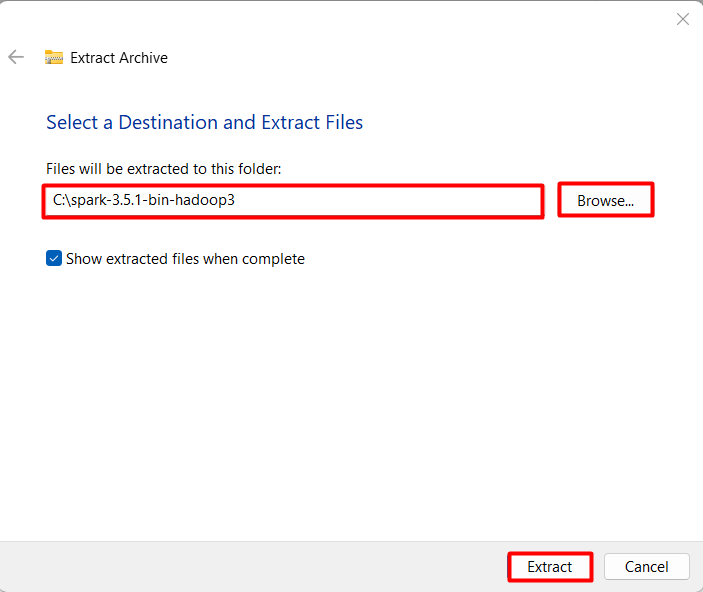
A dialog box will appear, prompting you to choose a destination folder for extracting the Spark files. Select a suitable directory on your system where you want to install Spark. Consider creating a dedicated folder, such as “spark” within your C:\ drive, for a structured installation.

After selecting the destination folder, click the “Extract” button. The extraction process might take a few minutes, depending on your system’s processing speed and the chosen archive format. Larger archives and slower systems might take longer to extract.
Install Spark on Our Fast Windows VPS
With Ultahost, Hosting Windows VPS has never been easier or faster. Enjoy ultra-fast SSD NVMe speeds with no dropouts and slowdowns
Step 3: Set the Environment Variable
Setting the appropriate environment variable is crucial for your Windows system to locate and utilize the installed Spark distribution.
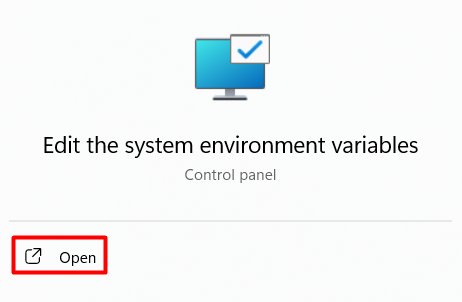
To do that first launch the environment variables settings by searching it on the start menu:

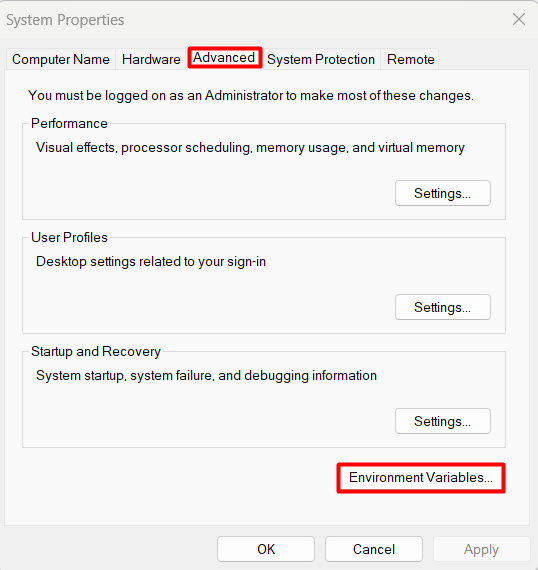
In the System Properties window, navigate to the “Advanced” tab and click on the “Environment Variables” button located at the bottom of the tab. This action opens the “Environment Variables” window, allowing you to manage user and system variables:

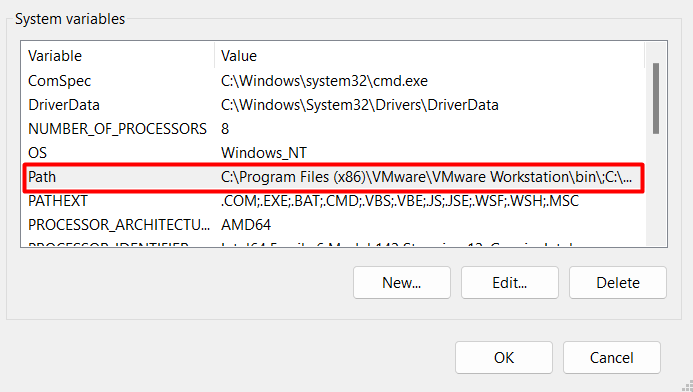
In the “Environment Variables” window, locate the “System variables” section and click the “New” button. This action will open the “New System Variable” window, where you can define a new system variable.

In the “Edit environment variable” window, click the “New” button and add the following path: %SPARK_HOME%\bin. This addition ensures that your system can locate and execute Spark’s executable files:

Click “OK” on all open windows to save the environment variable changes. Closing these windows without saving will discard any modifications made to the environment variables.
Read also How to Install Spark on Ubuntu.
Step 4: Verify Apache Spark Installation
Before downloading Apache Spark on Windows you need to make sure that Java is installed and placed in the environment variables. Otherwise, you may get a similar error:

So, if you performed every step correctly and if Java is also properly installed then you should get this output. To run Spark on Windows:
spark-shell --version

If Spark is installed and configured correctly, the command prompt will display the Spark version you downloaded and installed. This output confirms that your system recognizes the spark-shell command, indicating a successful installation.
Installing Apache Spark on Windows requires a systematic approach to ensure a successful setup. The process begins with downloading the Spark binary package from the official Apache Spark website, selecting the correct package type and download format, and extracting the package to a directory on the Windows system. Next, setting the Spark path in the environment variable is crucial to configure Spark correctly. This involves updating the system environment variables and verifying that the variable is set correctly.
By following these steps, users can successfully install Apache Spark on Windows. The key takeaways from this installation guide are to select the correct Spark version and package type, extract the package to a directory with sufficient disk space, set the Spark environment variable, and verify Java installation. With these steps, users can ensure a smooth installation process and start exploring the features and capabilities of Apache Spark.
If you are a developer or starting your journey consider that you ensure your current setup can handle the demands of your specific needs. This is where you need a powerful and reliable platform like Ultahost. We provide affordable VPS hosting which helps to manage your server and dedicated resources for guaranteed speed and stability to perform your required task.
Add JAVA_HOME\bin to the PATH environment variable.
Configure the winutils.exe file in the Hadoop bin directory