
How to Install UFW on Ubuntu 22.04
In Ubuntu 22.04, UFW, or Uncomplicated Firewall, is an ...


Swift is a powerful, modern programming language developed by Apple for building high-performance applications. Initially designed for developing iOS, macOS, watchOS, and tvOS apps, Swift has since expanded to support Linux platforms, including Ubuntu. With its growing popularity, Swift has become a versatile language, allowing developers to create a wide range of applications, from mobile and desktop apps to server-side software and machine learning models.
Ubuntu users can benefit from installing Swift on their systems, as it provides a robust and efficient way to develop applications. Swift’s high-performance capabilities, combined with its modern design, make it an attractive choice for developers seeking to create scalable and maintainable software. By installing Swift on Ubuntu, users can leverage the language’s features to build innovative applications, explore new programming concepts, and stay up-to-date with the latest developments in the programming world.
In this article, we will guide you through the step-by-step process to install Swift on Ubuntu, ensuring that you have a seamless and successful installation experience.
Following are steps described below on installing Swift on Ubuntu operating system:
Before Swift Ubuntu installation, it’s essential to ensure that your package list and system are up to date. This step is crucial, as it guarantees that your system has the latest security patches, bug fixes, and software updates:
sudo apt update && sudo apt upgrade

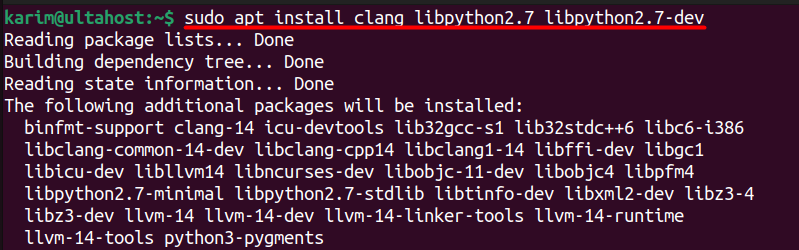
Swift relies on specific dependencies that must be installed beforehand. Use the following command to install the necessary dependencies:
sudo apt install clang libpython2.7 libpython2.7-dev
Proceed with downloading the Swift package from the official download page. Copy the Download Link. Right-click on the download link for the Ubuntu 22.04 version of Swift and copy the link address:
wget https://download.swift.org/swift-5.10.1-release/ubuntu2204/swift-5.10.1-RELEASE/swift-5.10.1-RELEASE-ubuntu22.04.tar.gz
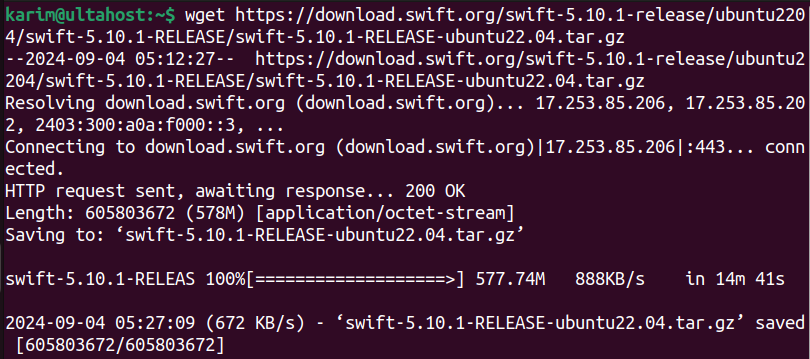
This command downloads the Swift tarball from the official Swift download page. The wget command is used to download files from the internet, and the URL specifies the location of the Swift tarball.
Once the Swift package is downloaded, extract .tar.gz Files in Linux using the following command:
tar -xzf swift-5.10.1-RELEASE-ubuntu22.04.tar.gz

This command extracts the Swift tarball. The tar command is used to extract tarballs, and the -xzf options specify that the tarball should be extracted (-x), the tarball is compressed with gzip (-z), and the tarball should be extracted in the current directory (-f).
Move the extracted Swift folder to a system directory, such as /usr/local/, to ensure system-wide accessibility:
sudo mv swift-5.10.1-RELEASE-ubuntu22.04 /usr/share/swift

This command moves the extracted Swift folder to the /usr/share/swift directory. The mv command is used to move files and directories, and the sudo command is used to execute the command with superuser privileges.
To make Swift executable globally, add its executable directory to your system’s PATH environment variable:
echo 'export PATH=/usr/share/swift/usr/bin:$PATH' >> ~/.bashrc

This command moves the extracted Swift folder to the /usr/share/swift directory. The mv command is used to move files and directories, and the sudo command is used to execute the command with superuser privileges.
After modifying .bashrc, apply the changes to your current terminal session:
source ~/.bashrc

This command sources the .bashrc file, which applies the changes to the current terminal session.
Confirm that Swift is installed correctly by checking its version:
swift --version

swift –version: Displays the installed Swift version, verifying a successful installation. This should return the version of Swift you’ve installed.
If you encounter permission issues, ensure you have the right sudo privileges or adjust file permissions accordingly.
Install Swift on Our Cheap Ubuntu VPS!
Combine the power of the world’s most trusted Linux distro with the flexibility of a VPS. Experience lightning-fast performance.
Swift offers a wide range of features that make it an attractive choice for developers. Some of the key features include:
Also, Read How to Install Steam in Linux for Gaming
Swift on Ubuntu offers numerous benefits, including:
In this article, we walked through the step-by-step process of installing Swift on Ubuntu. We began by updating our system and installing the required dependencies, including the clang compiler and Python libraries. Next, we downloaded the Swift tarball from the official Swift download page and extracted it to a directory on our system. We then moved the extracted folder to a system directory and added Swift to our system’s PATH. Finally, we verified that Swift was installed correctly by checking the version number.
By following these steps, we can successfully achieve Swift development environment on Ubuntu system. The installation process was straightforward and easy to follow, and we were able to get Swift up and running in just a few minutes. With the set up Swift on Ubuntu, we can start developing high-performance applications and taking advantage of the language’s many features and benefits.
We hope this guide has helped you to set up Swift on Ubuntu. Consider upgrading to an Ultahost Linux VPS for enhanced control, security, and root access. You’ll enjoy greater flexibility and performance as we handle all the administrative tasks to keep your servers running fast and stable with guaranteed uptime.
Ubuntu Version: Swift is generally supported on Ubuntu 20.04 LTS or later. Ensure you’re using a supported version.
Dependencies: Ensure that your system has required dependencies like clang, libicu, and libssl.
Open a terminal and run:
lsb_release -a
Run:
swift –version
Ensure that the Swift binary directory is correctly added to your PATH. Double-check that you have added export PATH=/usr/local/swift/usr/bin:$PATH to your shell configuration file and sourced it.
If you installed Swift from the official website, download the new version, extract it, and move it to /usr/local/swift, replacing the old version. Update your PATH if necessary.
If you used a package manager, update the package list and upgrade:
sudo apt-get update
sudo apt-get upgrade swift
Yes, you can install multiple versions by keeping them in separate directories and managing your PATH variable to switch between versions. For instance, you could have /usr/local/swift-5.6 and /usr/local/swift-5.7 and update your PATH accordingly.
You can consult the official Swift documentation or seek help from the Swift forums. For issues, you can also check out the Swift GitHub repository for bug reports and discussions.