
How To Install Node.js on Ubuntu 22.04
Node.js is an environment for executing and running ser...


OpenJDK the Open Java Development Kit is a free and open-source implementation of Java. It provides the tools developers need to create and run Java applications. Understanding how to install OpenJDK on Ubuntu is an important step for anyone working with Java on this popular Linux distribution.
This guide will walk you through the process of install OpenJDK Ubuntu system explain the different OpenJDK packages available and provide tips for managing and verifying your installation.
There are several reasons why you might want to install OpenJDK on your Ubuntu system:
OpenJDK comes with the JDK that includes everything you need to develop Java applications including the Java compiler (javac), the Java Runtime Environment (JRE), and other tools. The JRE only provides the environment to run Java applications. It doesn’t include the tools needed for development. When installing OpenJDK on Ubuntu, you can choose to install either the full JDK or just the JRE depending on your needs.
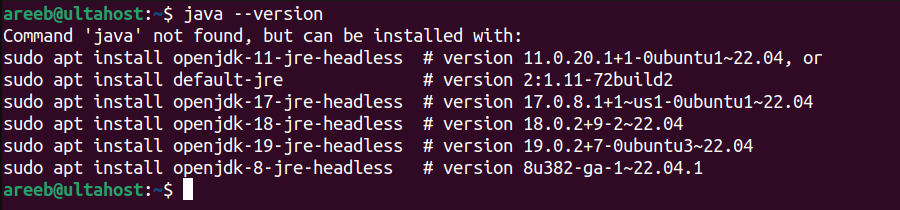
The specific commands for Ubuntu install OpenJDK will vary slightly depending on your Ubuntu version. Before installing OpenJDK it is a good practice to check if you already have Java installed on your system. You can do this by running the following command in your terminal:
java -version
If Java is installed this command will display the version information. If not you will see a message indicating that Java could not be found.
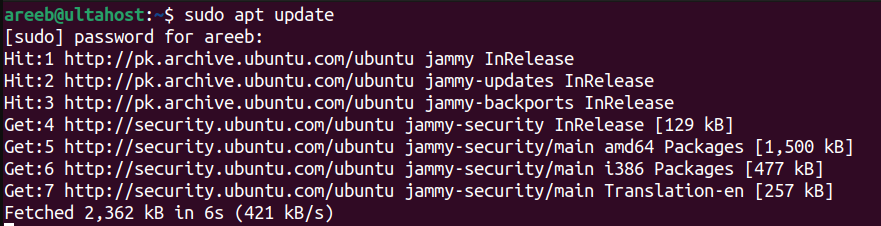
Updating Package Lists
Before installing any software on Ubuntu it is recommended to update the package lists with the latest information from the repositories. Use the following command in your terminal:
sudo apt update
Make sure you enter your password when prompted. This will update your Ubuntu repository.
OpenJDK installation
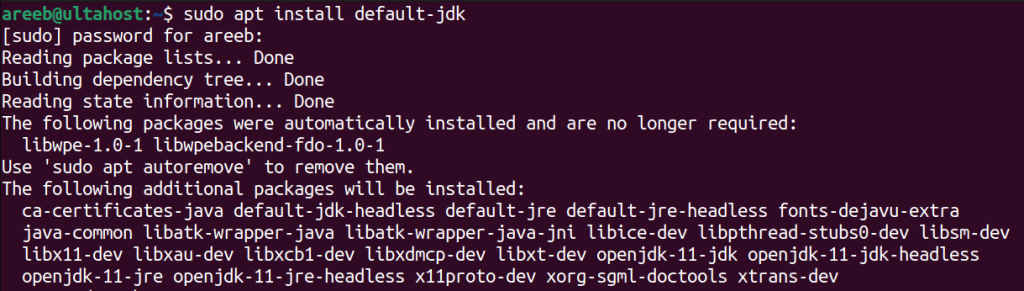
For Ubuntu OpenJDK you can install the latest version using the following command:
sudo apt install default-jdk
This command will install the default OpenJDK version along with the JRE.
Install OpenJDK on Our Java Hosting!
Enhance your web applications with our Ultahost Java hosting solutions. Enjoy unmatched flexibility, infinite scalability, and exceptional performance at a competitive price.
If you want to install a specific version of OpenJDK like version 11 you can use a command like this:
sudo apt install openjdk-11-jdk
This will install a specific OpenJDK package on your Ubuntu System.
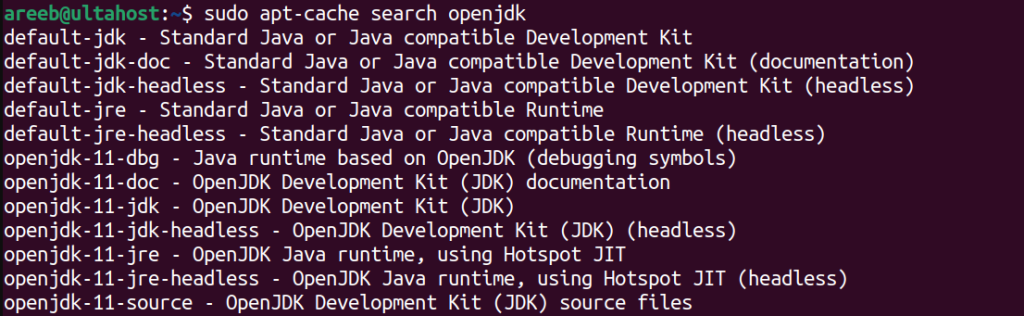
Find Available Packages
If you are unsure which OpenJDK version is available for your Ubuntu version you can use the apt search command:
sudo apt-cache search openjdk
This will list all available OpenJDK packages in the repositories.
Verifying the Installation
Once the installation is complete you can verify that OpenJDK is installed correctly by running the following command:
java --version
This command should now display the version information of the OpenJDK installation Ubuntu.

By default, the installation process might not automatically set the environment variables in Linux to point to the installed OpenJDK. This can cause issues when running Java applications from the command line. To configure these variables manually, edit your shell profile. For example .bashrc for Bash. Here’s an example using Nano as the text editor:
nano ~/.bashrc
Add the following lines to the end of the file replacing /usr/lib/jvm/java-X-openjdk-amd64 with the actual path to your installed OpenJDK version:
export JAVA_HOME=/usr/lib/jvm/java-17-openjdk-amd64
export PATH=$PATH:$JAVA_HOME/bin
Save the changes and reload your shell profile:
source ~/.bashrc
Read also How to Install Java on Ubuntu 22.04.
Following are some additional considerations regarding OpenJDK setup on Ubuntu:
1. Uninstalling OpenJDK: If you no longer need OpenJDK you can uninstall it using the following command:
sudo apt remove openjdk-*
2. Keeping Up-to-Date: It’s recommended to keep your OpenJDK installation up-to-date for security and performance reasons. You can update OpenJDK along with other packages using:
sudo apt update && sudo apt upgrade
By following these steps, you should be able to successfully install and configure OpenJDK on your Ubuntu system. Remember to choose the appropriate version based on your needs and keep your installation updated. With this knowledge, you can ensure that your system is complete to run Java applications and development tools effectively.
Installing OpenJDK on Ubuntu is simple but it can be tricky to manage different Java versions or ensure compatibility for specific applications. Upgrading to an Ultahost Ubuntu VPS empowers you with greater control and flexibility. These plans grant you root access allowing you to install and manage multiple Java versions using tools avoiding conflicts or compatibility issues.
OpenJDK is an open-source implementation of the Java Development Kit (JDK).
Installing OpenJDK allows you to run Java applications and develop Java software on your Ubuntu system.
You can update OpenJDK using the commands sudo apt update && sudo apt upgrade.
Yes, OpenJDK is free and open-source software.
It depends on your needs but OpenJDK 11 is a popular and widely supported version.