
Copying Files from Local to Remote Server wit...
SCP (Secure Copy Protocol) is a command that securely t...


ClickHouse is a high-performance, open-source database specifically designed for real-time analytics. Its columnar storage architecture and optimized query engine enable it to handle massive datasets and deliver lightning-fast query results. This makes ClickHouse a powerful tool for applications requiring immediate insights from vast amounts of data.
This guide will walk you through the process of installing, a popular and stable operating system. Ubuntu provides a user-friendly environment and readily available packages, making it an excellent choice for setting up ClickHouse. Whether you’re a developer, data analyst, or simply interested in exploring the capabilities of ClickHouse, this guide will equip you with the necessary steps to get started.
Before diving into the installation process, ensure your system meets the necessary software and system requirements to run ClickHouse smoothly.
Processor
A multi-core processor with a minimum of 2 cores is recommended. While there’s no official minimum, ClickHouse benefits from multiple cores for parallel processing.
RAM
At least 4GB of RAM is required for a basic installation. More RAM is recommended for larger datasets or high-load environments. The actual RAM requirement will depend on the size of your data and the query workload.
Storage
Sufficient disk space is needed to store the ClickHouse database files. The required amount will depend on the size of your data. ClickHouse utilizes a columnar storage format, which is generally more efficient in terms of storage space compared to row-oriented databases.
Optional Dependencies
While not strictly necessary, installing these packages can enhance the ClickHouse experience:
By meeting these prerequisites, you’ll ensure a successful and efficient ClickHouse Ubuntu installation on your system.
Unleash the power of Ubuntu VPS
Experience the reliability of the world’s leading Linux distro combined with the flexibility of a virtual server. Enjoy lightning-fast speeds and minimal latency.
This guide will walk you through the detailed process of installing ClickHouse on your Ubuntu system using the latest recommended approach from the official ClickHouse website.
Step 1: Install Necessary Dependencies
Before download ClickHouse for Ubuntu, ensure your system has the required tools by running the following command:
sudo apt-get install -y apt-transport-https ca-certificates curl gnupg
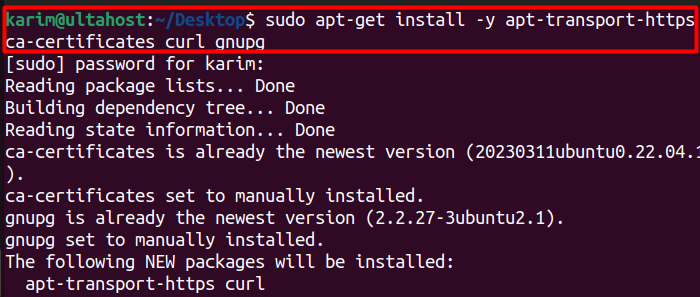
This command installs packages like `apt-transport-https` for secure HTTPS connections, `ca-certificates` for verifying certificates, `curl` for downloading files, and `gnupg` for handling cryptographic keys. These tools are essential for a secure and reliable ClickHouse installation.
Step 2: Add ClickHouse Repository Key
To establish a trusted connection with the ClickHouse repository, you need to add its public key to your system:
curl -fsSL 'https://packages.clickhouse.com/rpm/lts/repodata/repomd.xml.key' | sudo gpg --dearmor -o /usr/share/keyrings/clickhouse-keyring.gpg

This command downloads the ClickHouse repository key using `curl` and then decrypts it using `gpg`, saving it to `/usr/share/keyrings/clickhouse-keyring.gpg`. This step ensures that your system can verify the authenticity of packages downloaded from the ClickHouse repository.
Step 3: Add ClickHouse Repository to Sources List
Next, you need to inform your system’s package manager about the ClickHouse repository
echo "deb [signed-by=/usr/share/keyrings/clickhouse-keyring.gpg] https://packages.clickhouse.com/deb stable main" | sudo tee \ /etc/apt/sources.list.d/clickhouse.list
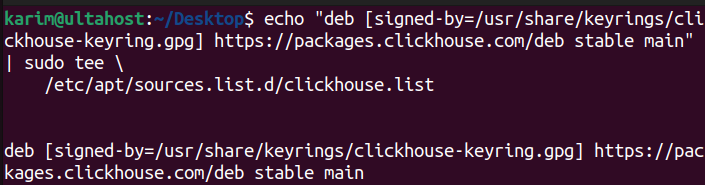
This command adds a line to your sources list, specifying the ClickHouse repository URL (`https://packages.clickhouse.com/deb`), distribution (stable), and components (main). It also instructs the system to verify packages using the key stored in `/usr/share/keyrings/clickhouse-keyring.gpg`. This step allows your package manager to access and install ClickHouse packages.
Learn about How to Install Apache on Ubuntu.
Step 4: Update Package List
After adding the ClickHouse repository, you need to update your system’s package list:
sudo apt-get update
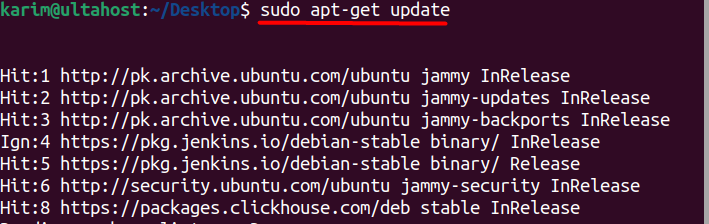
This command refreshes the package list with information from all configured repositories, including the newly added ClickHouse repository. This ensures that your system has the latest package information.
Step 5: Install ClickHouse Server and Client
Now you’re ready to install ClickHouse on Ubuntu:
sudo apt-get install -y clickhouse-server clickhouse-client
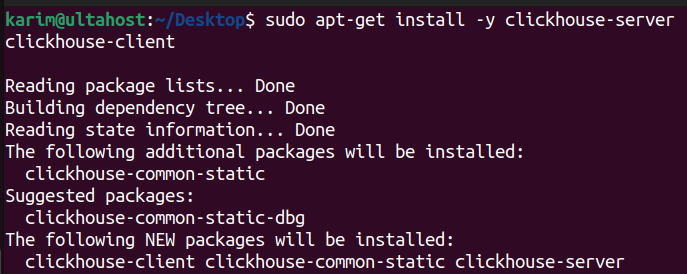
This command downloads and installs the ClickHouse server and client packages from the ClickHouse repository which can also be verified by looking at the bottom of the terminal:
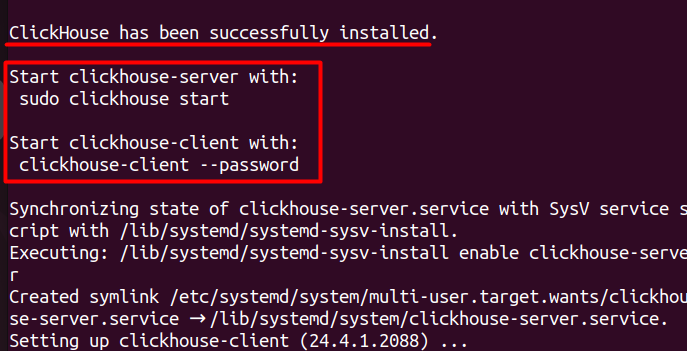
It also automatically installs any required dependencies.
Step 6: Start ClickHouse Server and Client
With the ClickHouse server and client installed, you need to initiate them to begin working with your database using the following commands
sudo clickhouse start
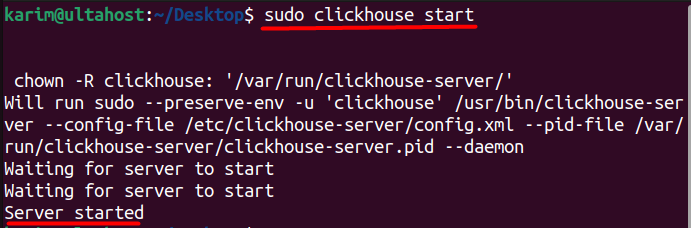
The clickhouse start command uses a systemd service to manage the ClickHouse server. System is a powerful system management tool used in Linux distributions like Ubuntu. This service handles the starting, stopping, and restarting of ClickHouse, ensuring it runs smoothly and efficiently.
Next, you need to open an interactive ClickHouse client session using the below command:
clickhouse-client --password
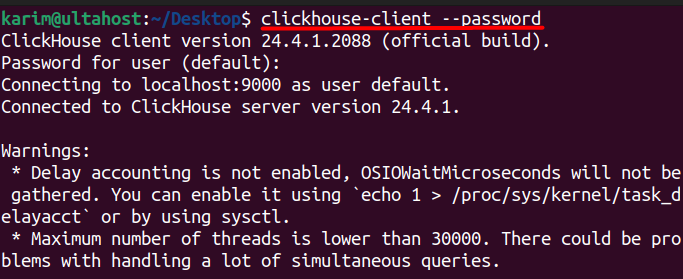
This command opens an interactive ClickHouse client session. The clickhouse-client tool provides a command-line interface for interacting with the ClickHouse server. This allows you to execute queries, manage databases, and perform various tasks related to your ClickHouse database.
The –password flag is used to specify a password for authentication. If you have set up user accounts with passwords in your ClickHouse configuration, this flag will prompt you to enter your password to access the database.
These two commands effectively start the ClickHouse server and connect you to the client, allowing you to interact with your database. You can now execute queries and start exploring the capabilities of ClickHouse.
This guide has provided a comprehensive walkthrough of installing ClickHouse on Ubuntu. We began by outlining the prerequisites for a smooth installation, ensuring your system meets the necessary hardware and software requirements. We then detailed the steps for adding the ClickHouse repository, installing the server and client packages, and starting the ClickHouse server.
You learned how to verify the installation and connect to the ClickHouse client using the command line. Finally, we discussed the optional step of configuring ClickHouse to customize its settings for your specific needs. By following these steps, you are now ready to leverage the power of ClickHouse for your real-time analytics endeavors.
If you’re a developer or just beginning your journey into the Linux operating system, it’s crucial to ensure your current setup meets your specific needs. This is where a powerful and reliable platform like Ultahost comes in. We offer Linux VPS hosting, providing dedicated resources and guaranteed speed and stability to handle your tasks efficiently.
ClickHouse is an open-source columnar database management system designed for online analytical processing (OLAP). It’s known for its high performance in processing large volumes of data.
ClickHouse configuration files are located in the /etc/clickhouse-server/ directory. The main configuration file is config.xml, and the users’ configuration is in users.xml. You may need to adjust these files according to your requirements.’
Official documentation for ClickHouse can be found on the ClickHouse website. It includes detailed guides on installation, configuration, and usage.