
How to Install OpenVPN on Ubuntu
OpenVPN, a robust and widely used Virtual Private Netwo...


Many software updates in Ubuntu contain important security patches, bug fixes, and performance improvements. However, periodically running update commands every couple of days seems too intensive a task, and it’s too easy to neglect. That’s why it’s helpful to set up automatic updates, so your system stays secure and up to date without manual effort.
This guide will demonstrate how to perform automatic updates on Ubuntu, including setting up email notifications, configuring root password access for user accounts, and automatically rebooting when necessary.
On Ubuntu, the auto-update feature helps organizations, developers, and server administrators keep the system reliable with minimal downtime. Additionally, it ensures your Debian-based system installs important security updates on time, which helps prevent vulnerabilities and system issues.
Enjoy Fast and Reliable Ubuntu VPS Hosting!
Deploy your project quickly on a preinstalled Ubuntu VPS, enjoying top performance, flexible plans, and unlimited bandwidth at a budget-friendly cost.
The auto updates are important in optimizing performance and creating less frustration for the user, especially in businesses, development, and server management. Let’s look at how to do this.
On Debian-based systems, the “unattended-upgrades” utility is available to automatically install updates. Specifically, it handles the updates in the following steps.
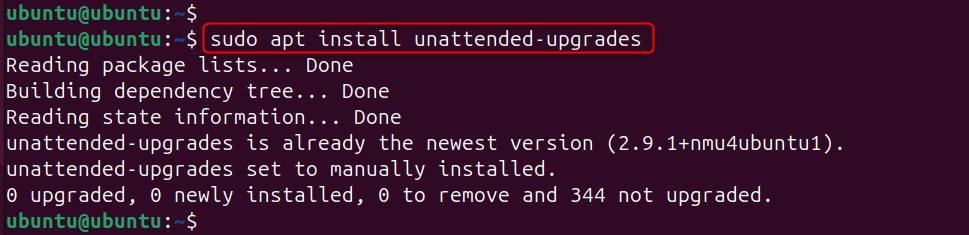
The system also installs the “unattended-upgrade” package by default. To install it, run the following command:
sudo apt install unattended-upgrades
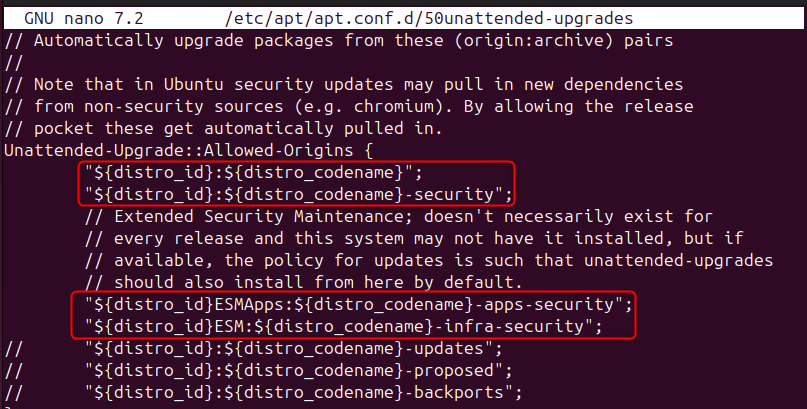
The configuration file is in “/etc/apt/apt.conf.d/50unattended-upgrades”. It contains all the required configurations of the package. You can launch it in any editor, and you will find that the commands related to security updates are already uncommented:
For Ubuntu:
The configuration file can just initialize the following two lines to perform updates of security patches, i.e., a controlled update mechanism.
For ESM Supported Releases:
The release supported by ESM is a Linux system or kernel version that has reached the end of its standard maintenance period, but Ubuntu continues to provide updates for it.
In this step, you can configure the settings for autoupdates as well as upgrades in the particular file. Let’s launch the file in any editor, and locate the following two lines:
APT::Periodic::Update-Package-Lists "1";
APT::Periodic::Unattended-Upgrade "1";
The first command will be updating the packages list, and the second one will be installing the configured updates. Set the following parameter values to “1” for automatic update & upgrade.

As these services are based on a system service. Thus, restart the service for that to take effect:
sudo systemctl restart unattended-upgrades

Now, you can verify the active or inactive status of the service via the following command:
sudo systemctl status unattended-upgrades

The output should be “active,” which represents that the service is working.
To confirm the services are running properly, you can execute (or even dry-run) the script in debug mode to view errors/detailed output:
sudo unattended-upgrades --debug
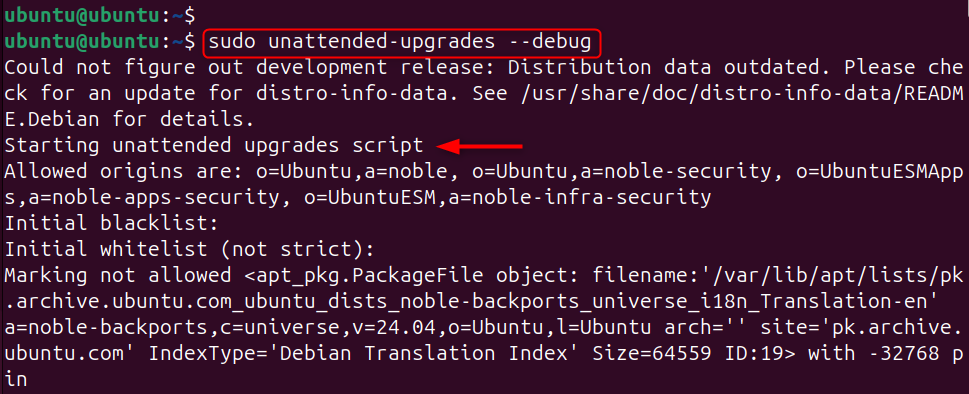
Note: Instead of “–debug”, you can specify “–dry-run”. Both have the same purpose.
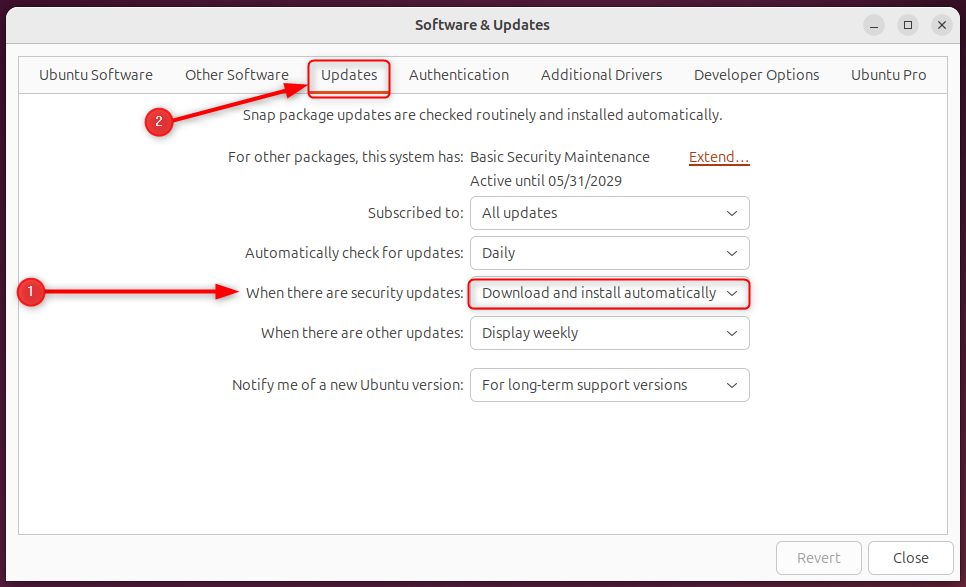
The Software & Updates application manages updates through the frontend. Open it and go to the Updates tab. Under “When there are security updates”, set the option to “Download and install automatically”.
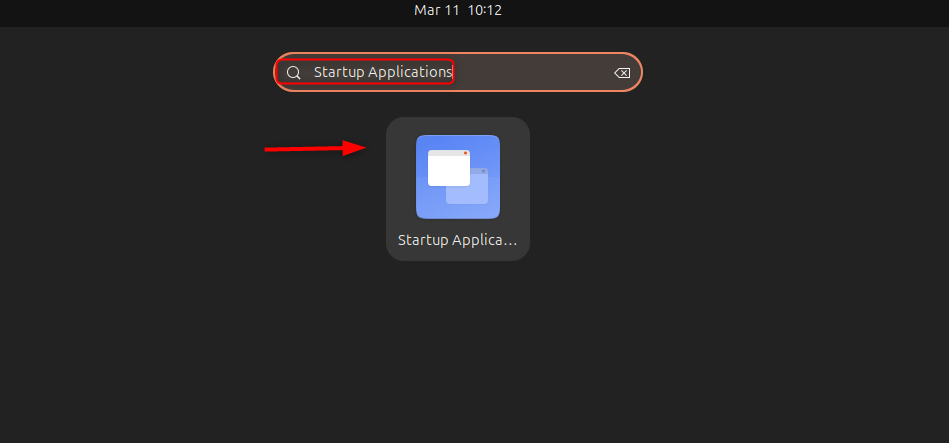
You can also automate this through Startup Applications. To do so, create a personal script containing the commands for the applications that should run at system startup. Here’s how:
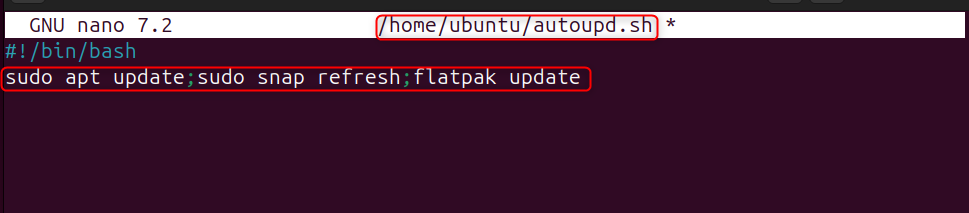
In this step, create the script file through the touch command and ensure it is executable:
touch ~/autoupd.sh;sudo chmod +x ~/autoupd.sh

Now, add the commands you want to run. Use the following commands to update the repositories:
sudo apt update;sudo snap refresh;flatpak update
Open the “Startup Applications” from the applications menu:
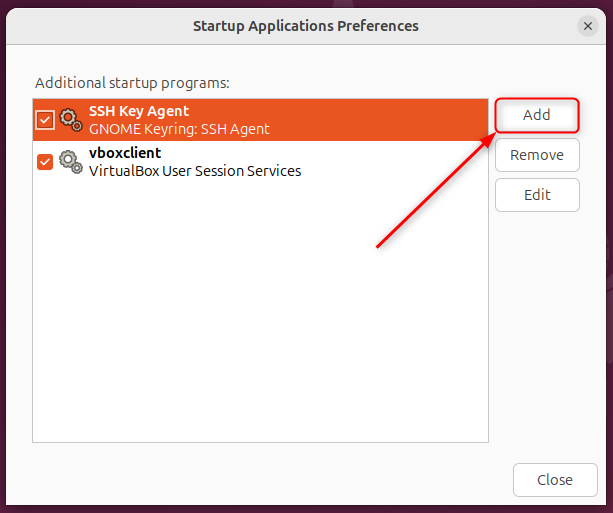
A starting program list will appear. Click on “Add” to add a new program:
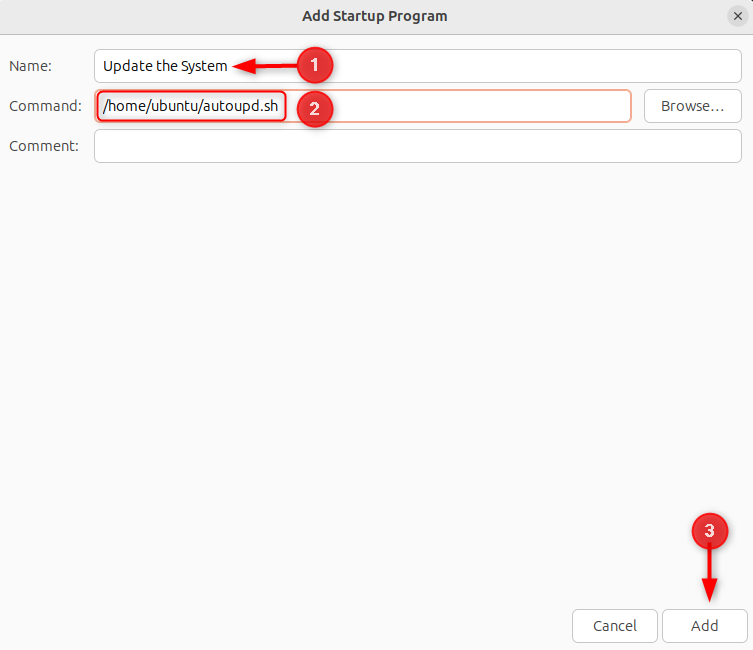
After that, specify the name of the Startup Program, “Browse” to the script location, then hit “Add” to add it as a “Startup Program”:
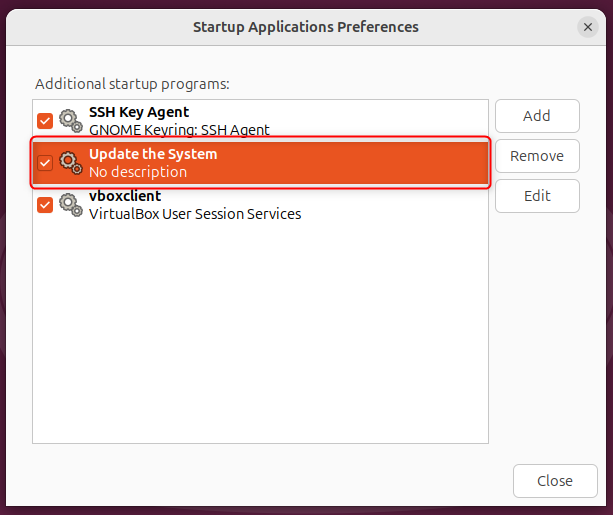
Here, the “Startup Program” has been added:
You can modify the configuration file to fit your specifications. In this file, we will make several changes to optimize your experience.
To get email notifications about security patch updates, you first need to configure/map your email with the unattended-upgrades configuration file. To do this, go to the email section of the file, and uncomment this line:
Unattended-Upgrade::Mail "";
Then, insert your particular email in the quotes as seen in the figure below.

Next, you can specify the frequency with which you would like to receive the email notifications. You have three options:
After that, you need to uncomment the following line:
Unattended-Upgrade::MailReport "on-change";
Select the particular value from any of the three, i.e., “on-change”, “always”, and “only-on-error”:

Note: After any change, please restart the “unattended-upgrades” service to apply the changes.
sudo systemctl restart unattended-upgrades

Some updates require the system to reboot to take effect. The unattended-upgrades service automatically triggers a reboot after each update. Here’s how to set it up:
Reboot Automatically Without Confirmation
When an update that requires a reboot is installed, the system creates a temporary file at /var/run/reboot-required. To enable automatic reboot in this case, uncomment the corresponding line in the unattended-upgrades configuration file.
Unattended-Upgrade::Automatic-Reboot "true";

Note: If you want to stop the system from rebooting automatically, you can change the value from “true” to “false”.
Reboot the System While Other Users Are Logged In
The reboot process may be paused as long as other users are logged in. To prevent this from happening, uncomment this line and set it to “true”:
Unattended-Upgrade::Automatic-Reboot-WithUsers "true";

Reboot After Some Time
The reboot process in the ‘Automatic-Reboot’ section will reboot the system without any delay, but you can specify a delay for the reboot process. To do this, find this line and change it to the desired value:
Unattended-Upgrade::Automatic-Reboot-Time "02:00";
Here, “02:00” means 2 minutes.

If you would like to remove any new dependencies that are installed automatically with the upgrades, uncomment this line in the configuration file.
Unattended-Upgrade::Remove-New-Unused-Dependencies "true";

You can remove the unused old packages from the updates in the same way. In the configuration file, uncomment this line:
Unattended-Upgrade::Remove-Unused-Dependencies "true";

You can remove the automatically updated Kernel packages (Kernel Images, Kernel Headers, and tools for Kernel Version Lock) by uncommenting this line. Make sure to set it to “true”.
Unattended-Upgrade::Remove-Unused-Kernel-Packages "true";

You can do the same for the other parts in this file according to your preferences.
One of the biggest security and stability steps you can take is to keep your system updated. Many software updates in Ubuntu contain important security patches, bug fixes, and performance improvements. On Ubuntu 24.04, you can configure automatic updates using unattended-upgrades, the Software & Updates application, or a script placed in a Startup Applications program. The unattended-upgrades method is the most straightforward. Further, for unattended upgrades, you can do advanced configurations. The post has shown the various ways of setting automatic updates on Ubuntu 24.04.
On Ubuntu, the system automatically applies updates without requiring any input from the user to keep itself up to date.
These updates apply security updates and bug fixes to the system as soon as they are available. This helps keep the system safe.
Ubuntu uses the unattended-upgrades package to install updates automatically. Once you set it up, the system installs permitted updates on its own.
You can enable it by installing the unattended-upgrades package and configuring it. Then, edit the settings files to define the update schedule and specify which repositories can be updated.
Yes, Ubuntu lets you customize most settings, including enabling only security updates, setting the update schedule, and configuring automatic system restarts when needed.
Automatic updates enhance security, but most organizations install only security patches automatically. This approach still reduces overall risk while addressing the most critical vulnerabilities promptly.
Try High-Performance Managed VPS Hosting!
Boost your website’s speed and stability with managed VPS hosting built for strong performance, flexible resources, and generous bandwidth at competitive prices.